iPhone X Rear Camera Lens Replacement
Prior to commencing any repair work, it is essential to disconnect the device from all electrical power supplies.
- Necessary Tools:A Phillips head screwdriver is needed.
Consult the device's user manual for detailed information pertaining to your specific model and any supplementary safety guidelines.
Step 1 | iPhone X Rear Camera Lens Replacement

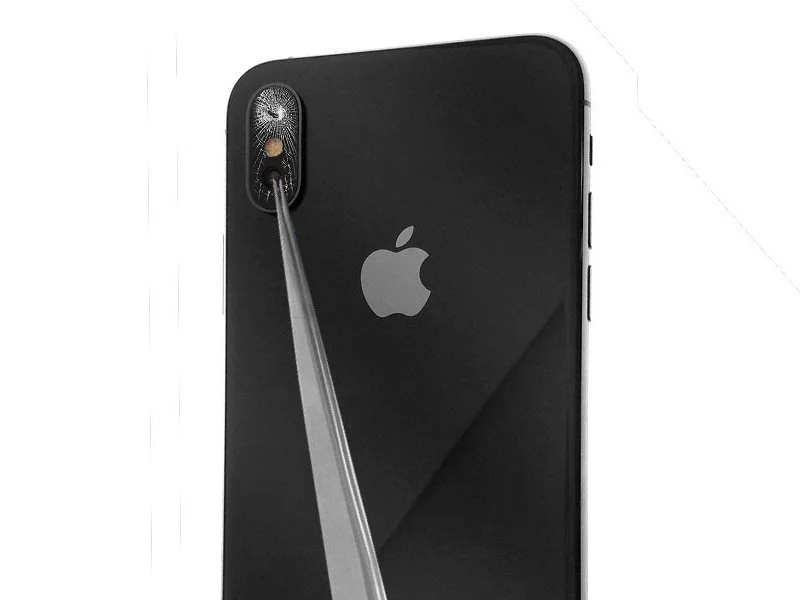
- Carefully extract all fragments of fractured glass from within the camera's protective enclosure.
- Eliminate the shattered glass surrounding the camera lens, subsequently ensuring the edges of the lens area are thoroughly cleaned.
Step 2
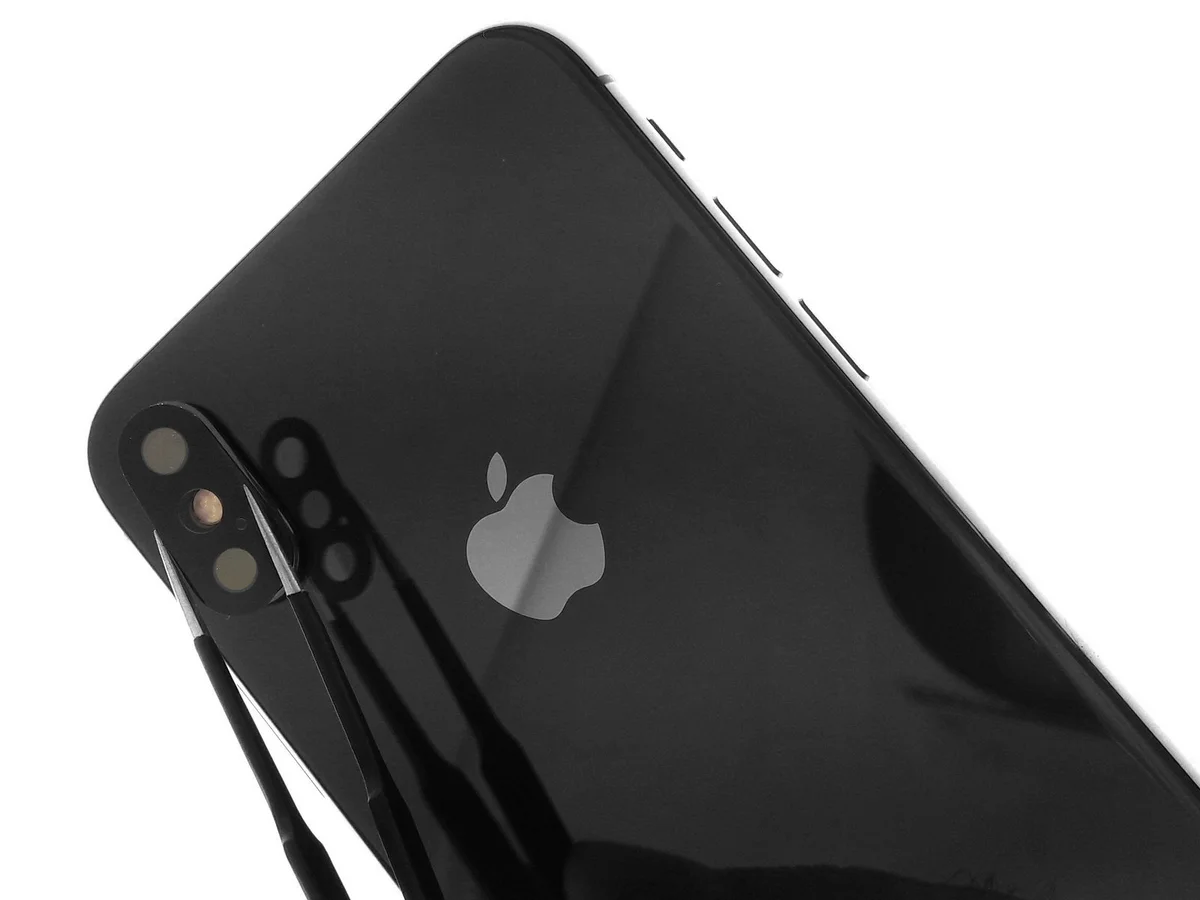
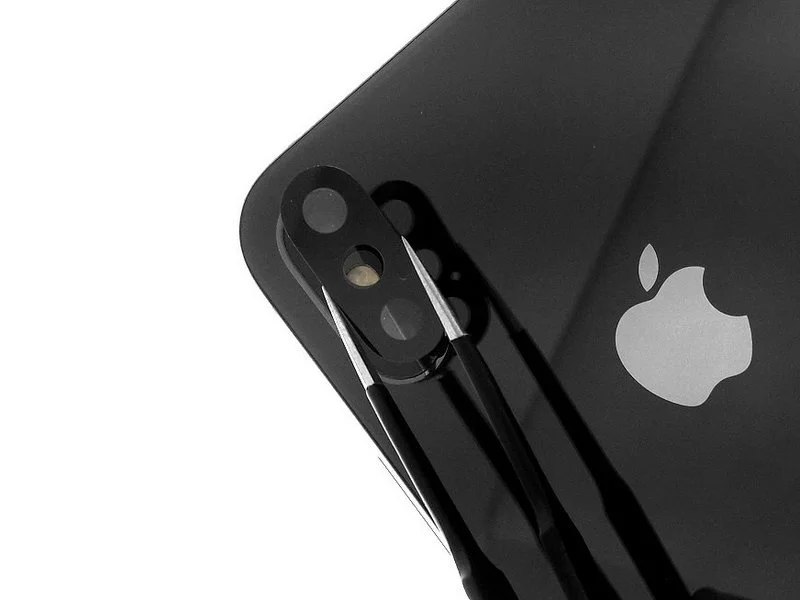
- Secure the updated rear camera glass to its position, employing either adhesive backing or carefully applying two small amounts of clear superglue to the lateral edges of the camera housing.
- Employing specialized precision tweezers, carefully place the substitute camera lens within its designated area.
- Absolute accuracy is paramount.Failure to maintain precision during this process could necessitate cleaning and reapplying superglue, should misalignment occur during camera glass alignment!
Step 3

- Gently press upon the camera lens surface to ensure the lens glass is firmly attached to the camera body.
- At this point, evaluate the rear camera's functionality by capturing images and recordings, verifying the clarity of the resulting visuals.