iPhone 5s Teardown
First, apply pressure to point One, then to point Three. Next, engage the "G" mechanism, followed by point Three once more. Repeat the "G" action, then activate the "S" mechanism. Proceed to point Four, repeat it, then engage the "S" mechanism again. Continue to point Five, activate the "S" mechanism, and then confirm point Five. Finally, engage the "C" mechanism.
Given Apple's focus on technological innovation rather than instructional design, it's reasonable to assume that early childhood learning materials developed in Cupertino would likely be unnecessarily complex.
- Despite the unusual naming conventions, we proceeded to examine the device.
- Due to the scarcity of this component, a team member was dispatched to Australia to acquire it.
Following this guide, you'll explore the internal components of the newest iPhone model, and afterward, we encourage you to examine the iPhone 5c's construction as well.
- Alternatively, find us on Instagram to view humorous and unconventional imagery.
- Utilize the platform for brief, unconventional statements.
- To connect with others, utilize the Facebook platform.
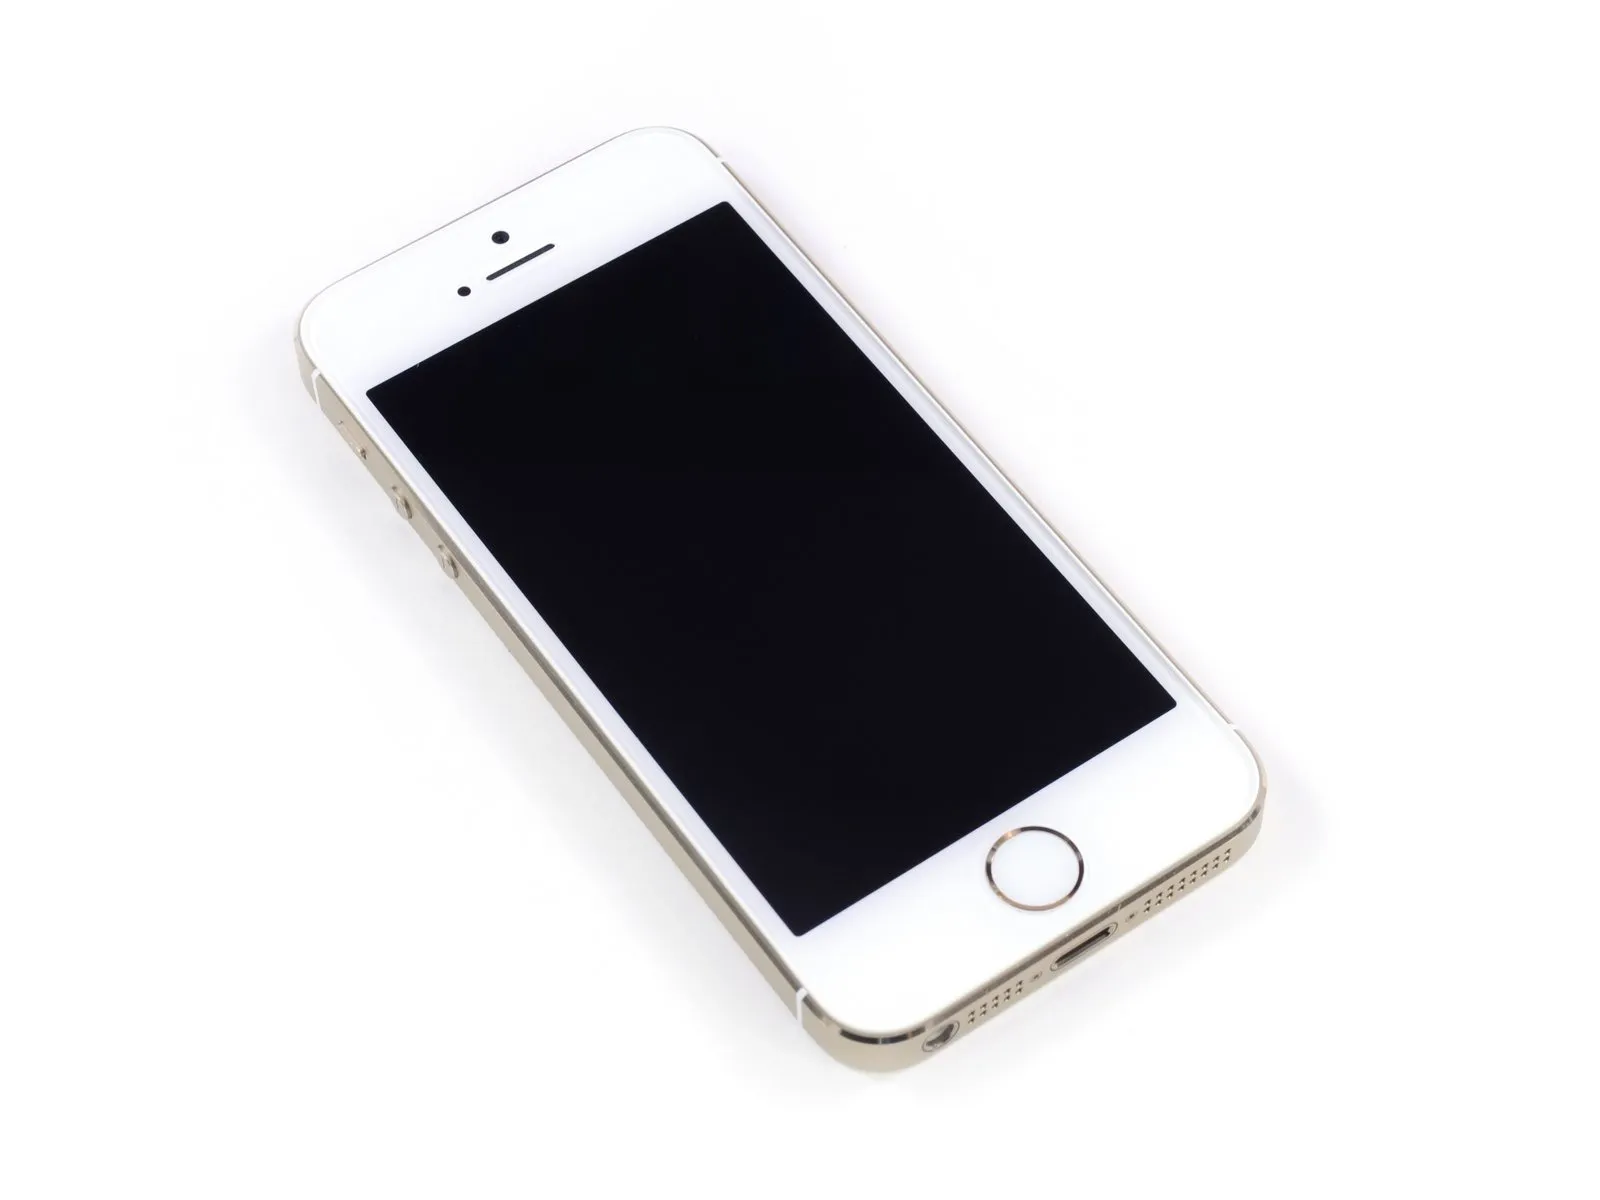
Step 1 | iPhone 5s Teardown


To obtain an early examination of the iPhone 5s, iFixit’s technicians undertook a 17-hour time displacement.
Our teardown benefited from the generous support of MacFixit Australia, who allowed us to utilize their Melbourne location; they offer a range of Mac and iPhone upgrades, accessories, and iFixit toolkits for purchase.
Verification by our language experts confirmed that the numeral "5" remains identifiable as "5" even when inverted.
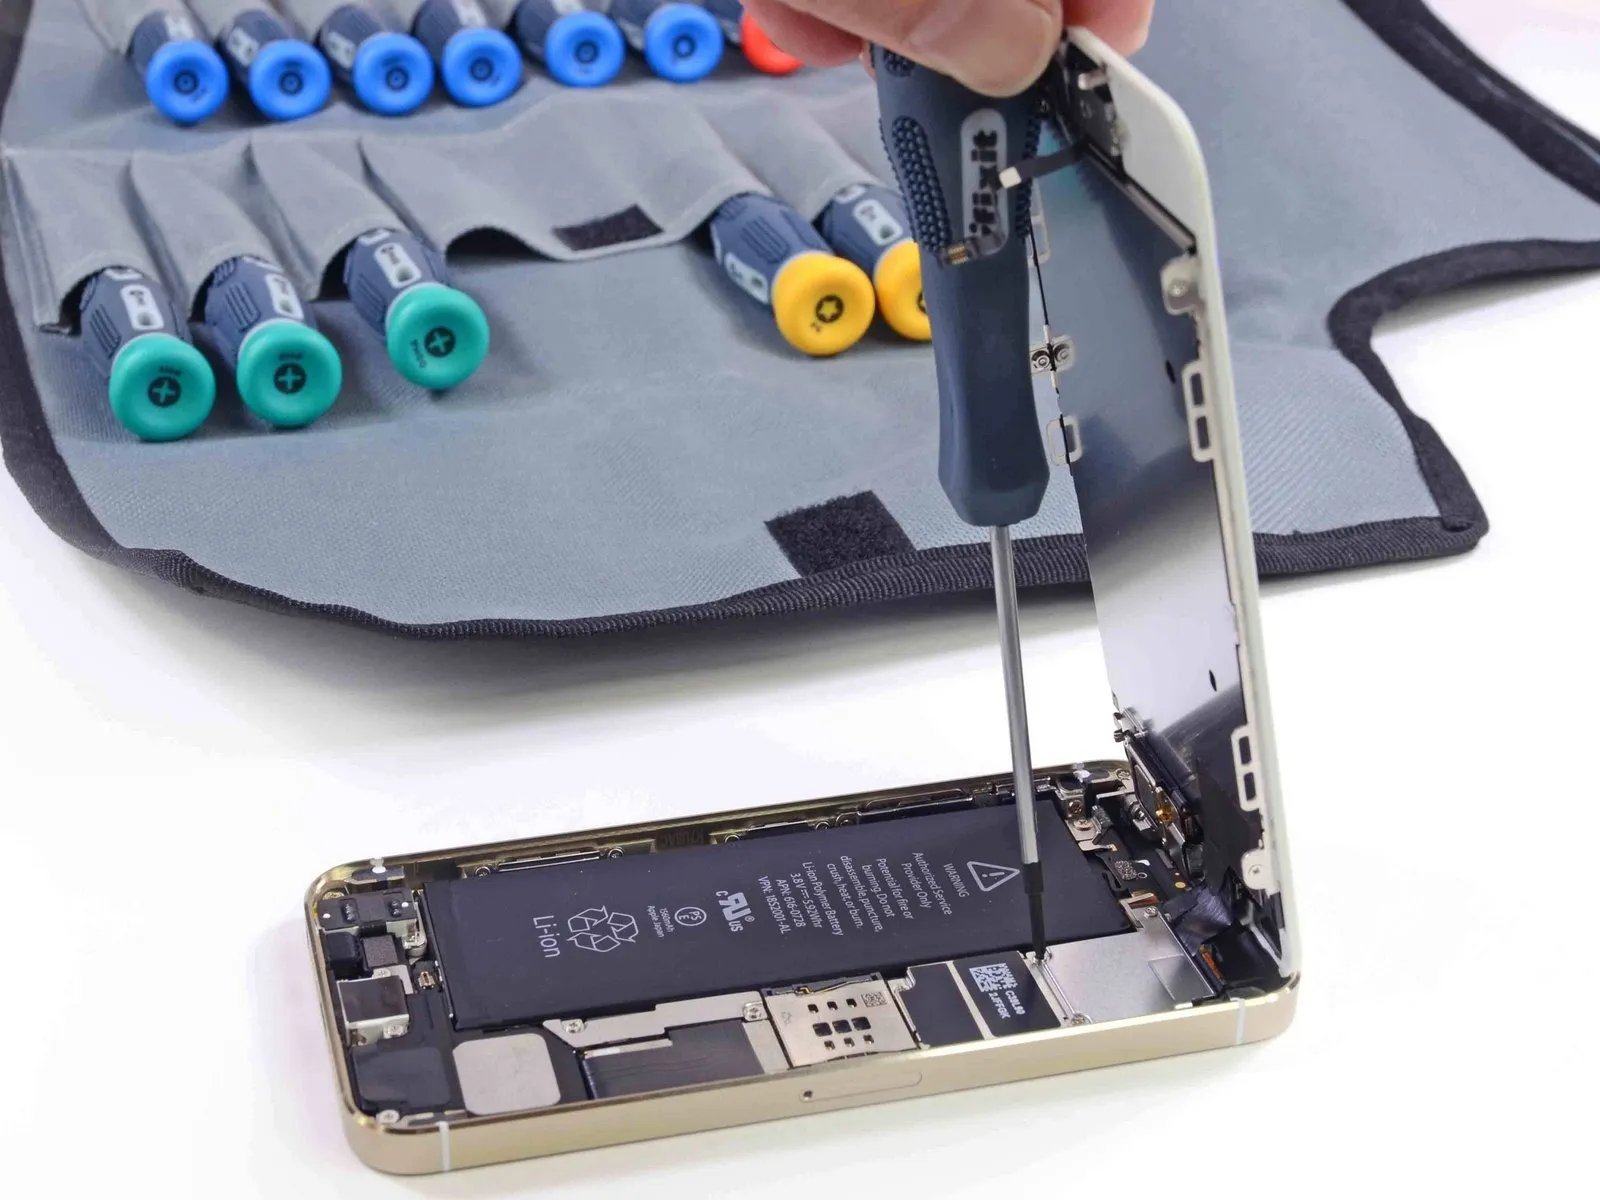
To disassemble this device, utilize the newly released iFixit Pro Tech Screwdriver Set.
Step 2
Before proceeding with disassembly of the 5s, review the following technical specifications.
- The device utilizes an Apple A7 processor, incorporating a 64-bit architecture.
- The M7 motion co-processor.
- Memory capacity options include 16 gigabytes, 32 gigabytes, or 64 gigabytes.
- The screen boasts a 4-inch retina display with a pixel density of 326 pixels per inch.
- The device incorporates an 8-megapixel iSight camera featuring larger 1.5-micrometer pixels, alongside a 1.2-megapixel FaceTime camera.
- The home button incorporates an integrated fingerprint identity sensor.
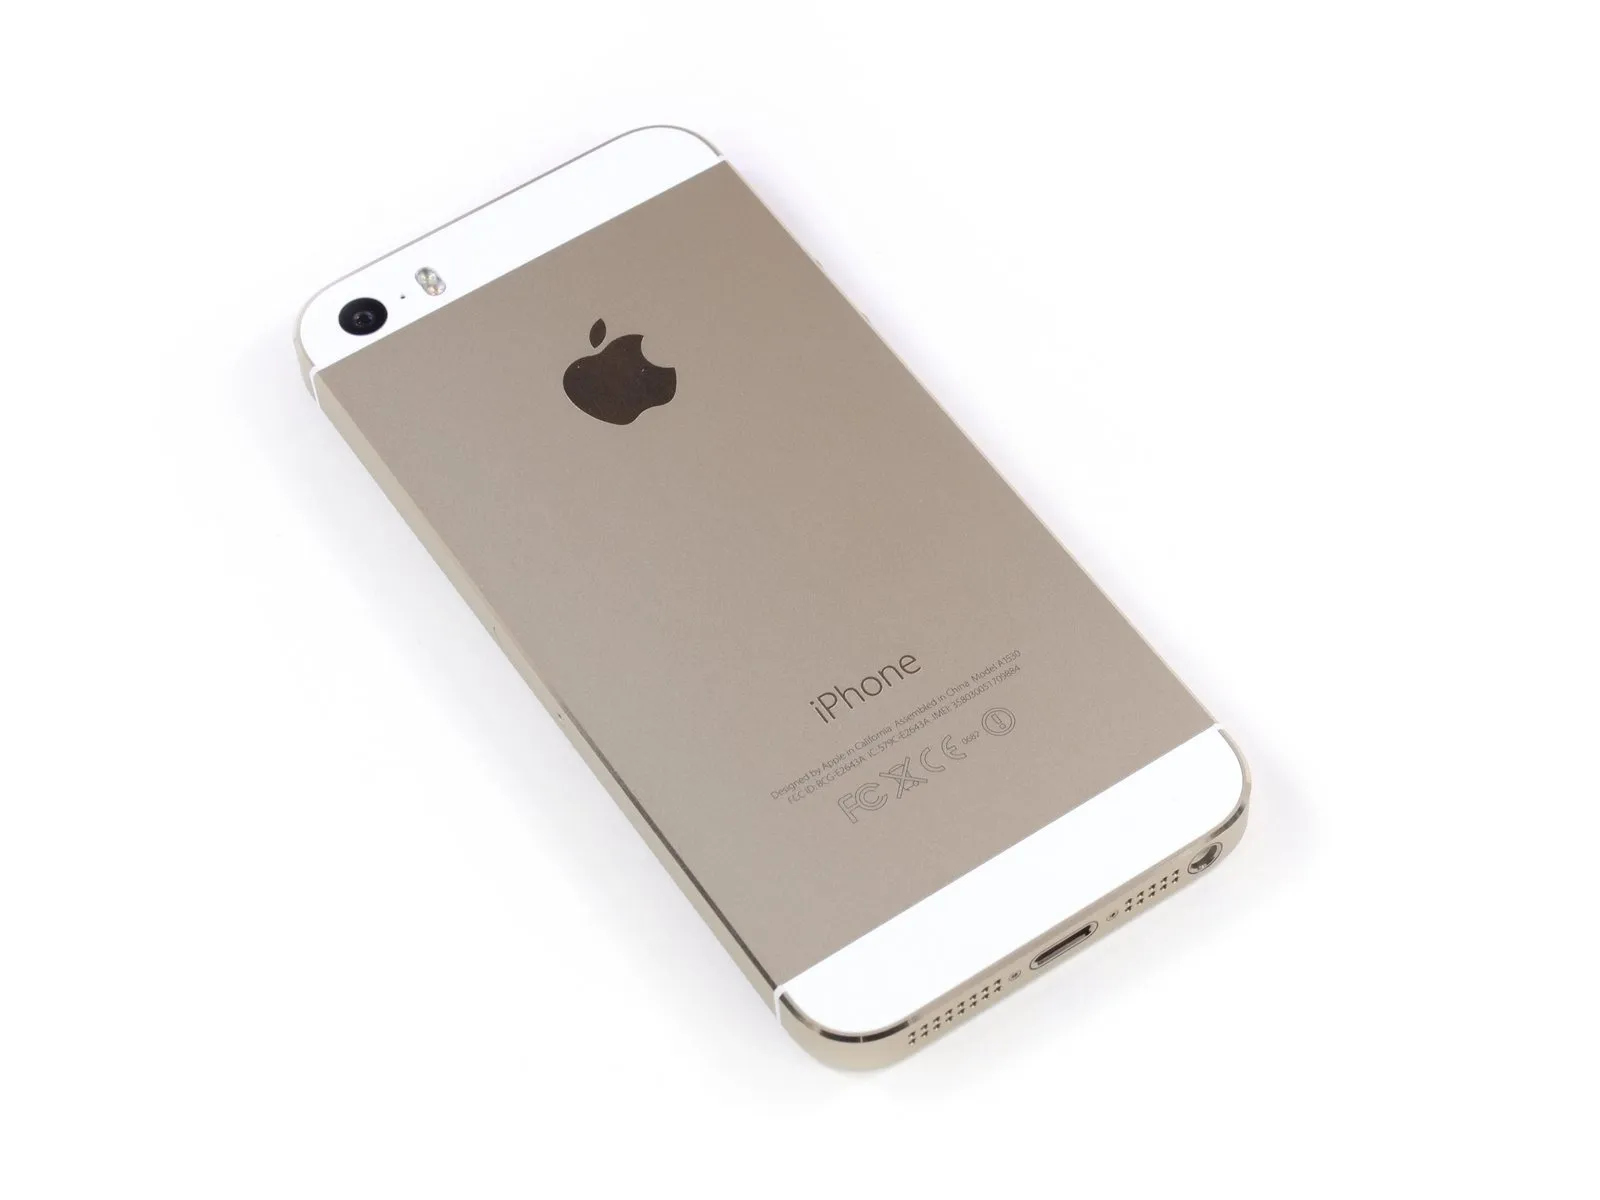
- The device chassis is offered in space gray, silver, or a gold finish—alternatively referred to internally as Not-at-all-the-Color-of-Space, Second Place Medal, and Bling.
Step 3
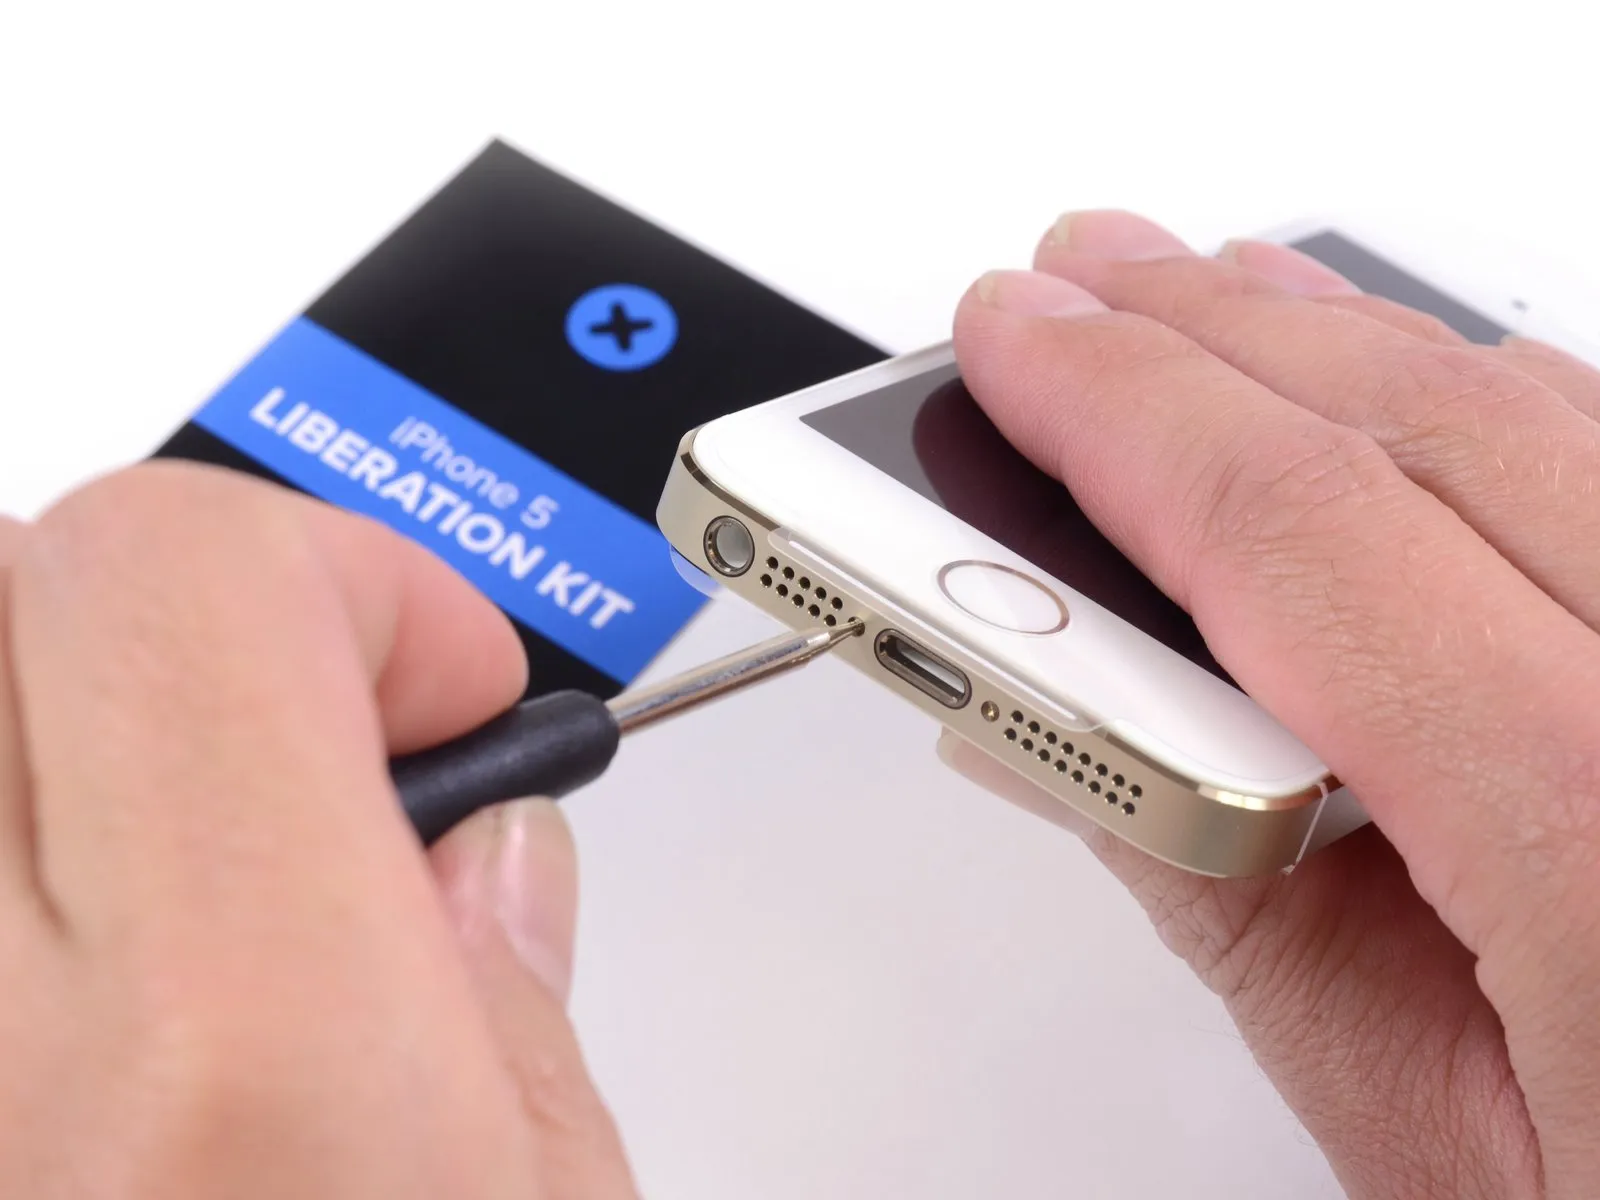
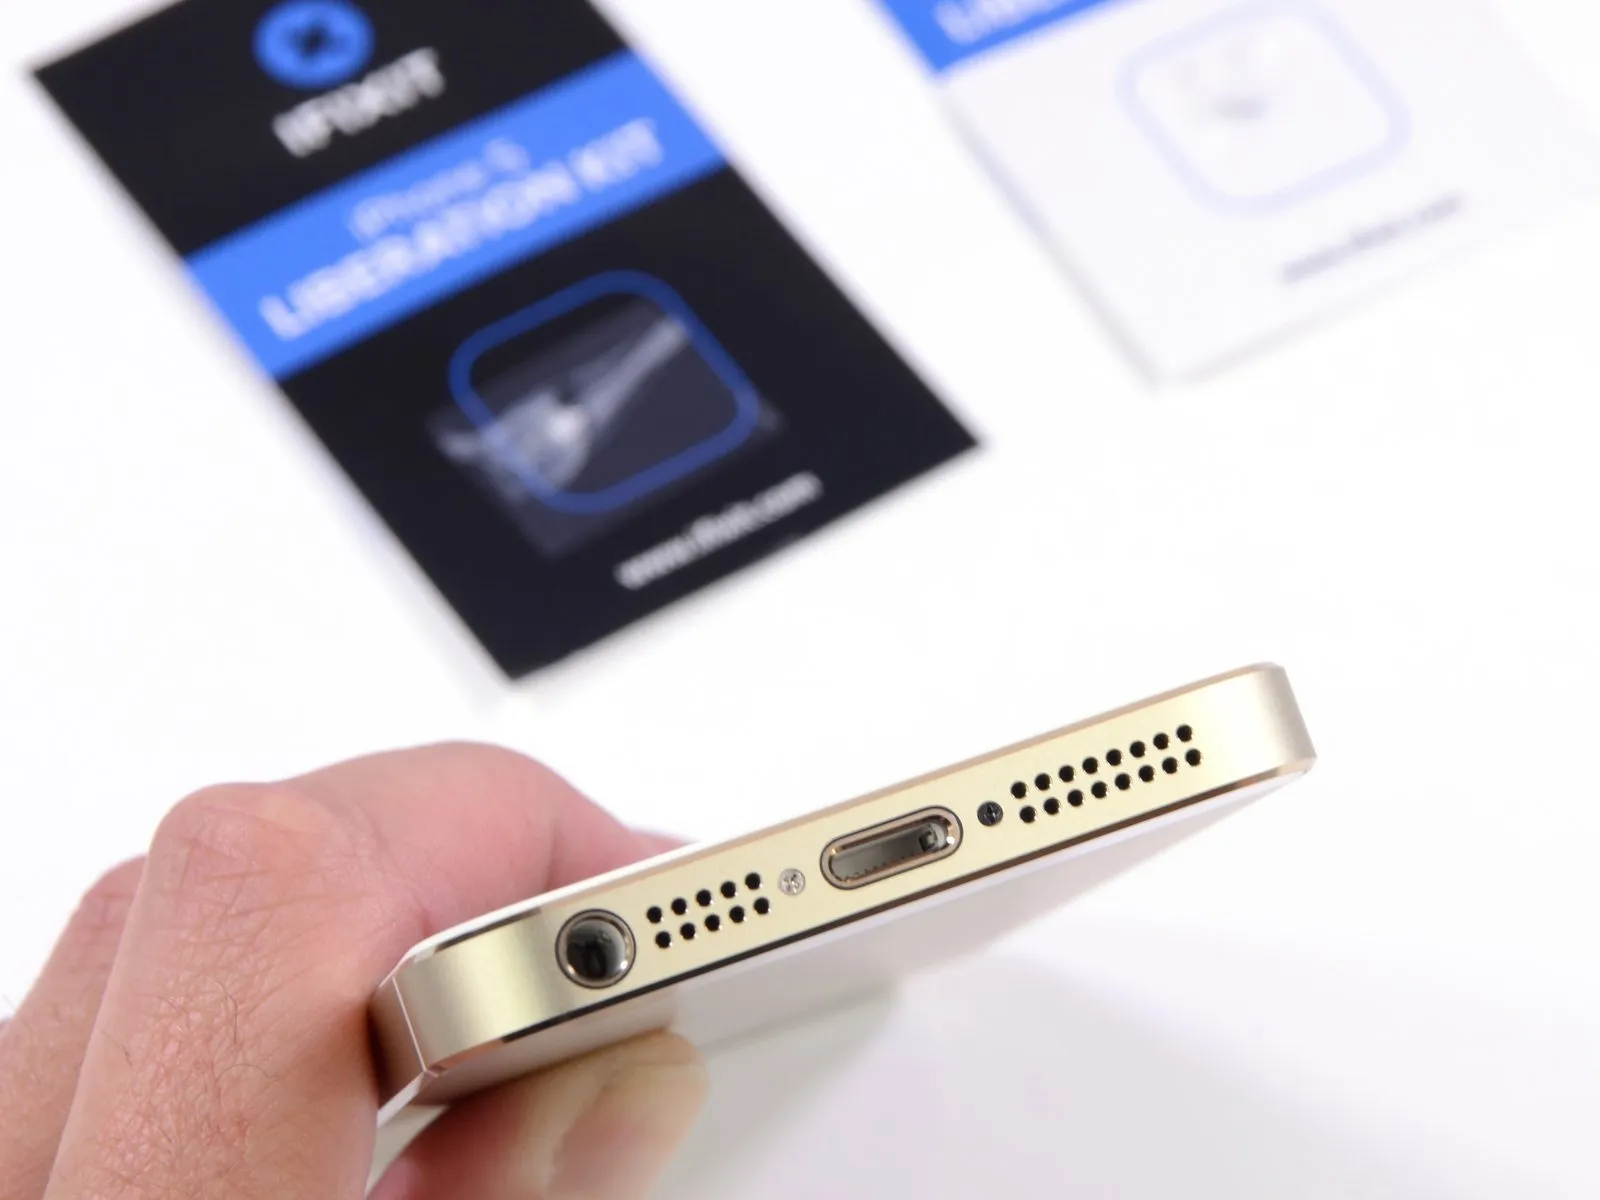
As with previous Apple devices, accessing the internal components requires removing pentalobe screws; fortunately, the necessary tool is included.
Using the iPhone 5 Liberation Kit, we successfully confirmed its functionality.
Replacement Phillips screws are available solely in silver or black, and we do not stock alternative colors.
Efforts are underway to persuade our design team to produce replacement screws fabricated from 14k gold, priced at $50 per unit; however, these screws are anticipated to exhibit a tendency to strip upon initial removal, aligning with the established characteristics of iPhone hardware. Further updates will be provided.
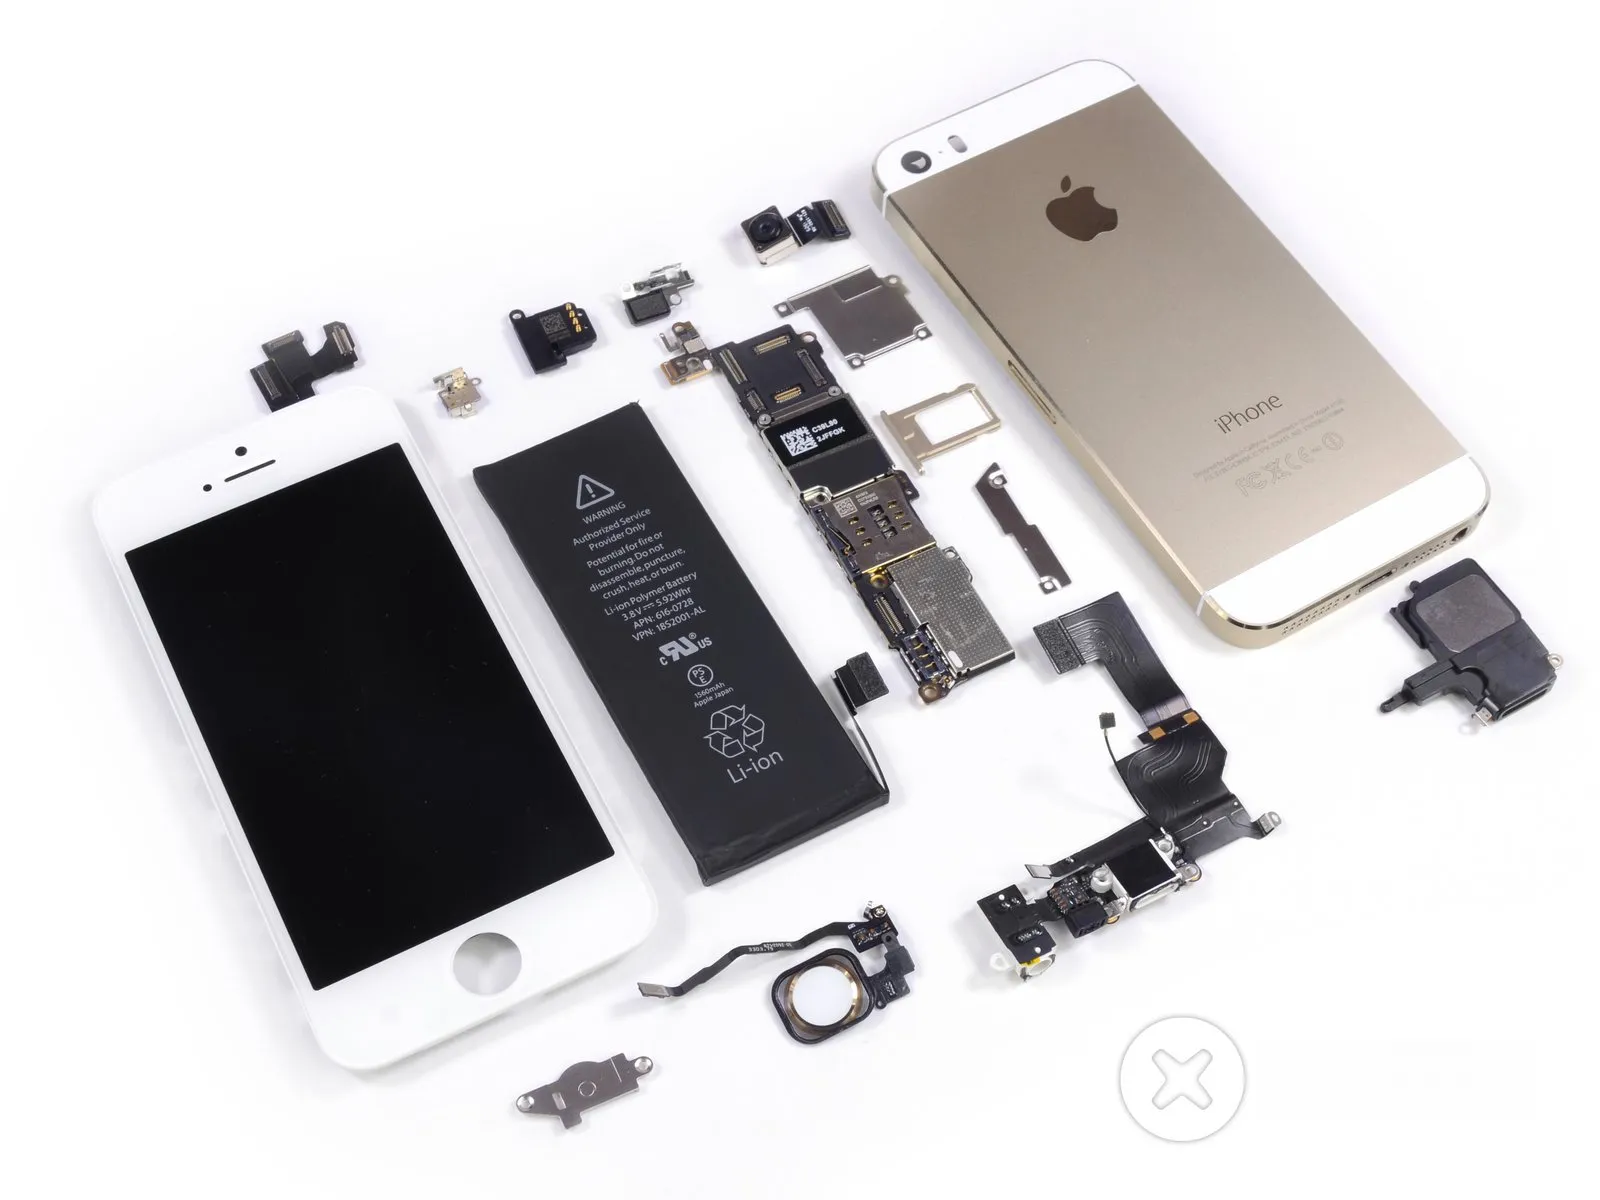
Having successfully disassembled the iPhone 5s, we anticipate another iPhone repair involving a similar design will be documented shortly.
Step 4
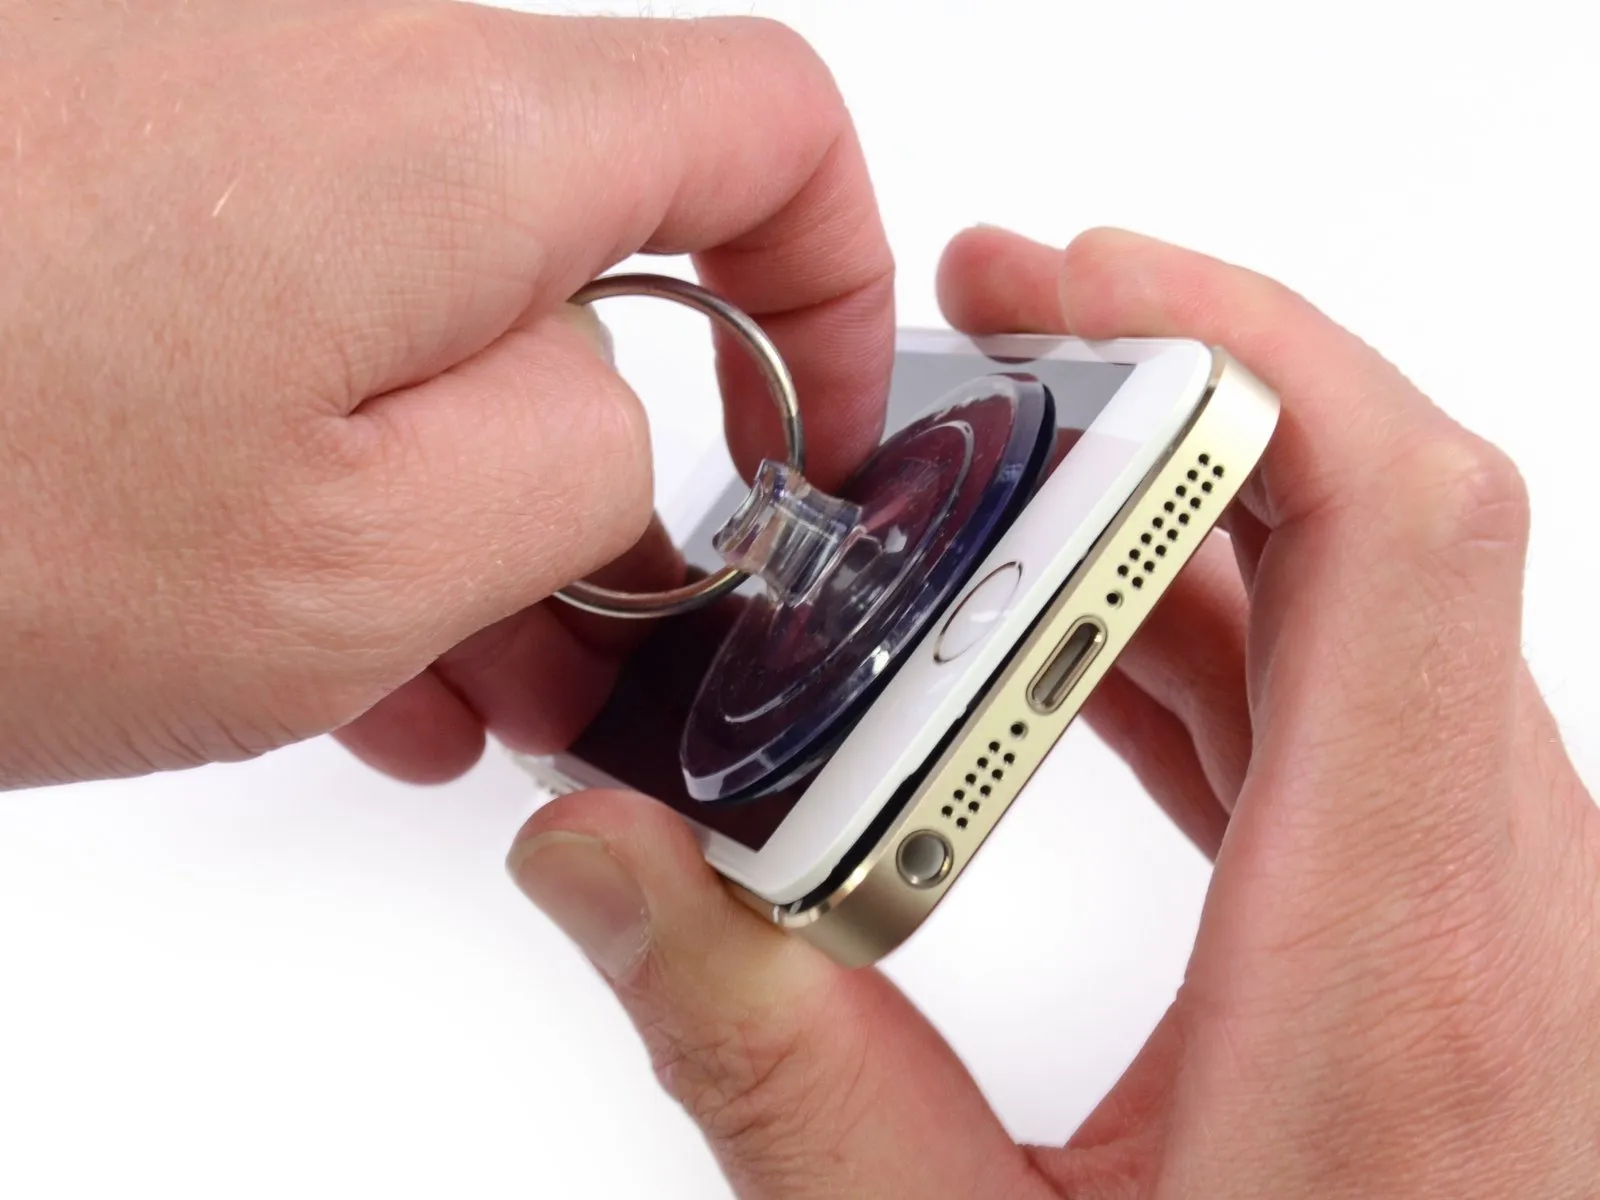
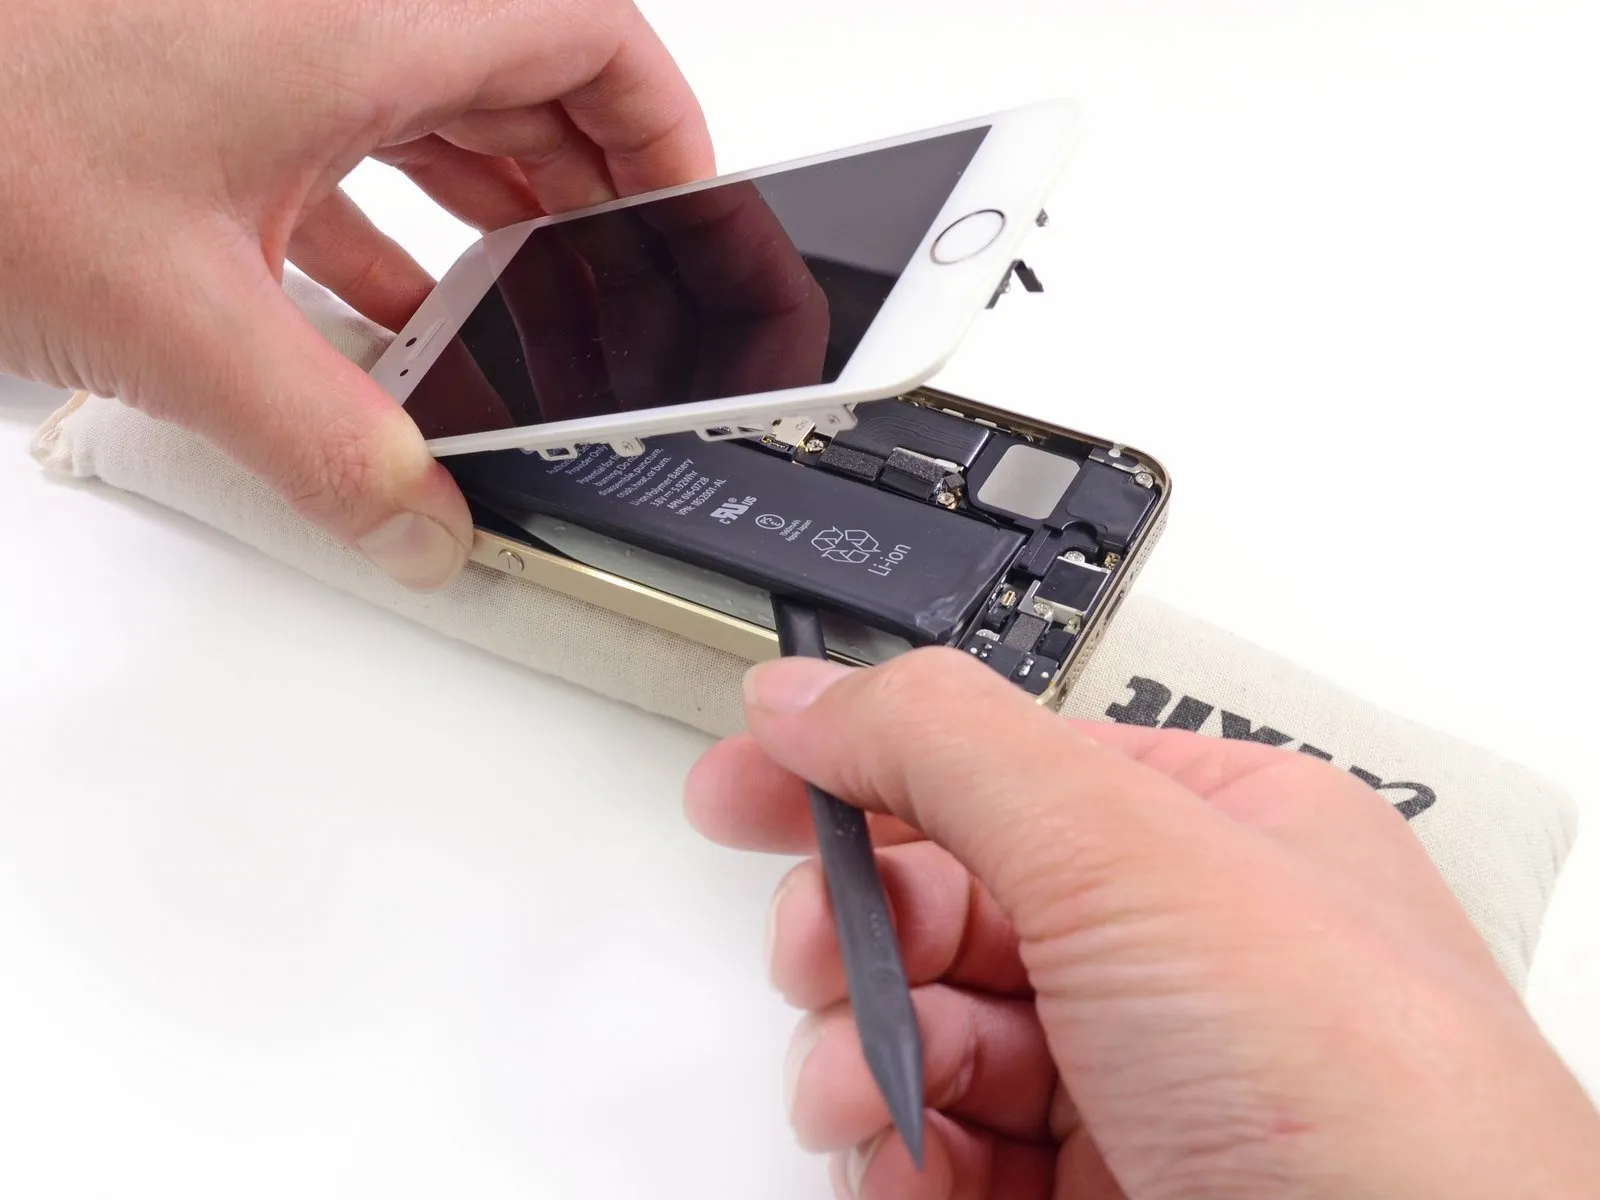
Carefully disengage the display assembly from the rear casing using a suction cup, mirroring the technique employed in previous repair cycles.
To avoid potential damage, carefully use a spudger for separation.
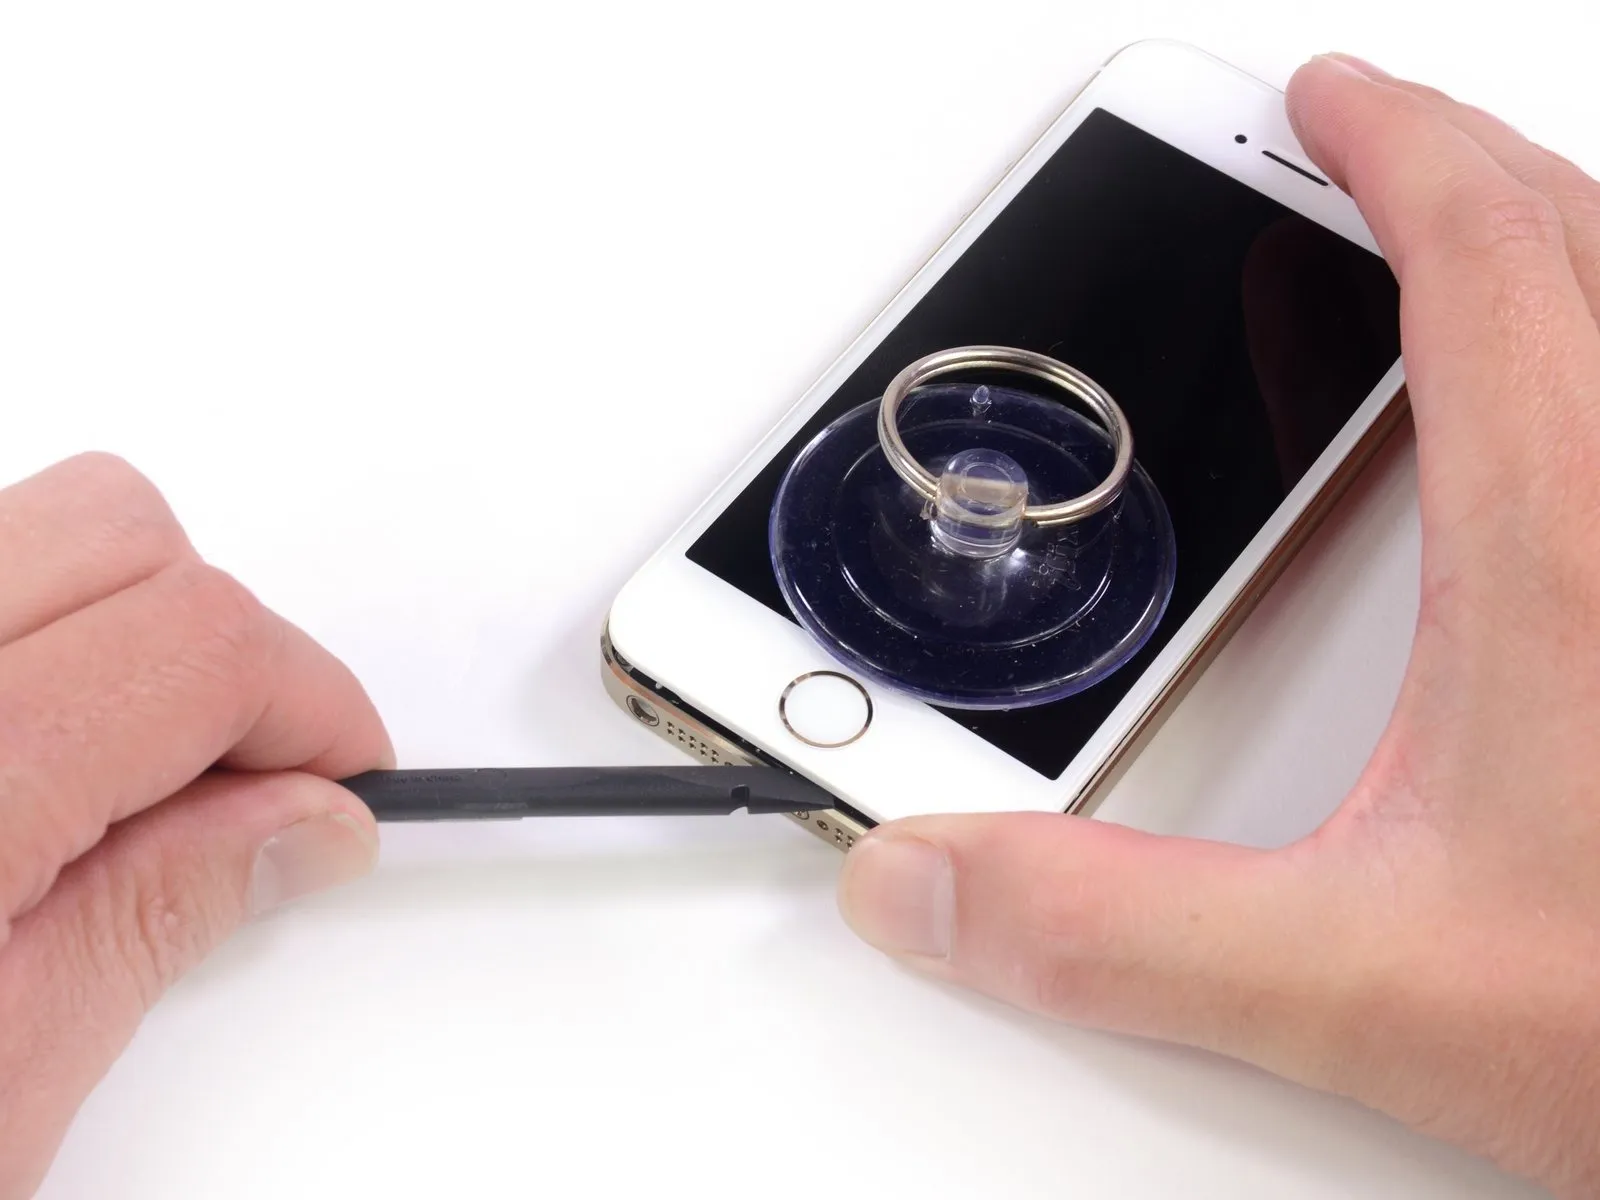
Step 5
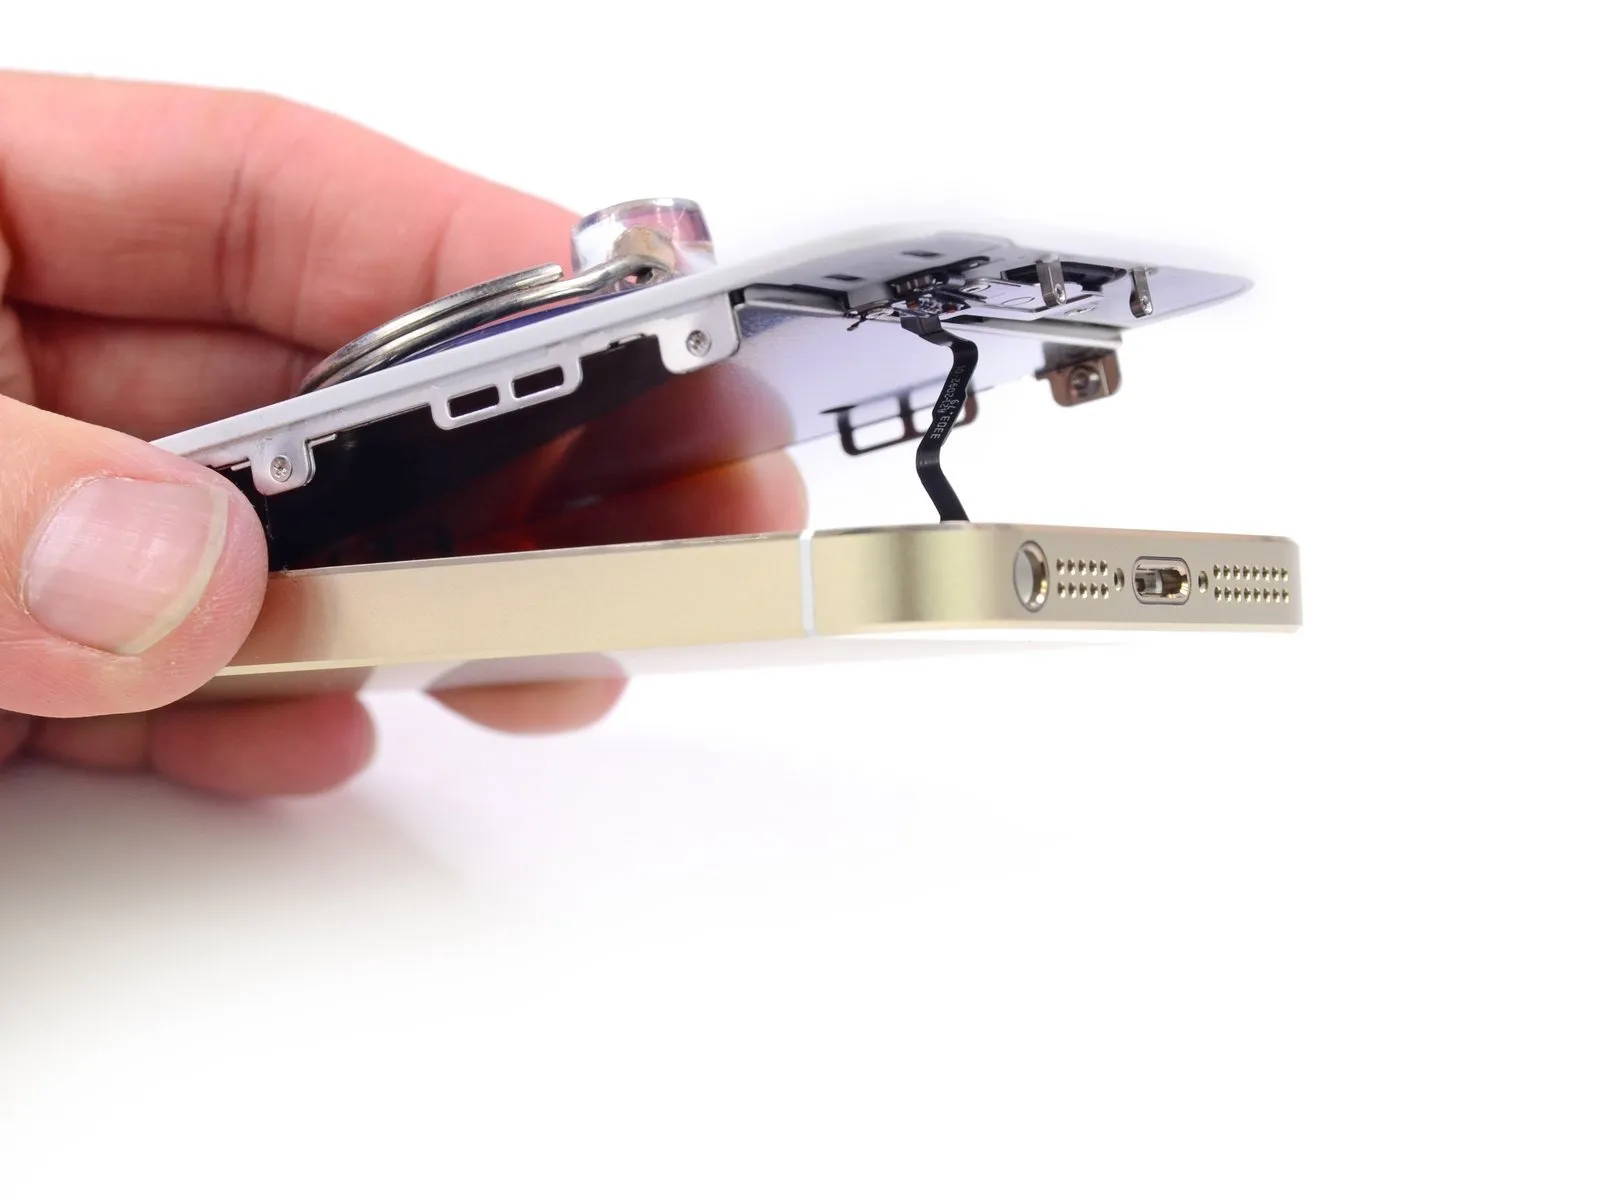
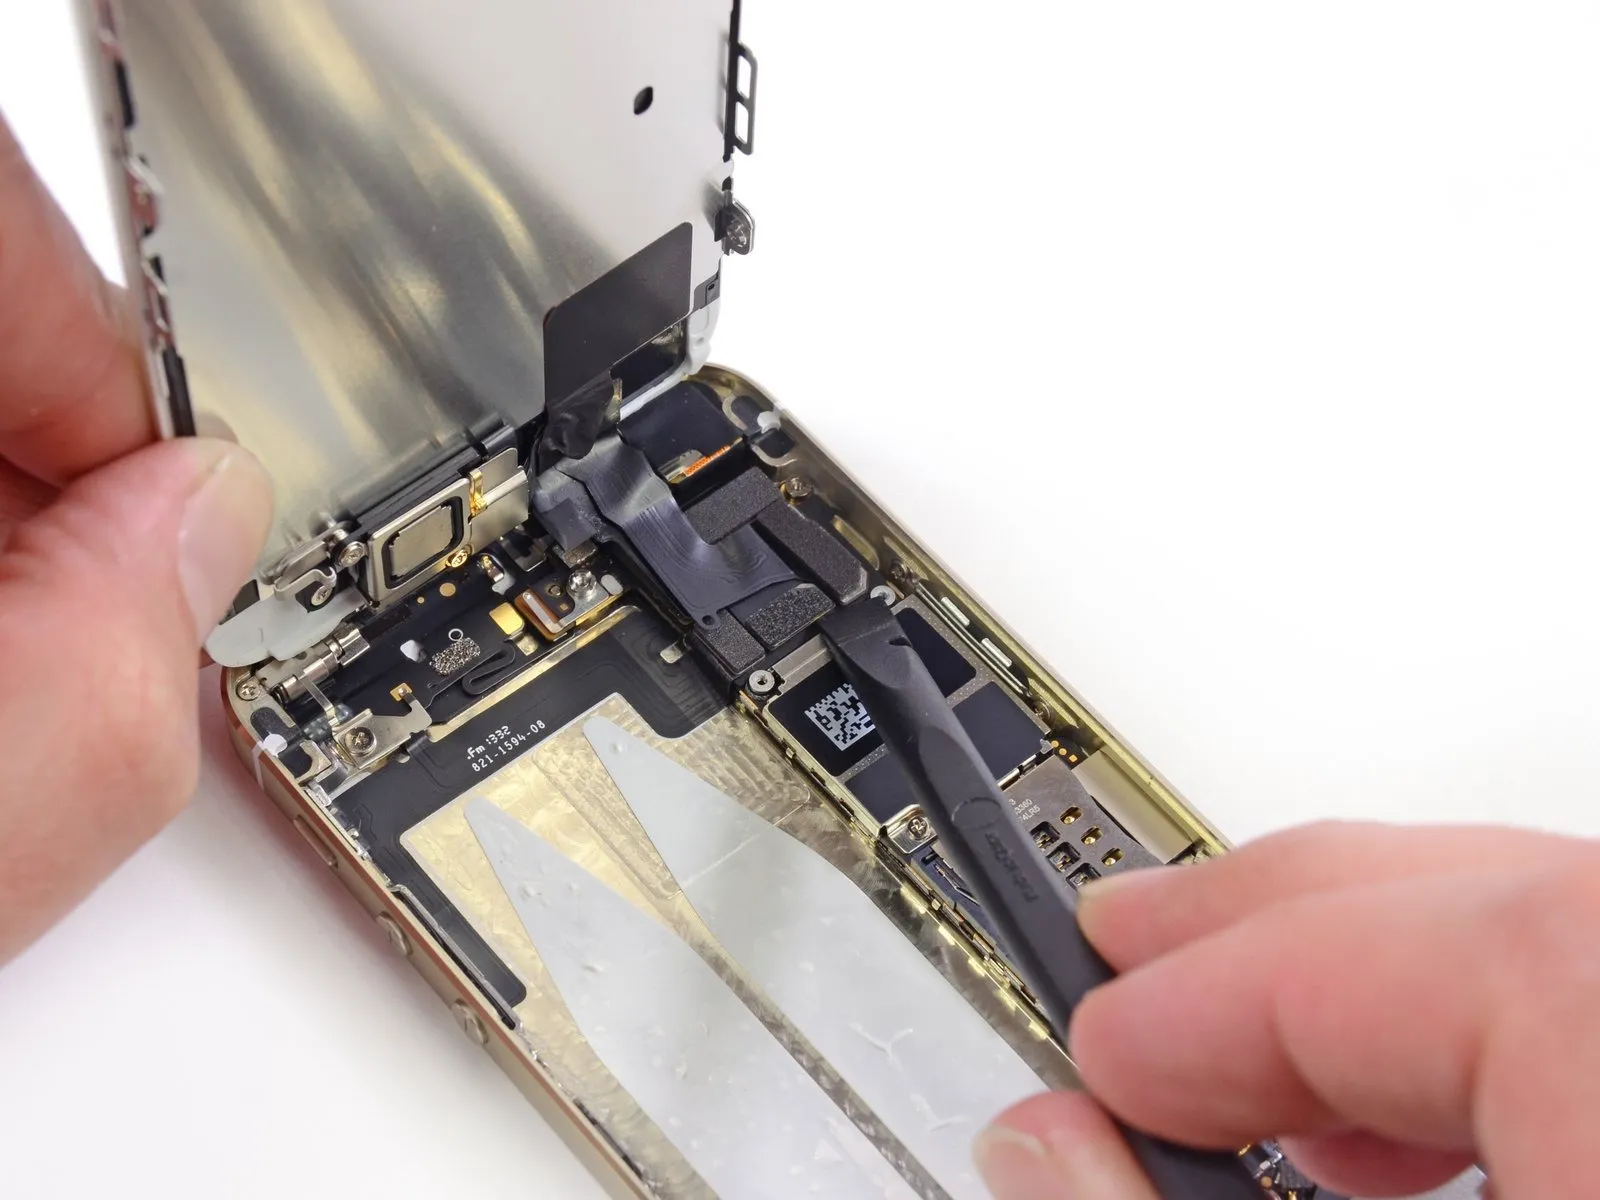
Using the spudger cautiously proved successful, revealing a cable situated at the phone's base; this cable facilitates communication between the home button's Touch ID sensor and the Lightning port assembly.
Excessive force when detaching the suction cup carries a risk of cable damage.
Carefully avoiding the initial trap, use a spudger to detach the Touch ID cable connector.
Examining the internal components of the 5s reveals a design remarkably similar to the iPhone 5, with the notable exception of the absence of a battery release tab.
Step 6
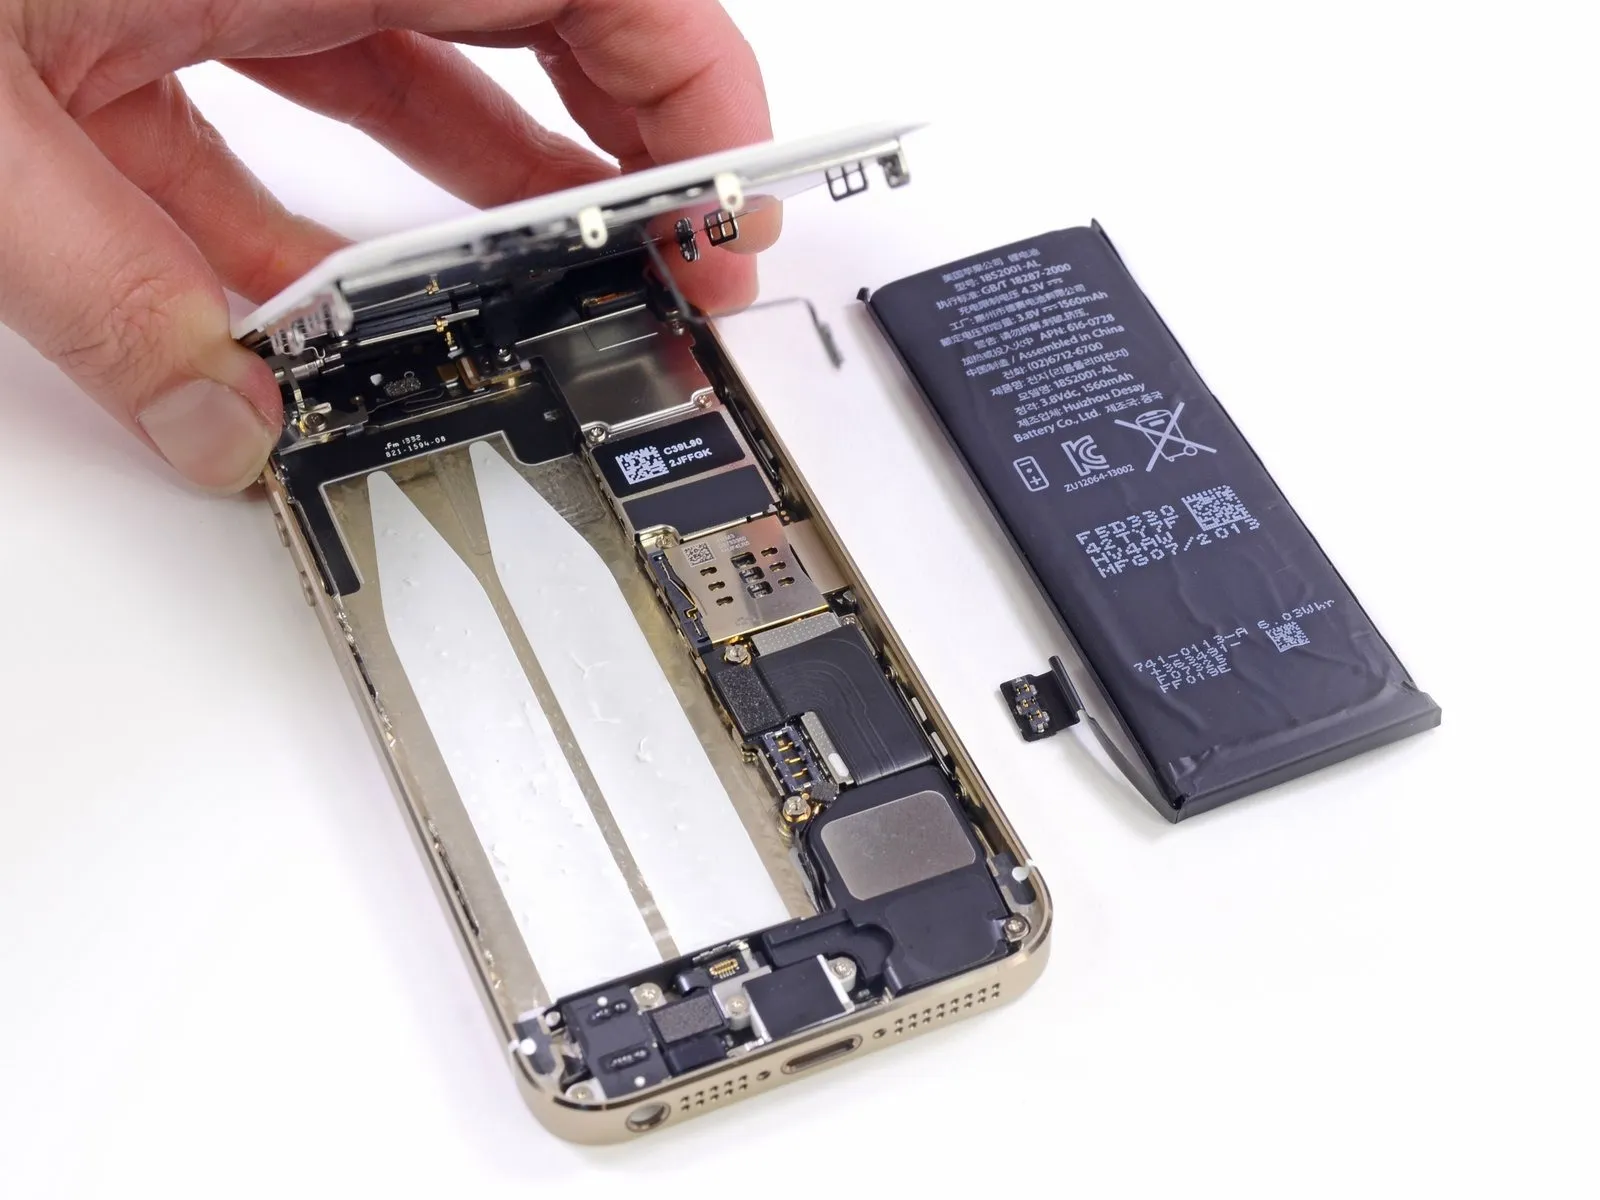
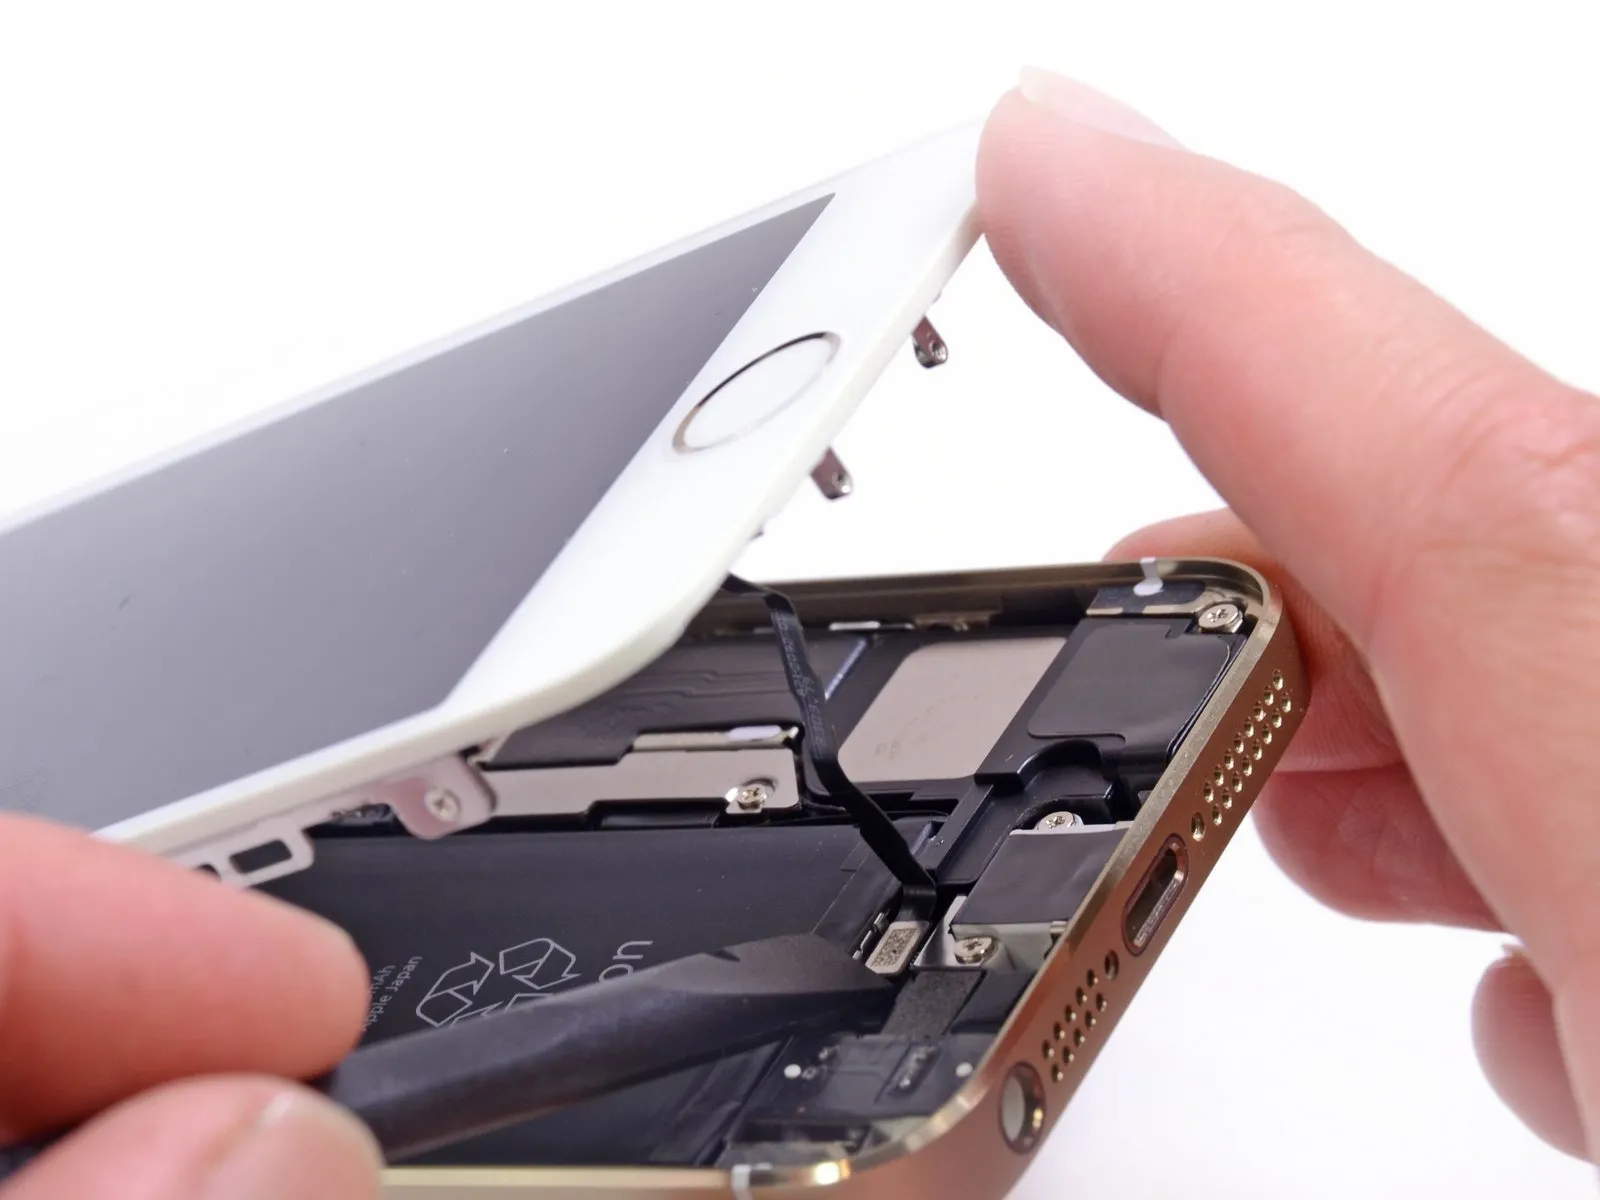
- Using the provided screwdriver set, detach the metal connector covers and then carefully disconnect the battery.
- The absence of the battery's pull-tab signals a complication during repair, as the battery is secured with adhesive.
- Expect significant adhesive securing the battery; removal and replacement are likely to be difficult.
- Because this device uses a battery that isn't designed for tool-free access, like some other phones, an iOpener is required to safely detach it using heat.
- The iPhone 5 utilized a small amount of adhesive, but the iPhone 5s employs two large strips of white adhesive to secure the battery.
- Due to reports indicating the adhesive strips are easily removable, we are obtaining additional iPhones to further examine this behavior and will revise the repair difficulty rating accordingly.
Step 7
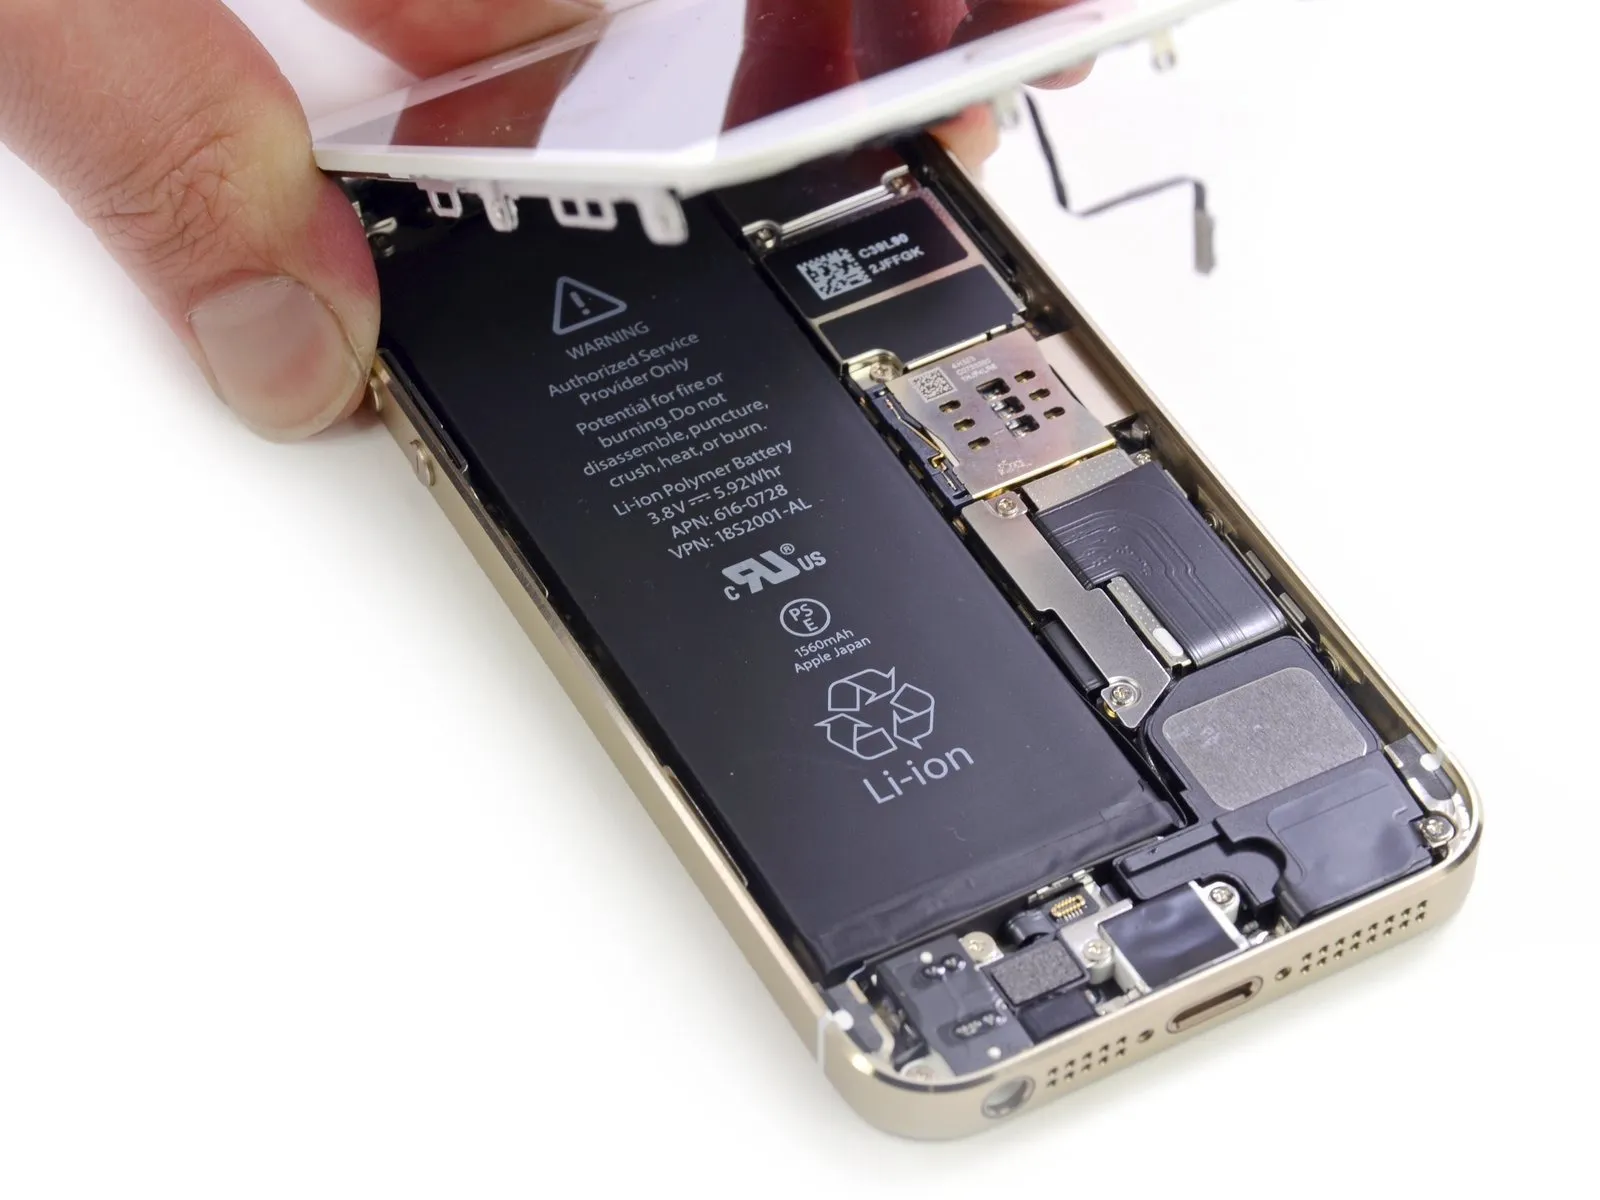
While Apple states the 5s offers up to 10 hours of 3G talk time, performance may be reduced when using iOS 7.
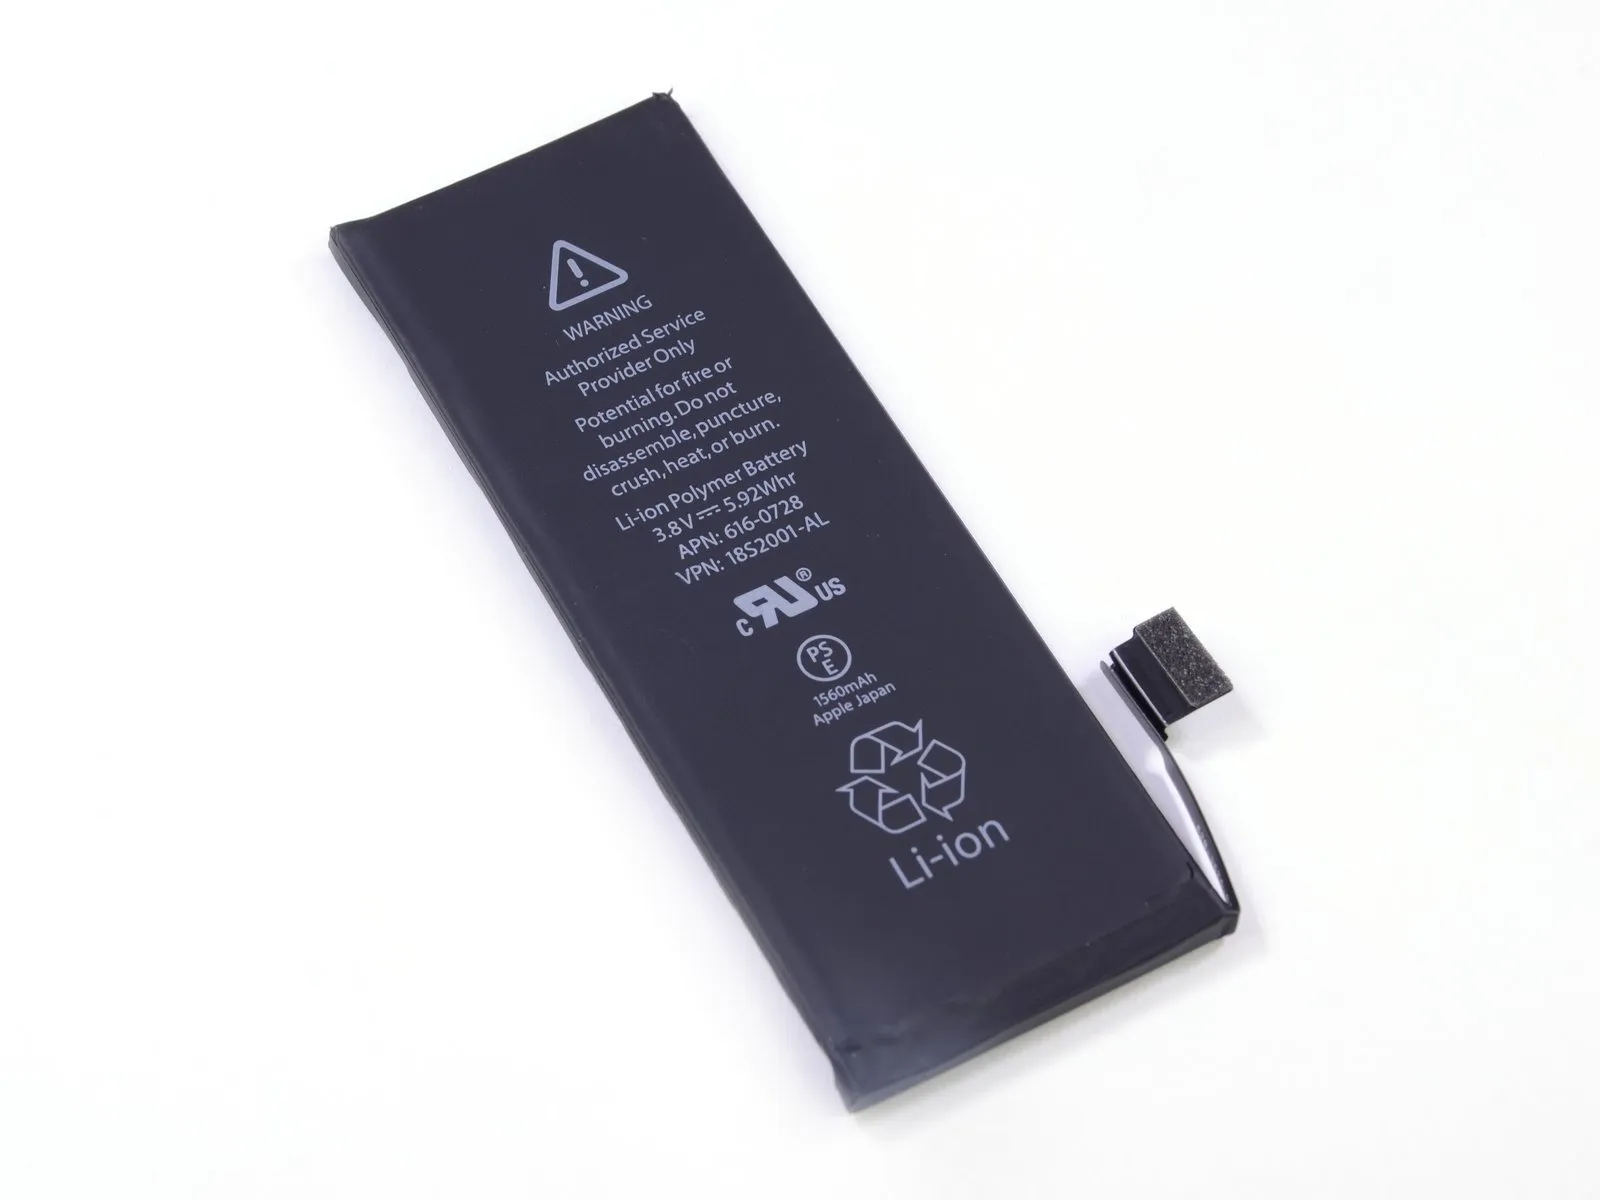
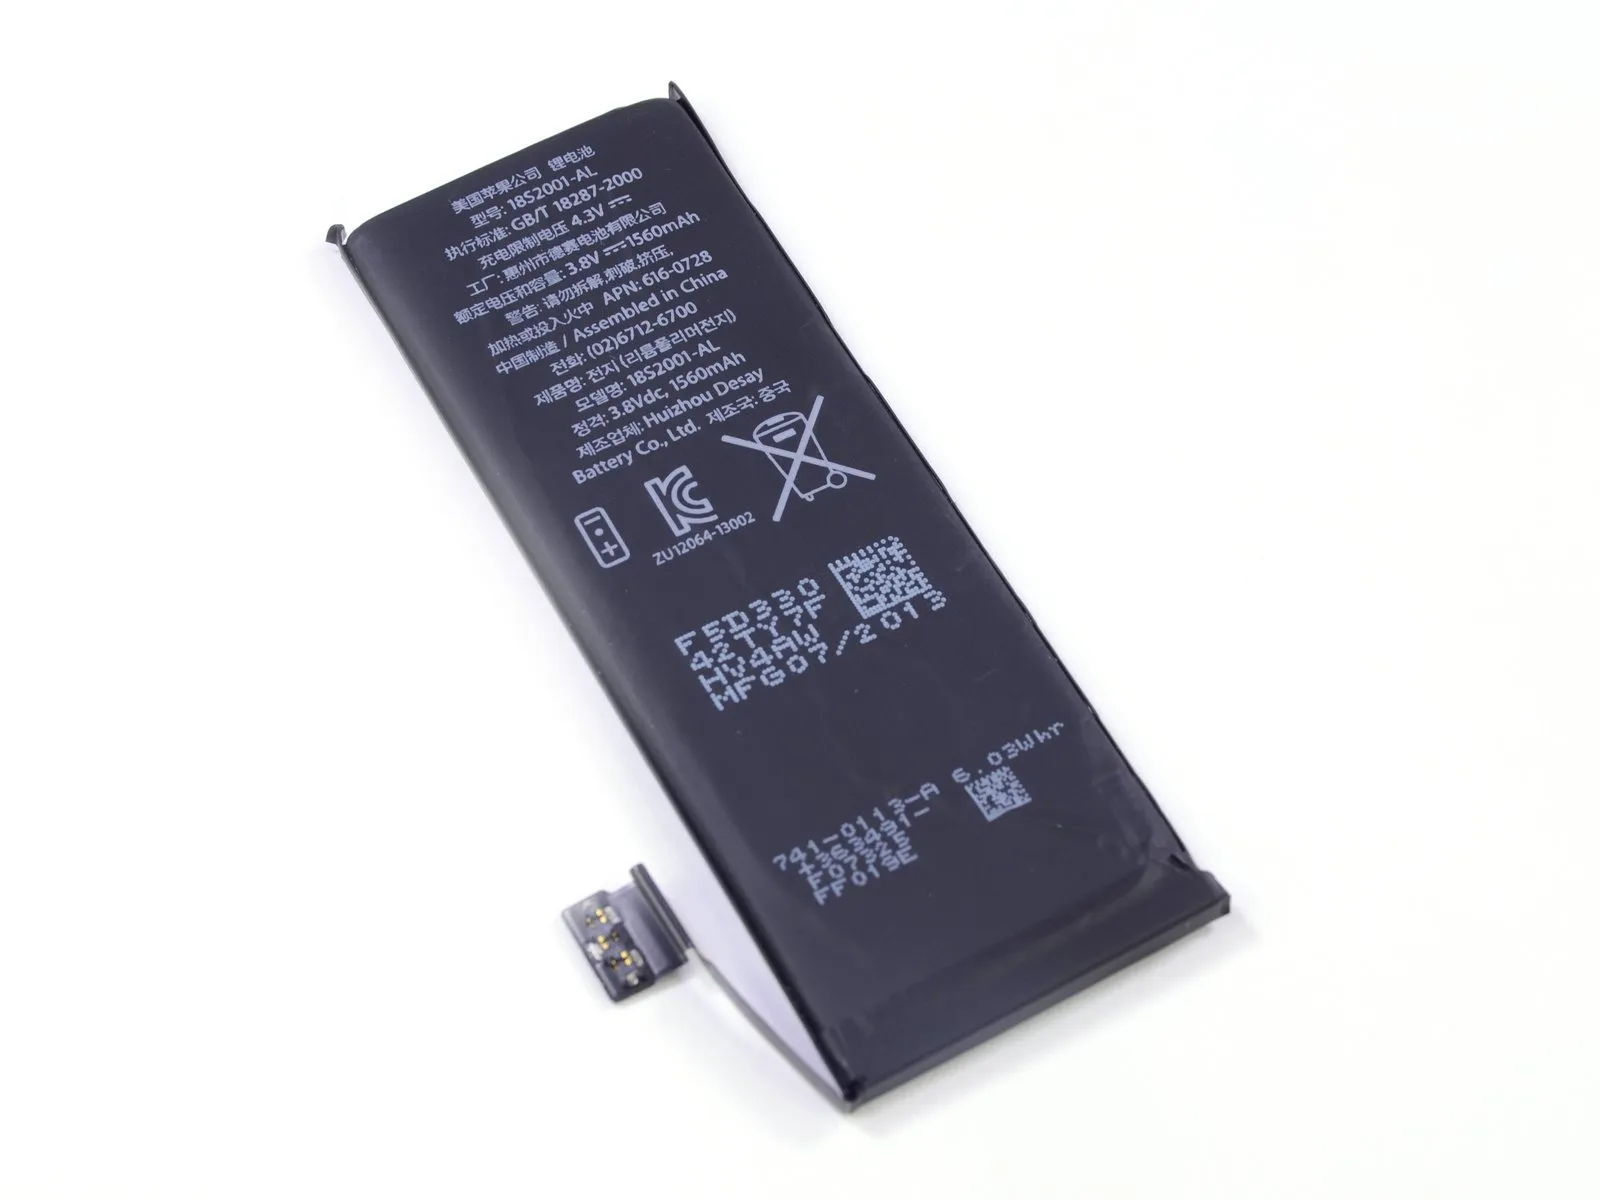
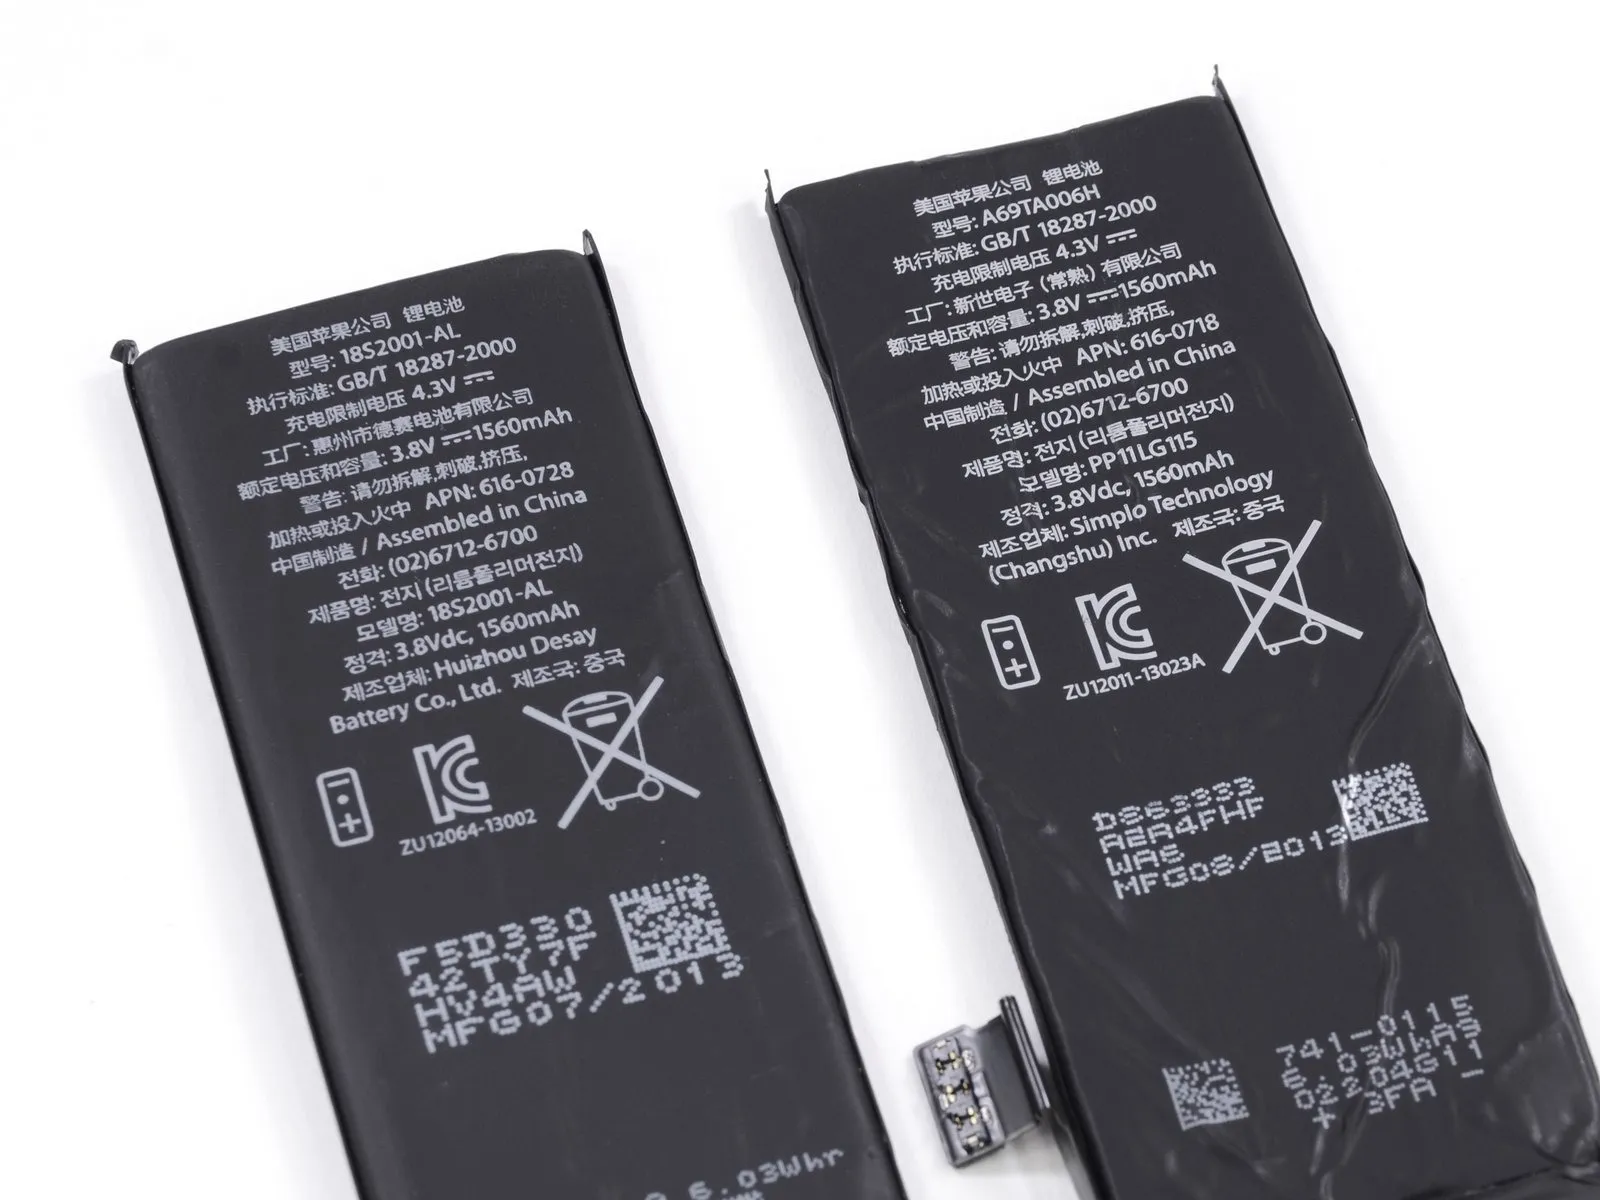
This Desay Battery Co., Ltd battery, manufactured in Huizhou, China, features a 3.8V nominal voltage and a capacity of 1560 mAh, resulting in a total energy output of 5.92Wh.
The iPhone 5 battery delivers 3.8 volts and a 1440 milliampere-hour capacity, totaling 5.45 watt-hours, enabling up to 8 hours of talk time on a 3G network and a standby duration of up to 225 hours.
The Samsung Galaxy S4 utilizes a 2600 milliampere-hour battery with a voltage of 3.8 volts, resulting in a total energy capacity of 9.88 watt-hours; this configuration enables a maximum talk time of 7 hours and a standby duration of up to 300 hours.
The Motorola Moto X battery operates at 3.8 volts with a capacity of 2200 milliamp-hours and a total energy of 8.4 watt-hours, providing an estimated 24 hours of typical combined use.
The replacement battery for the 'space-gray' model originates from Simplo Technology Inc., reflecting variations in battery suppliers across different production runs.
Step 8
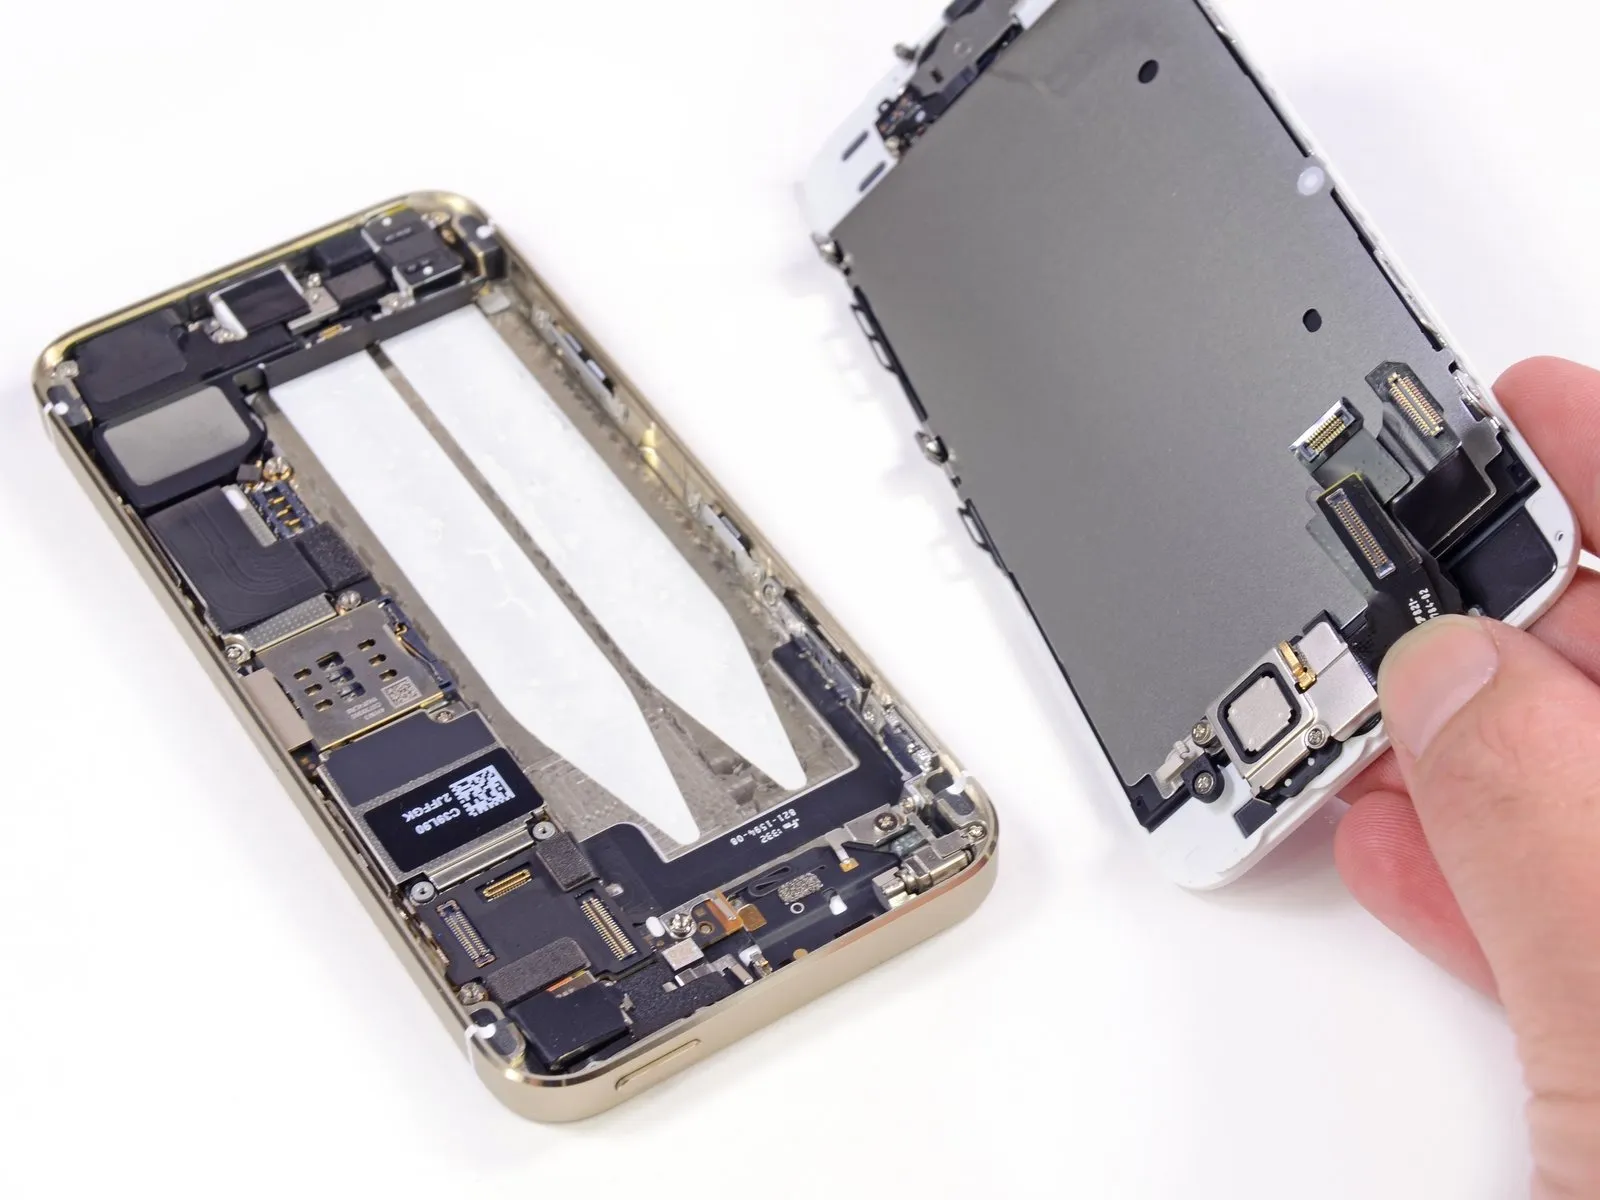
After disconnecting the battery for safety, proceed with removing the 326 ppi Retina display assembly, which remains unaltered.
Carefully use a spudger to release the connectors securing the FaceTime camera, digitizer, and LCD cables, which will then allow the display assembly to be separated.
Technical specifications for the display are identical to those found in the iPhone 5; the iPhone 5s display maintains the same dimensions, performance characteristics, and overall design as its predecessor, diverging from the typical size and feature upgrades seen in other contemporary smartphone models.
Step 9
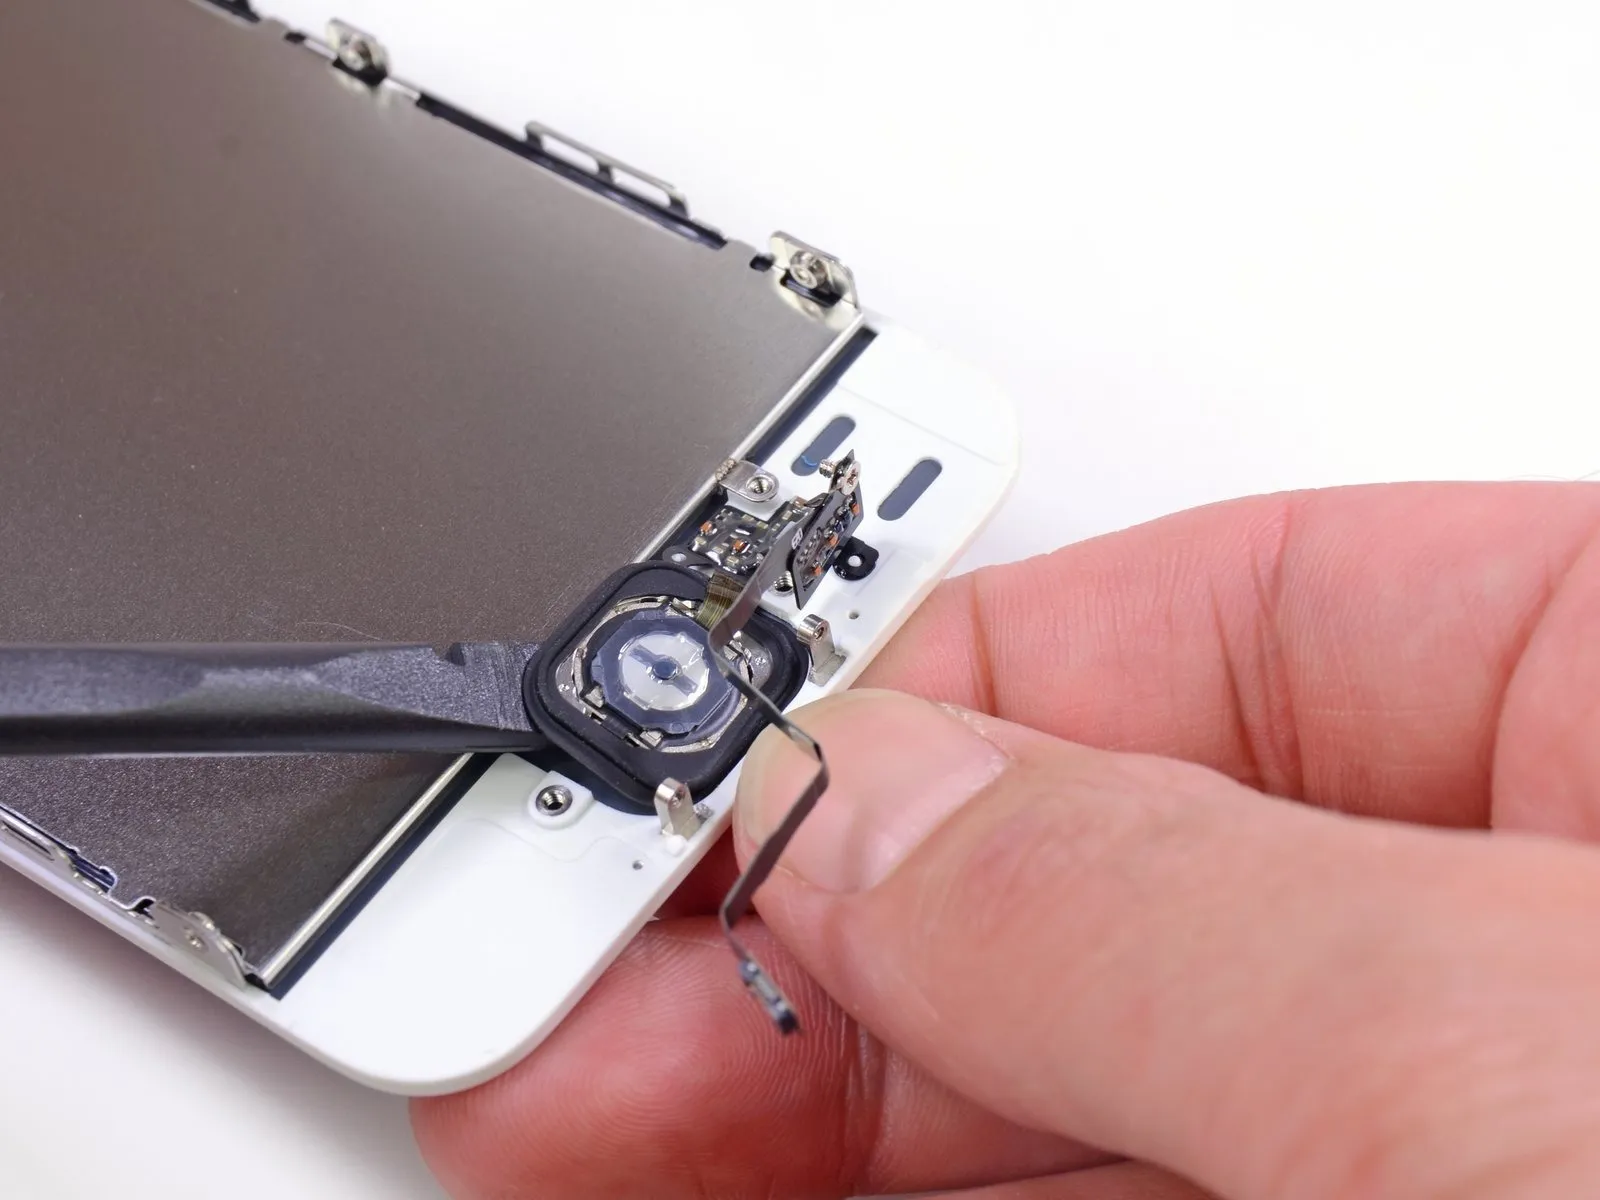
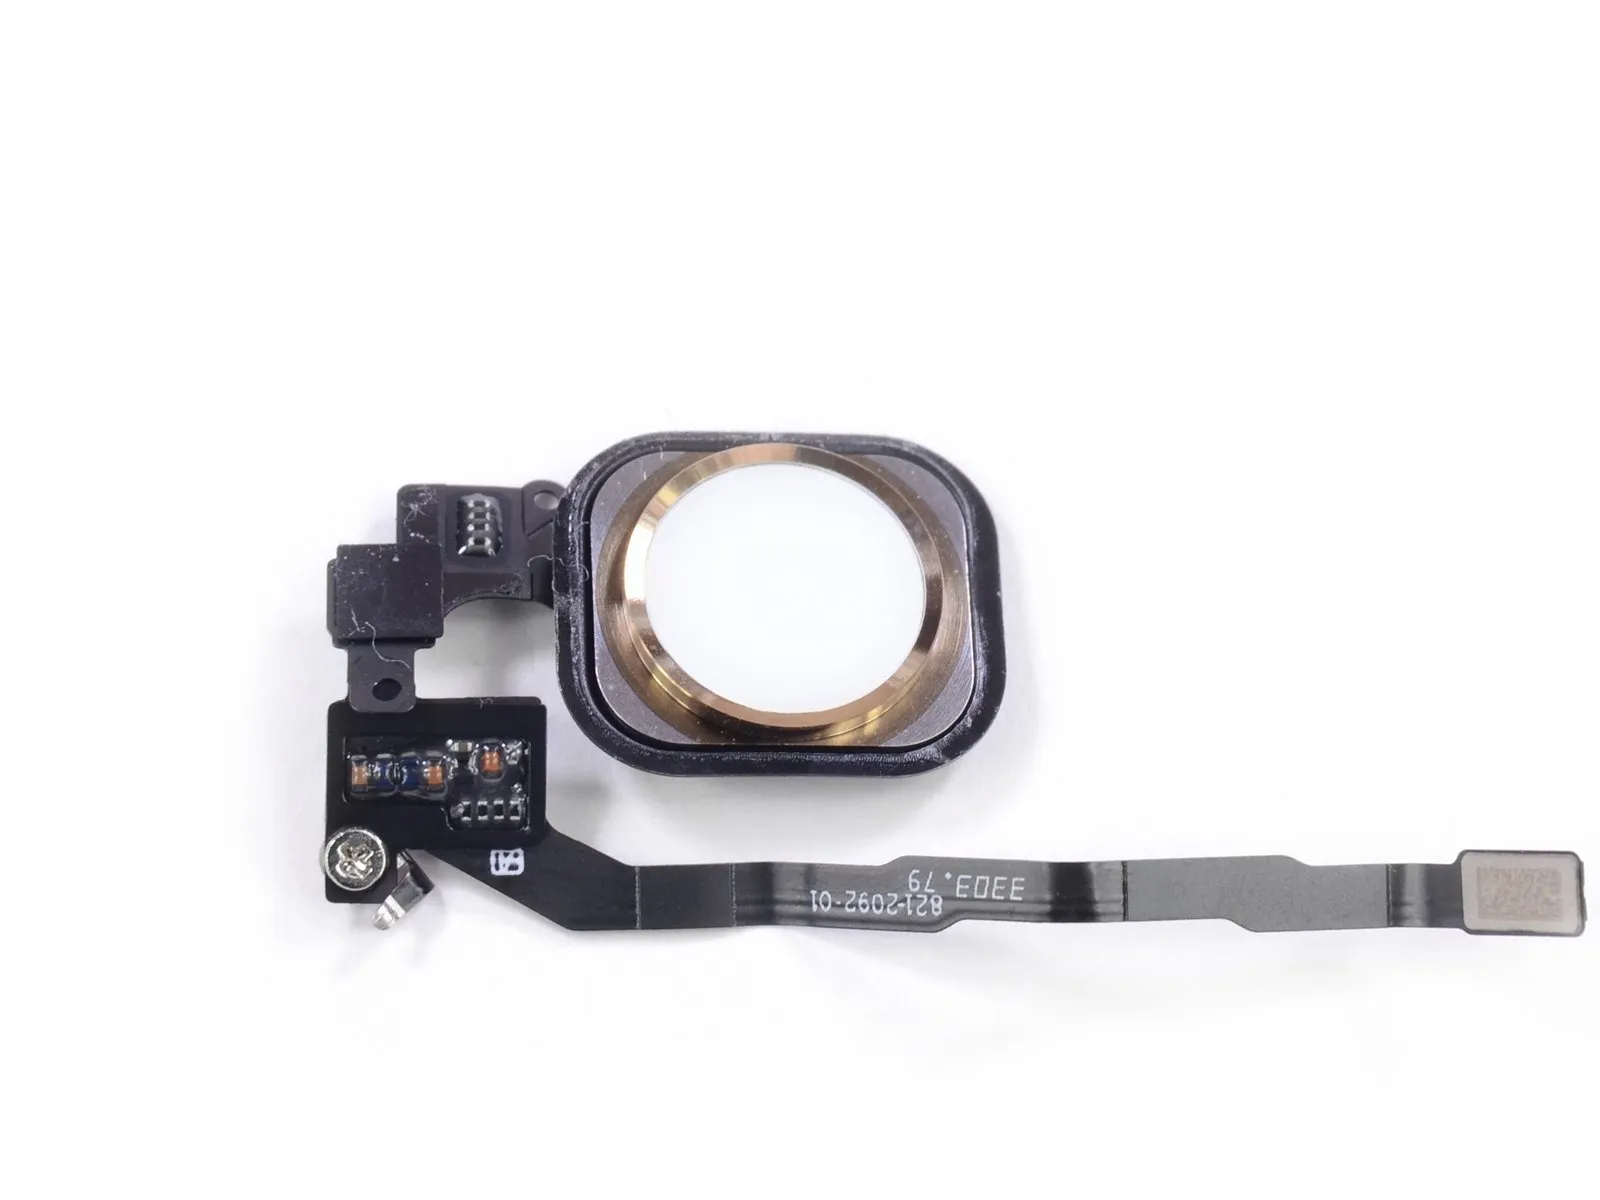
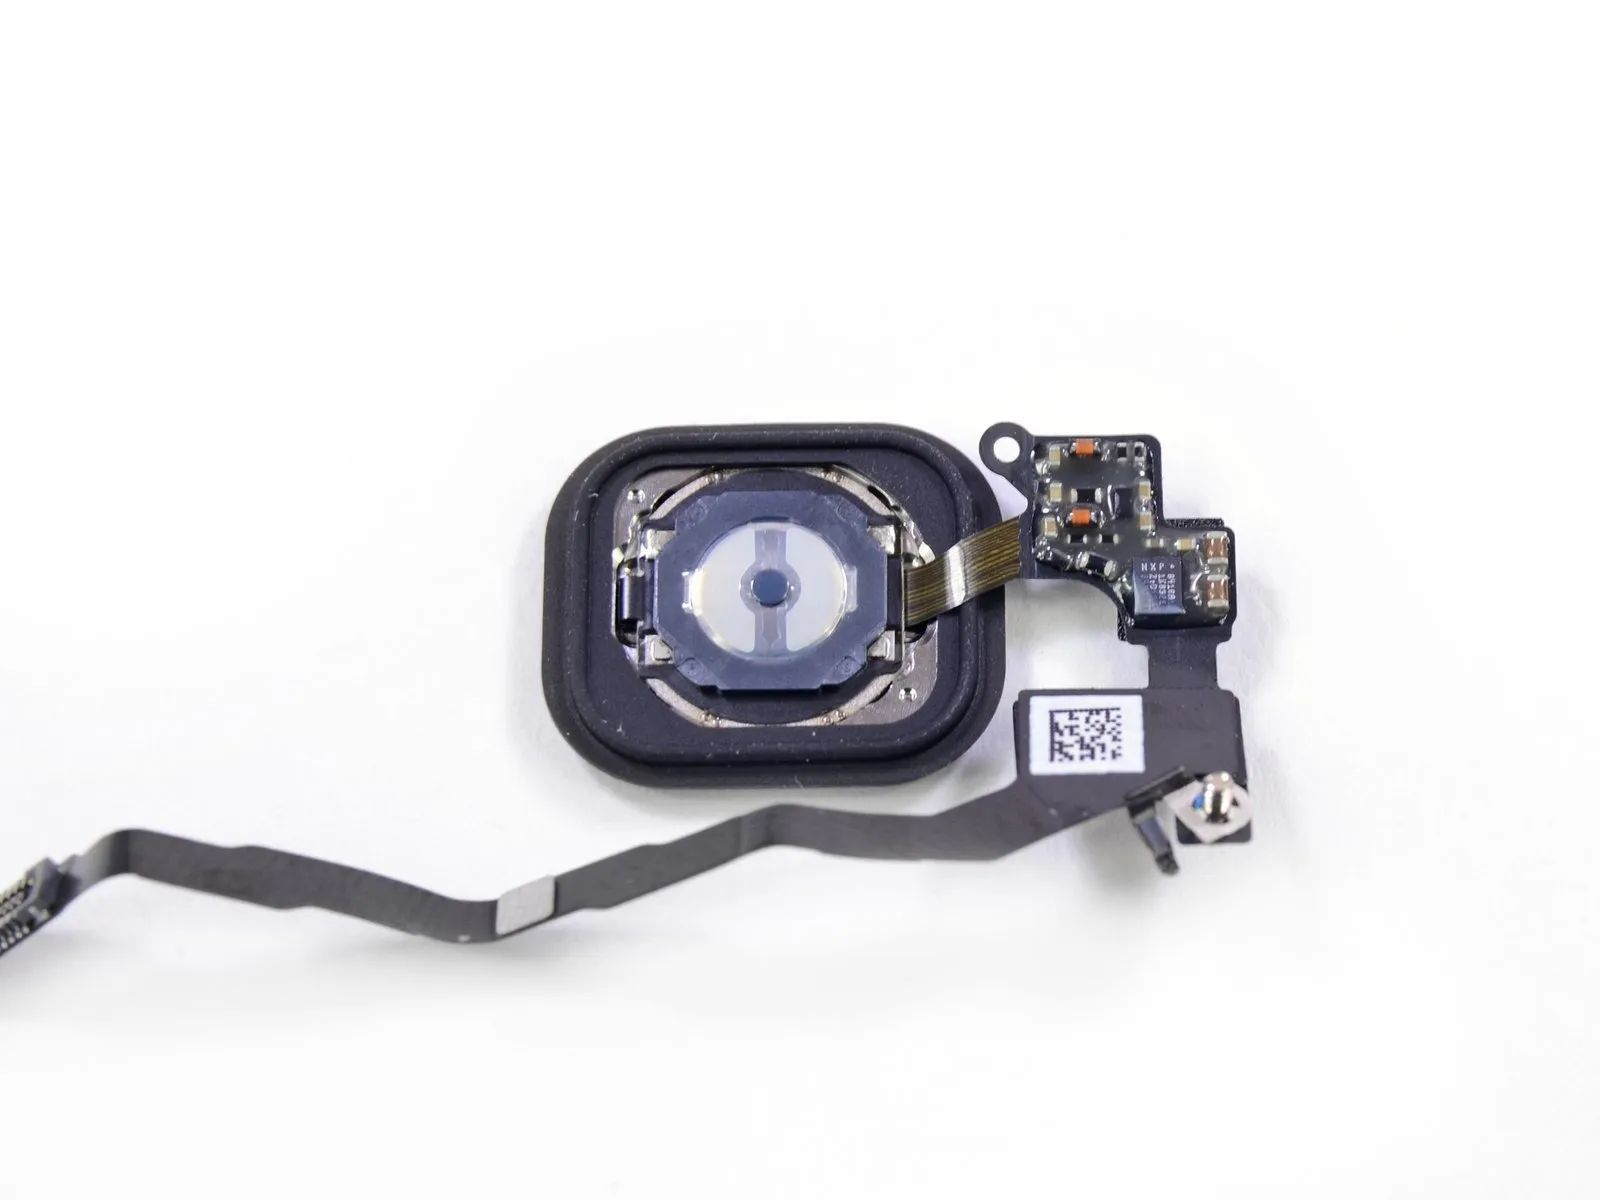
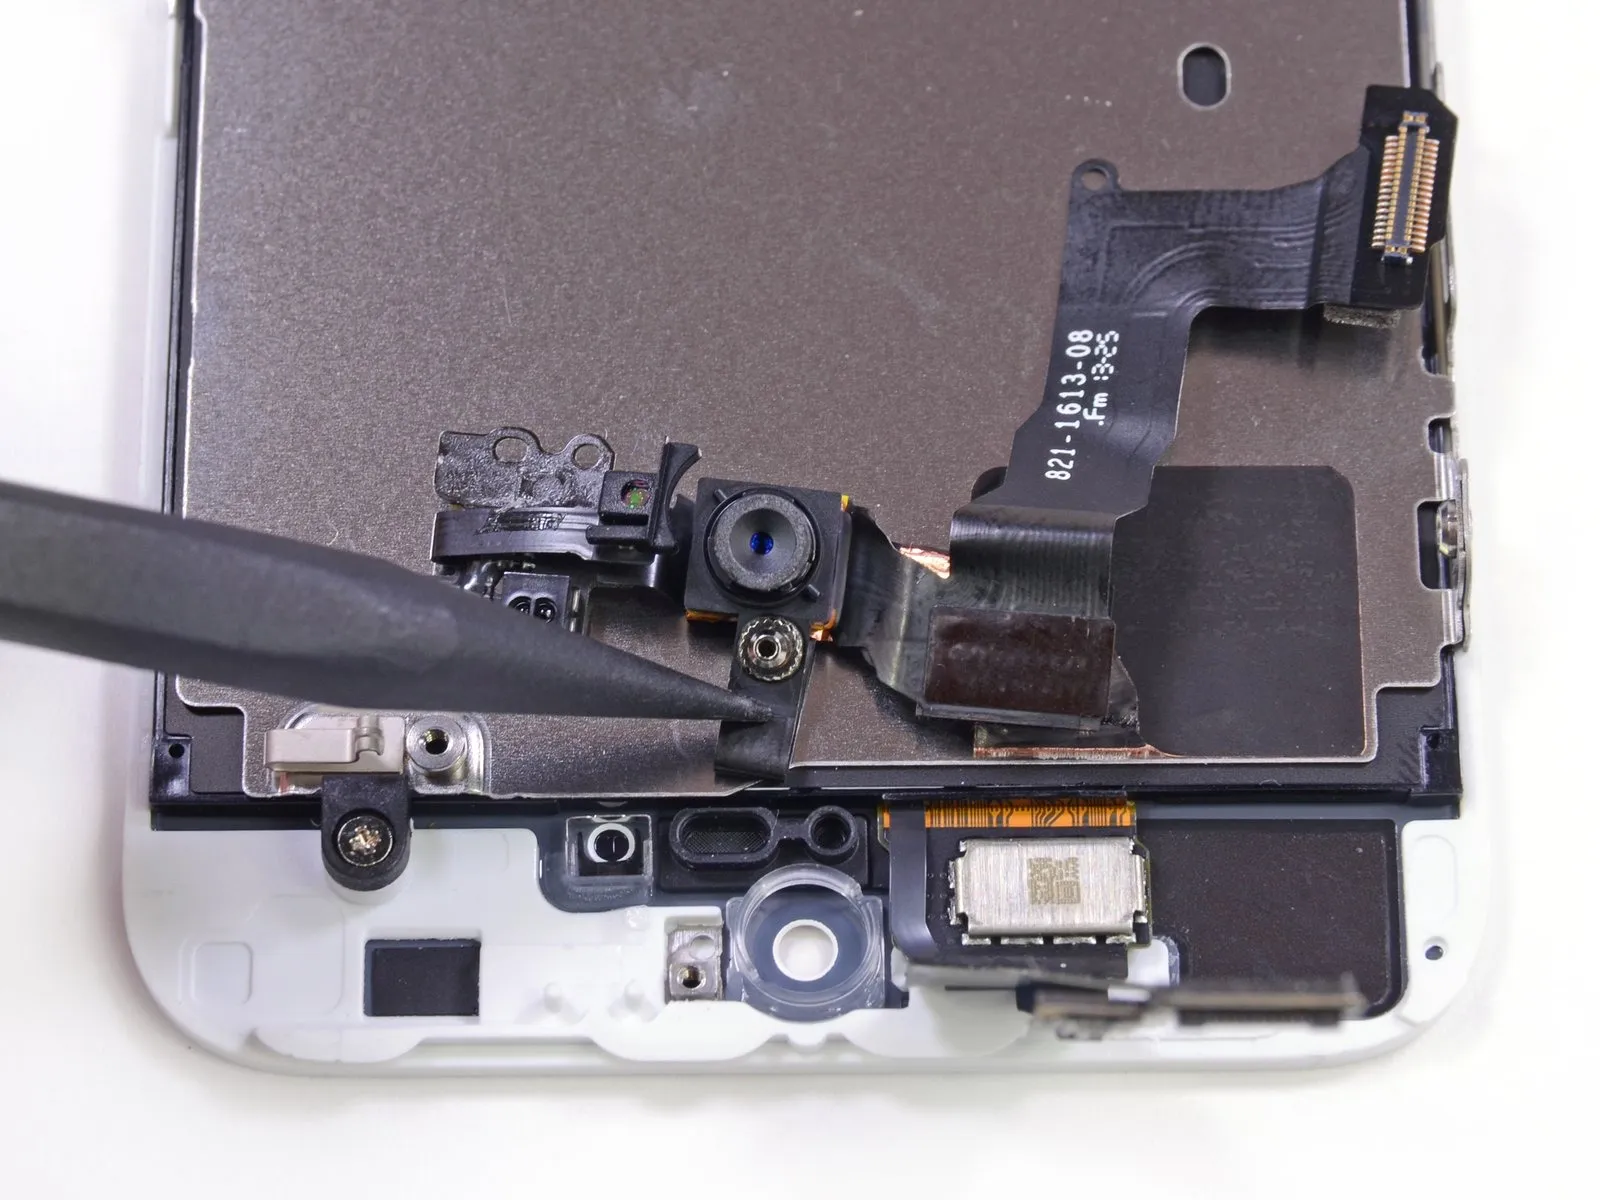
Carefully remove the home button assembly, which incorporates the Touch ID fingerprint sensor, and clean it to eliminate any residue.
The Touch ID sensor utilizes a CMOS chip containing numerous microscopic capacitors to generate a digital representation of your fingerprint's surface features.
Fingerprint data, utilizing AuthenTec technology now owned by Apple, is stored directly on the device, meaning that attempting to spoof the sensor will not transmit information to Apple's servers.
The longevity of the sapphire crystal safeguarding the CMOS fingerprint sensor is a concern, as it may be susceptible to wear and potential failure over extended use, similar to the risks associated with a battery improperly secured with adhesive.
Step 10
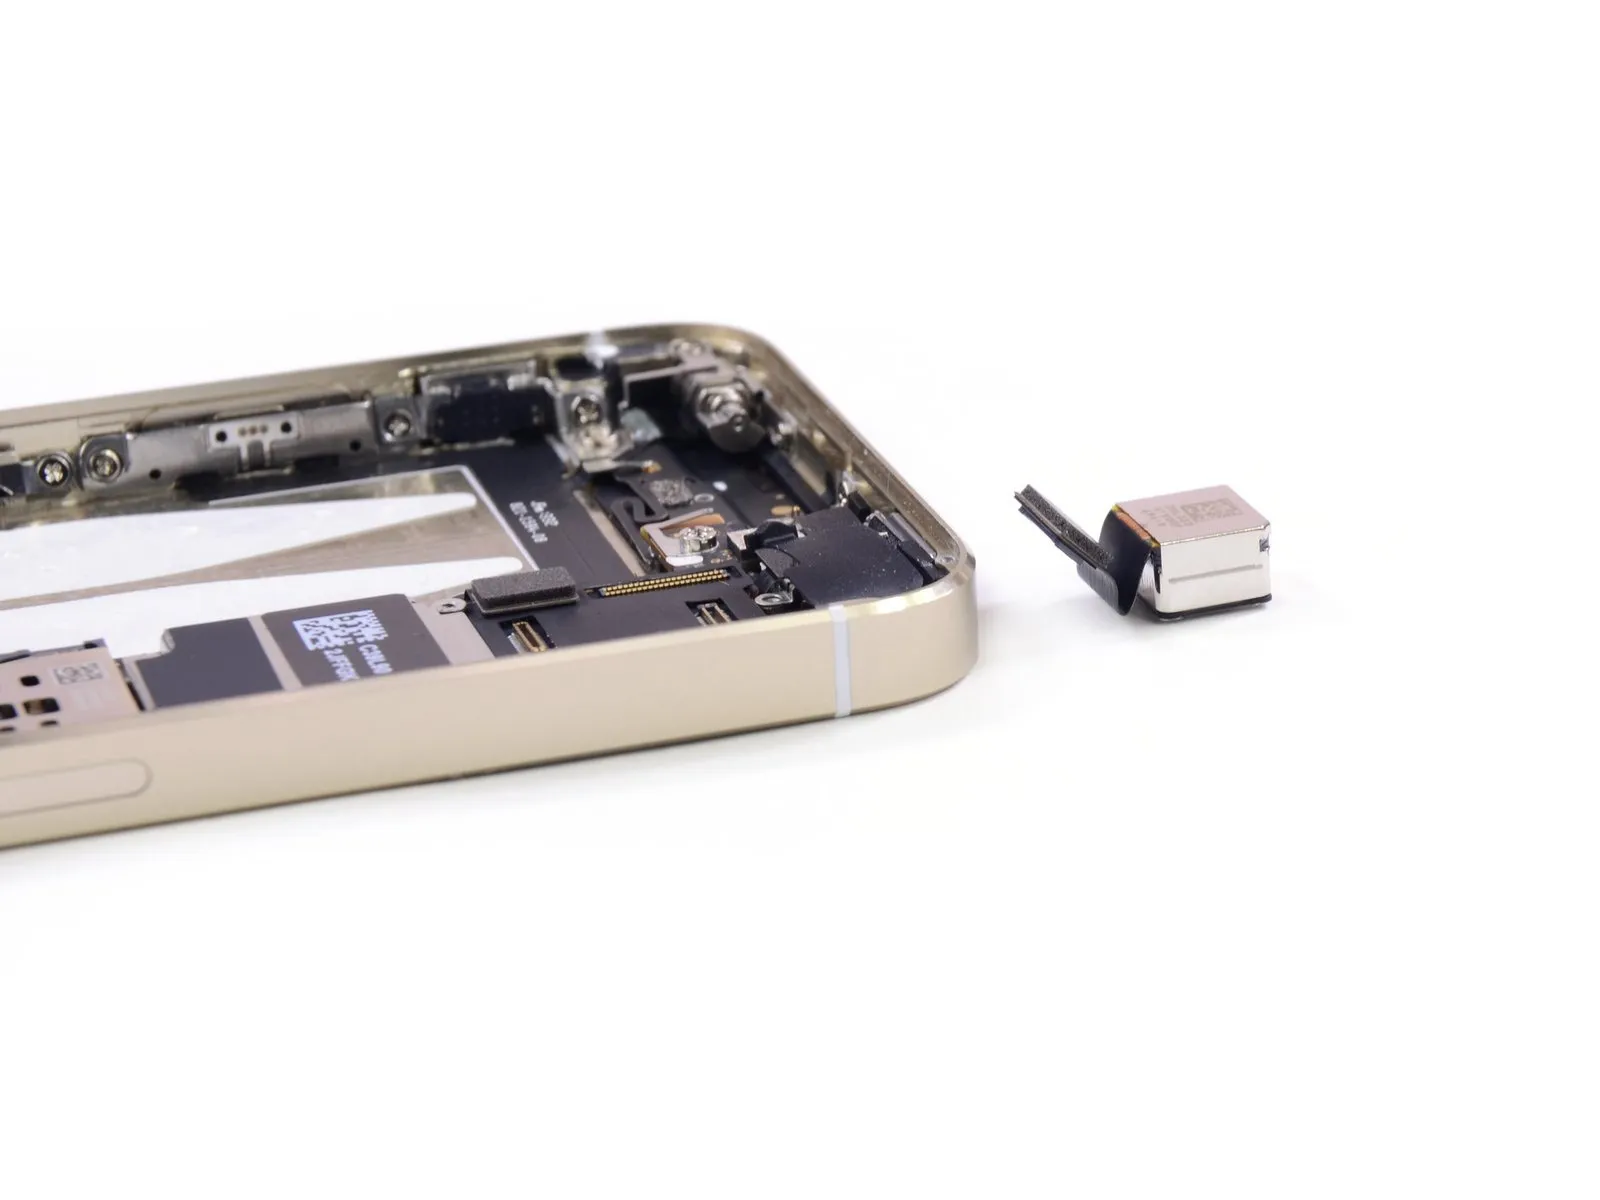
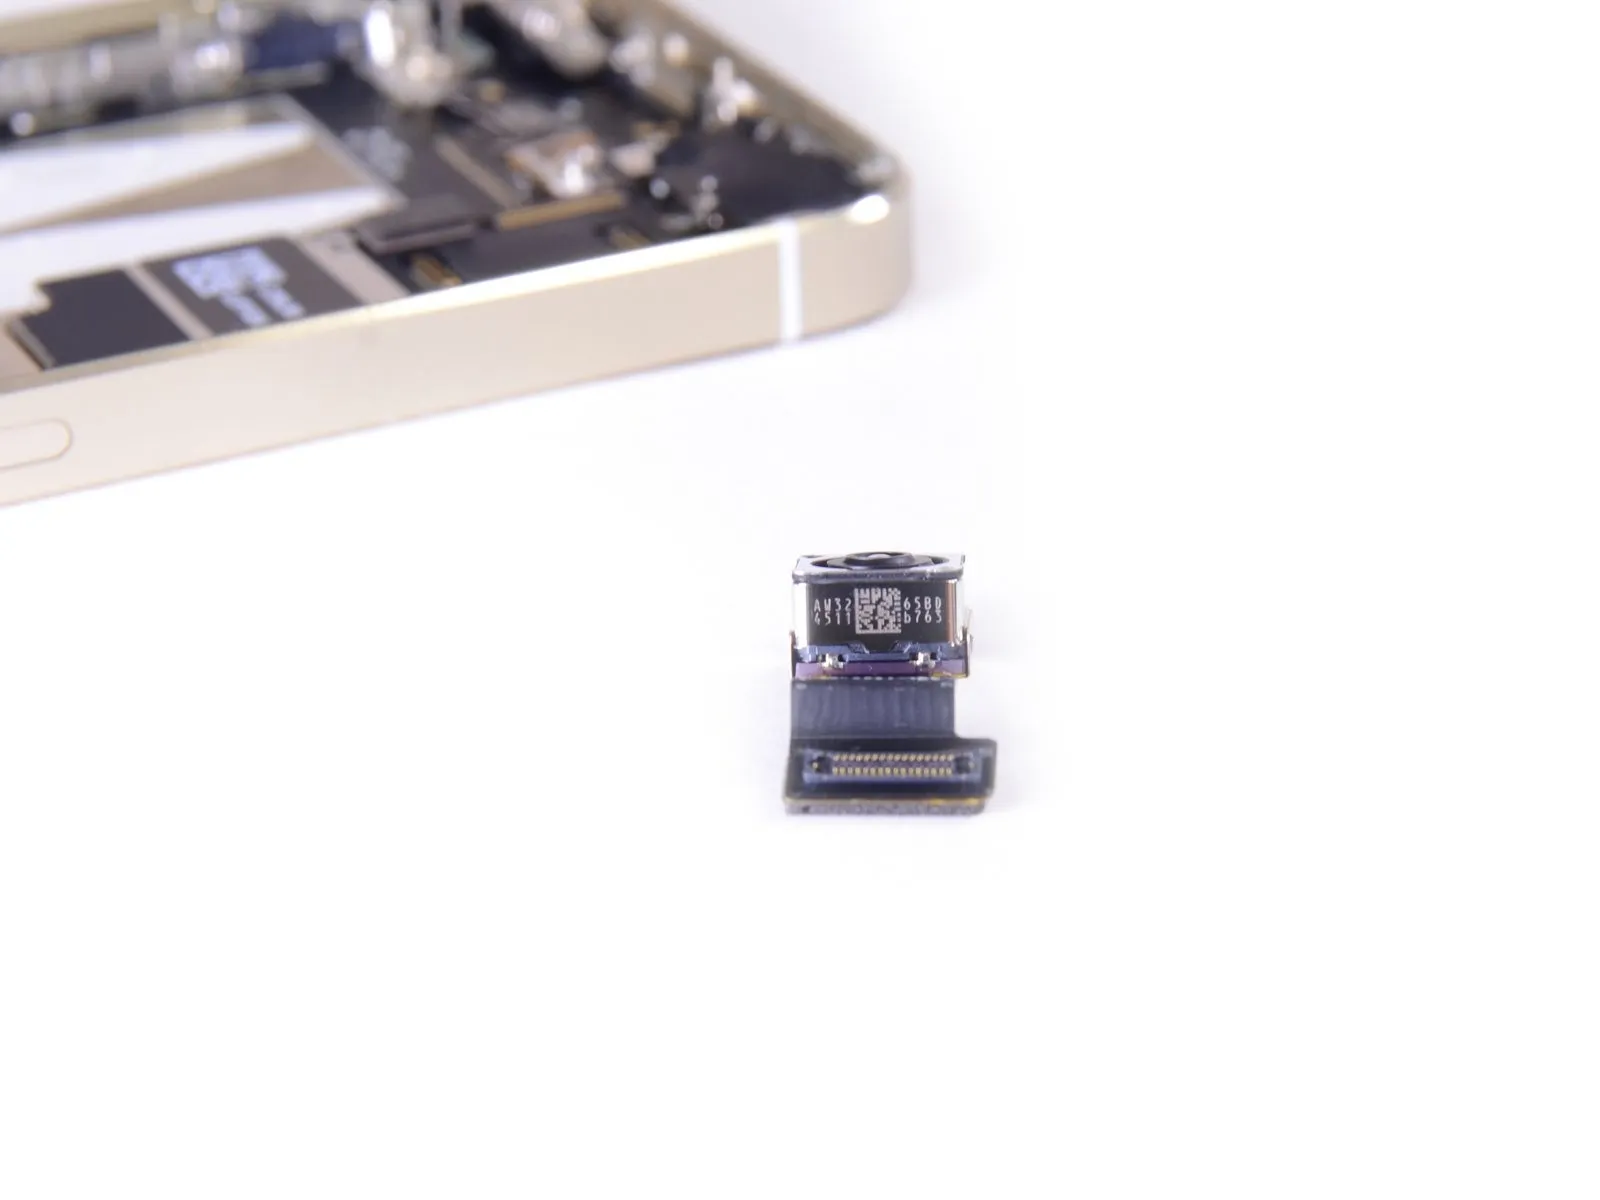
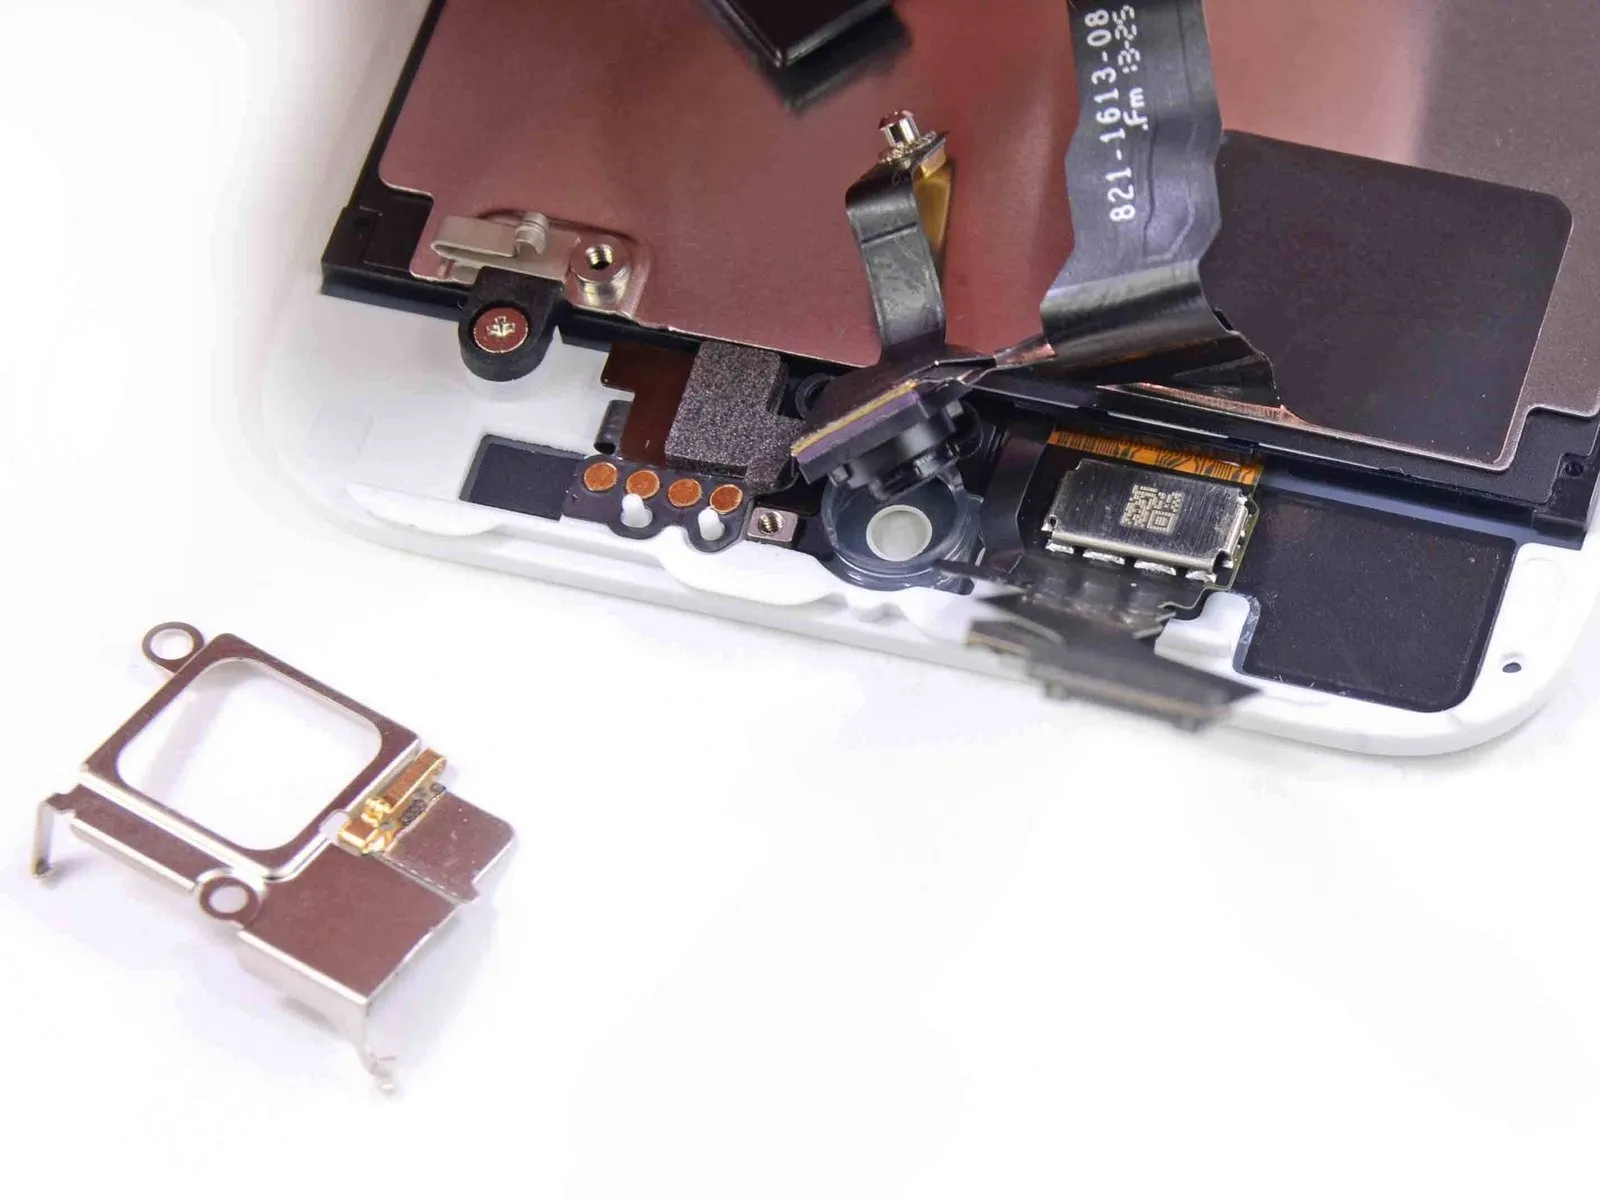
Carefully remove the protective covering to expose the iSight camera.
Located on the rear of the iSight camera assembly is a label indicating the part numbers DNL333, 41WGRF, and 4W61W.
Chipworks' Technology Analysis Group Vice President Jim Morrison confirmed that the DNL markings match those found on camera modules containing the Sony IMX145, previously observed in both the iPhone 4s and iPhone 5; while side markings differ, sources within the industry attribute this variation to Sony.
Given Apple's specification of a 1.5 μ pixel pitch for this camera, the sensor is unlikely to be the IMX145, indicating a more recent model was utilized.
Locate the alphanumeric identifier, AW32 65BD 4511 b763, which is printed on the camera's lower surface.
Step 11
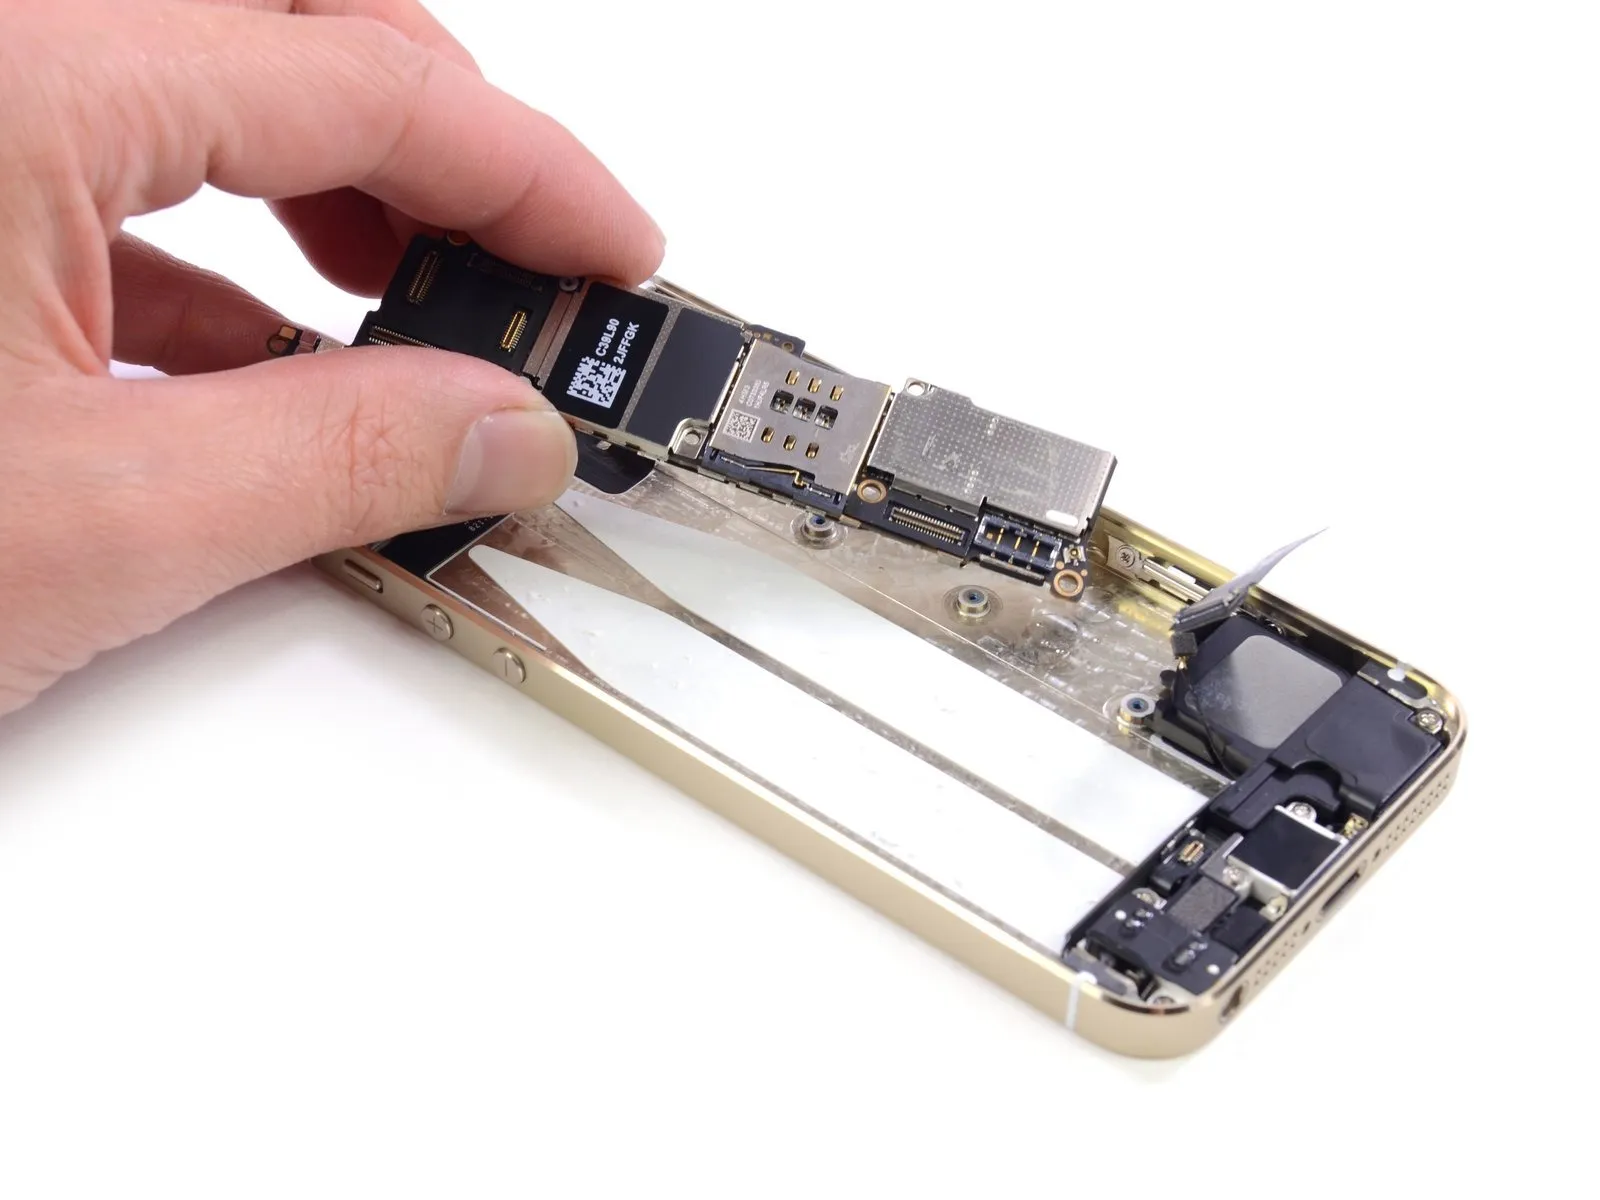
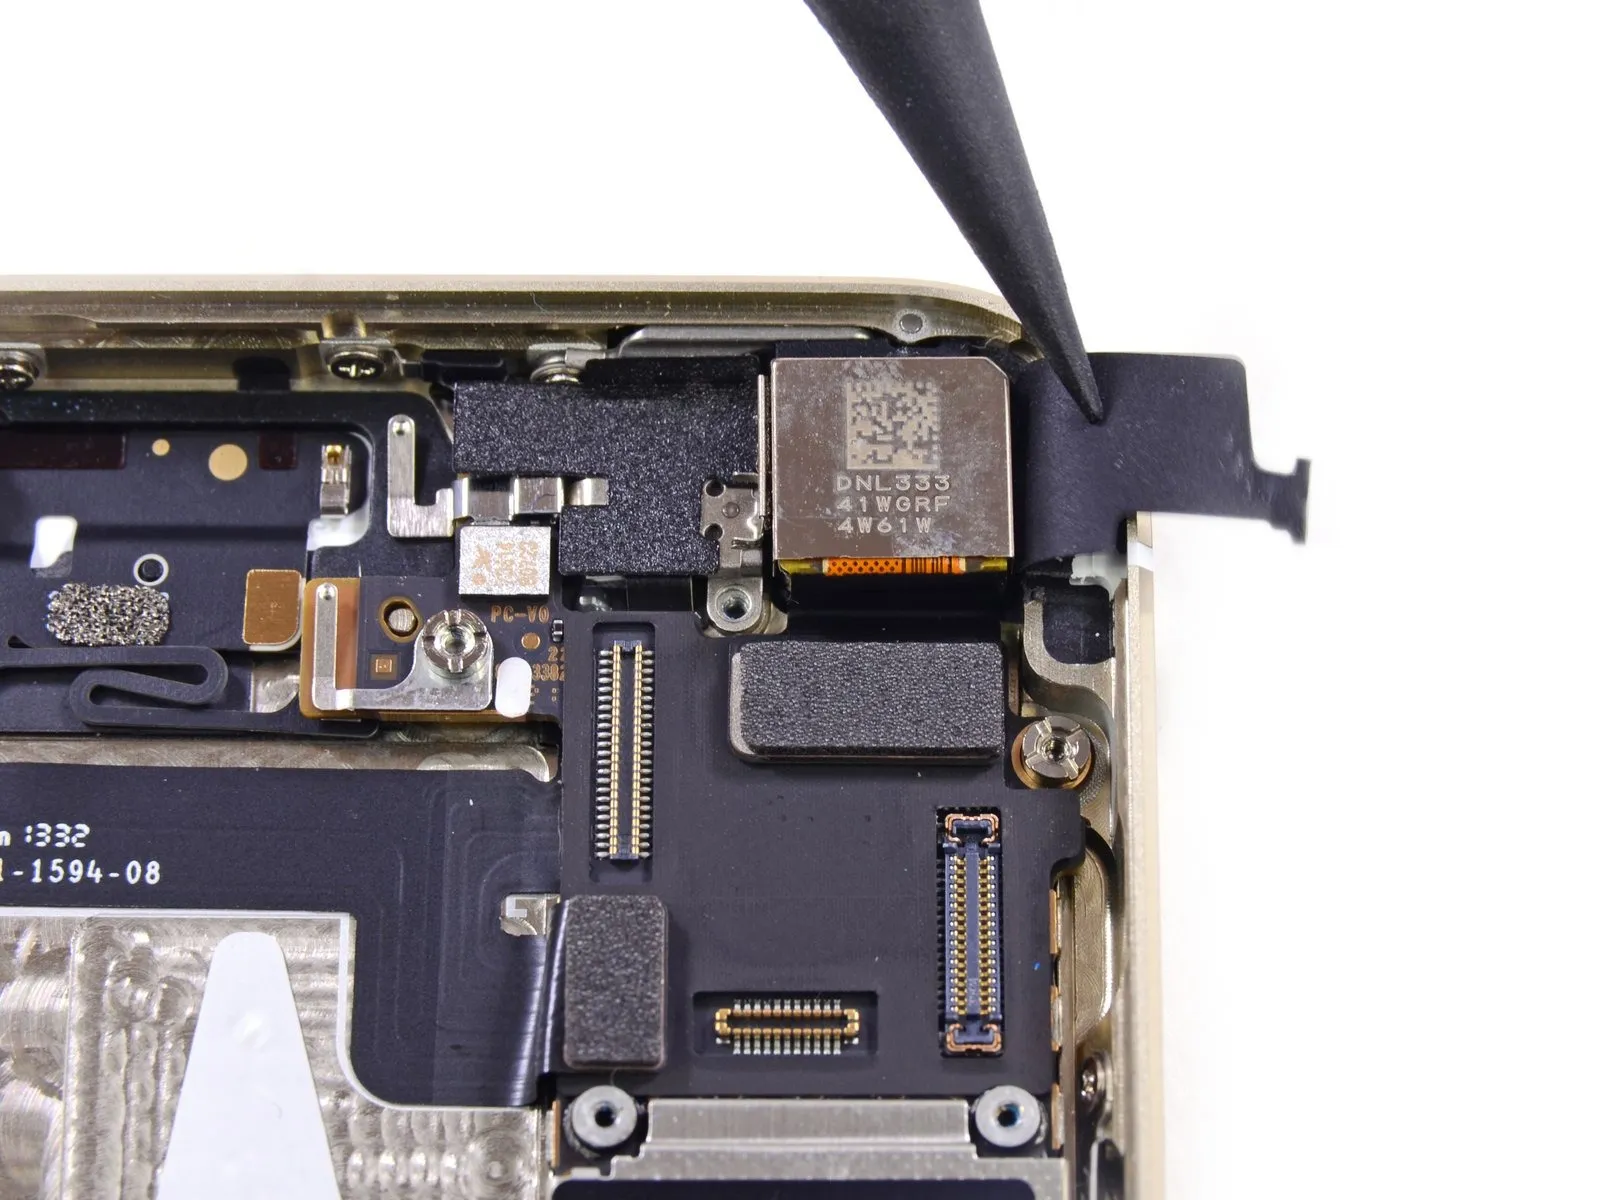
The internal layout of the iPhone 5s demonstrates Apple's approach to refining device design through incremental improvements and optimized component placement.
The antenna connection cables have been eliminated, reducing potential points of failure and accidental disconnections.
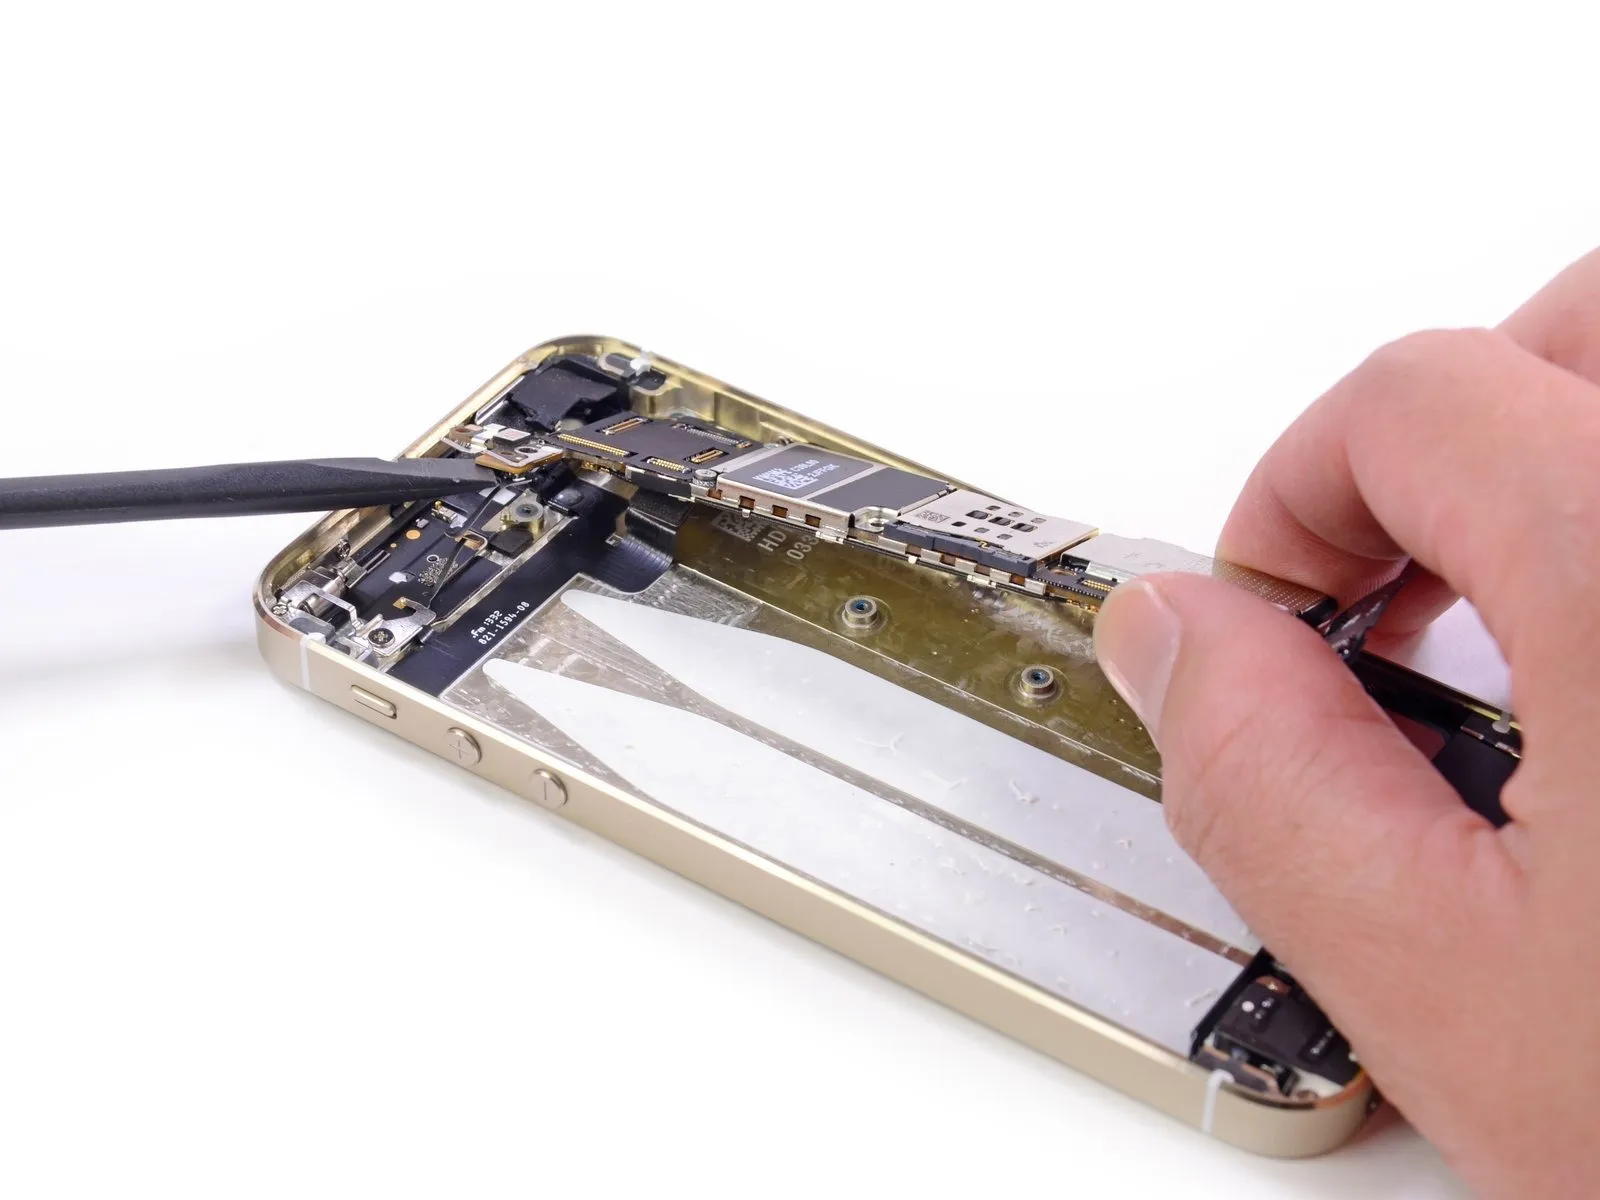
Accessing the antenna connector would be significantly easier if its placement were on the logic board's upper surface instead of the lower.
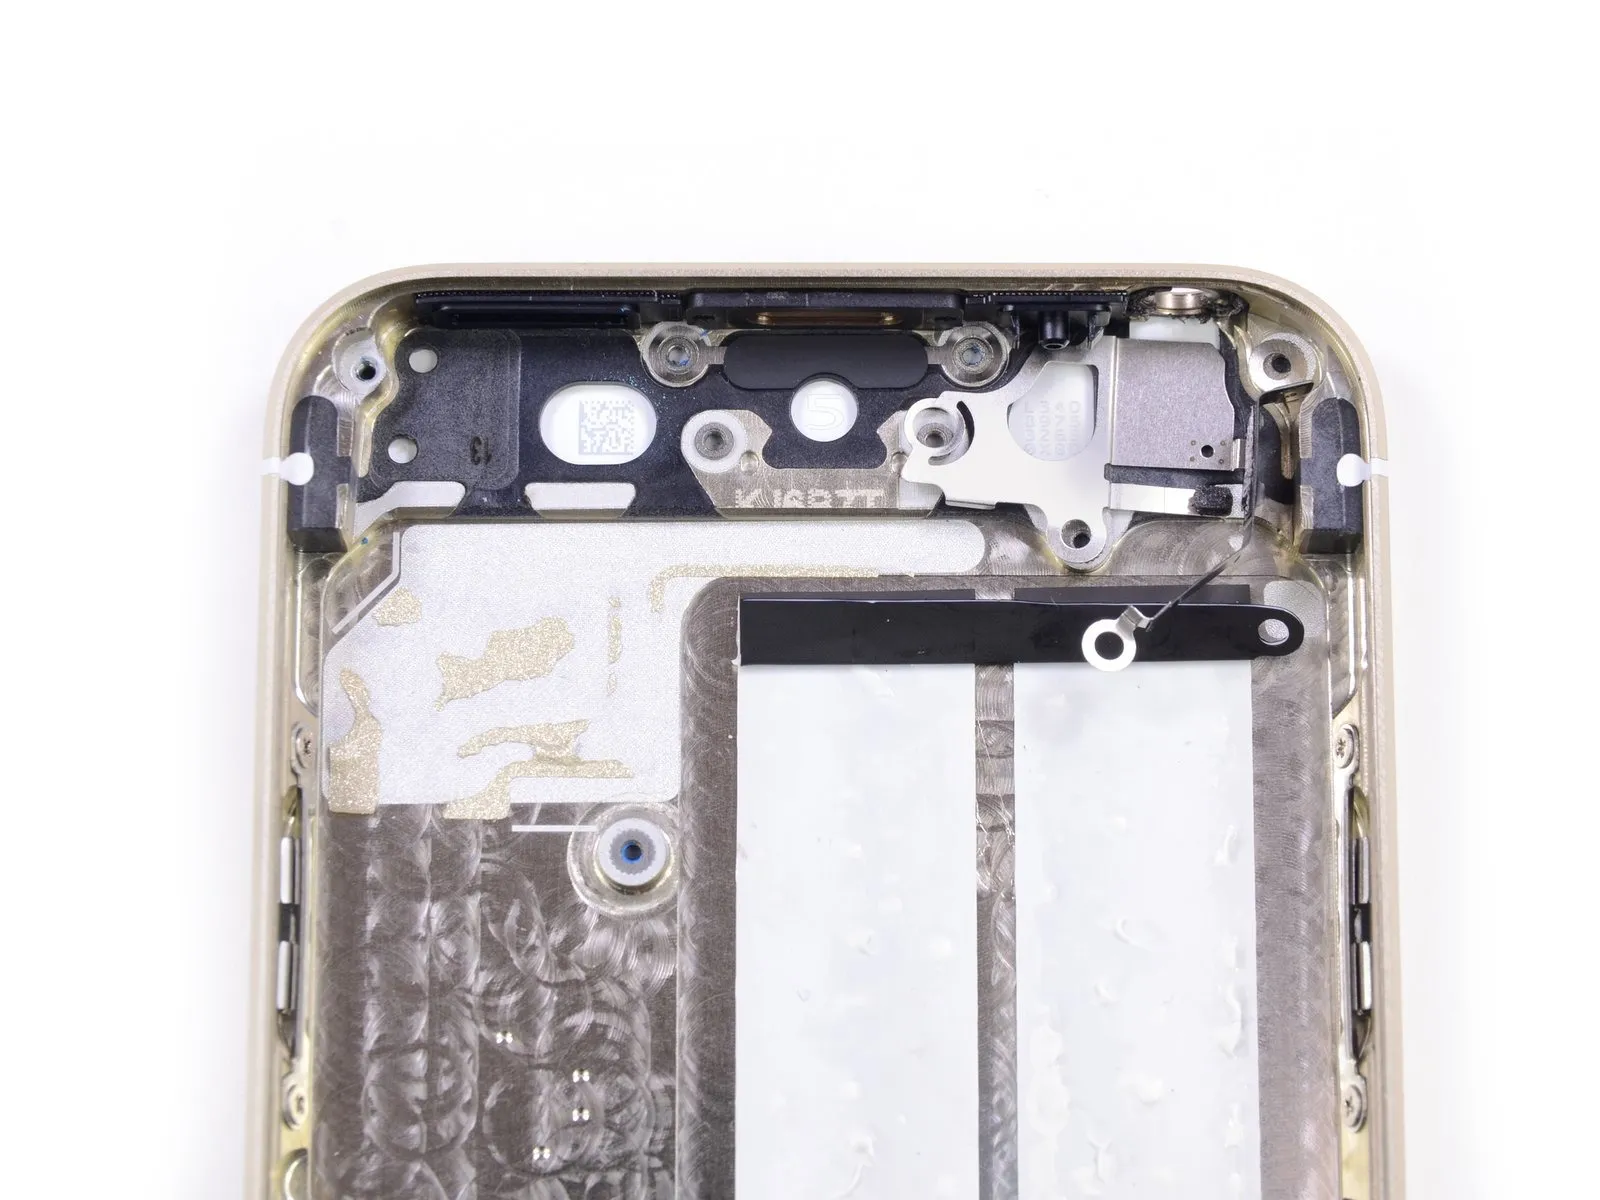
Step 12
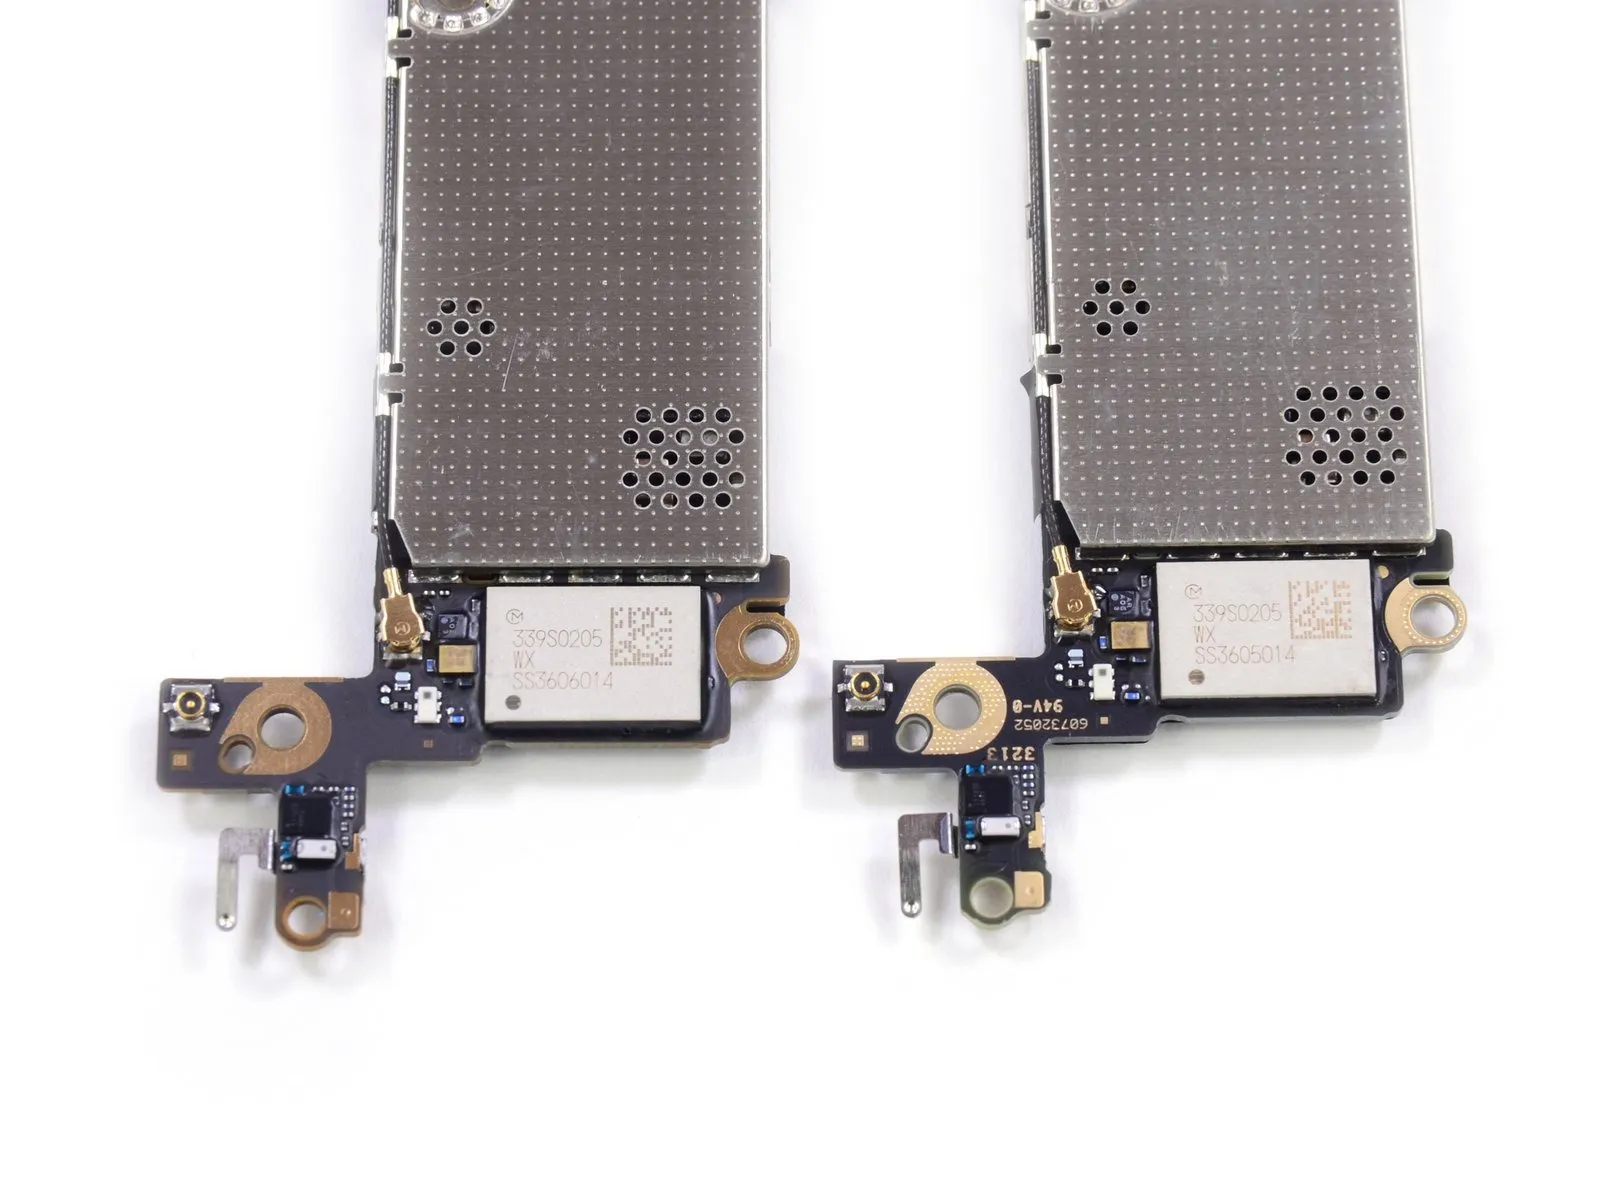
When contrasting the 16 GB and 64 GB versions, note that
Examination reveals the Murata integrated circuit is identical in both iPhone 5s models.
Although the logic board layouts are the same for both versions, variations in printed markings—such as the presence or absence of the "94V-0" designation on the rightmost component—suggest Apple utilizes different production facilities for the 5s logic boards.
Step 13
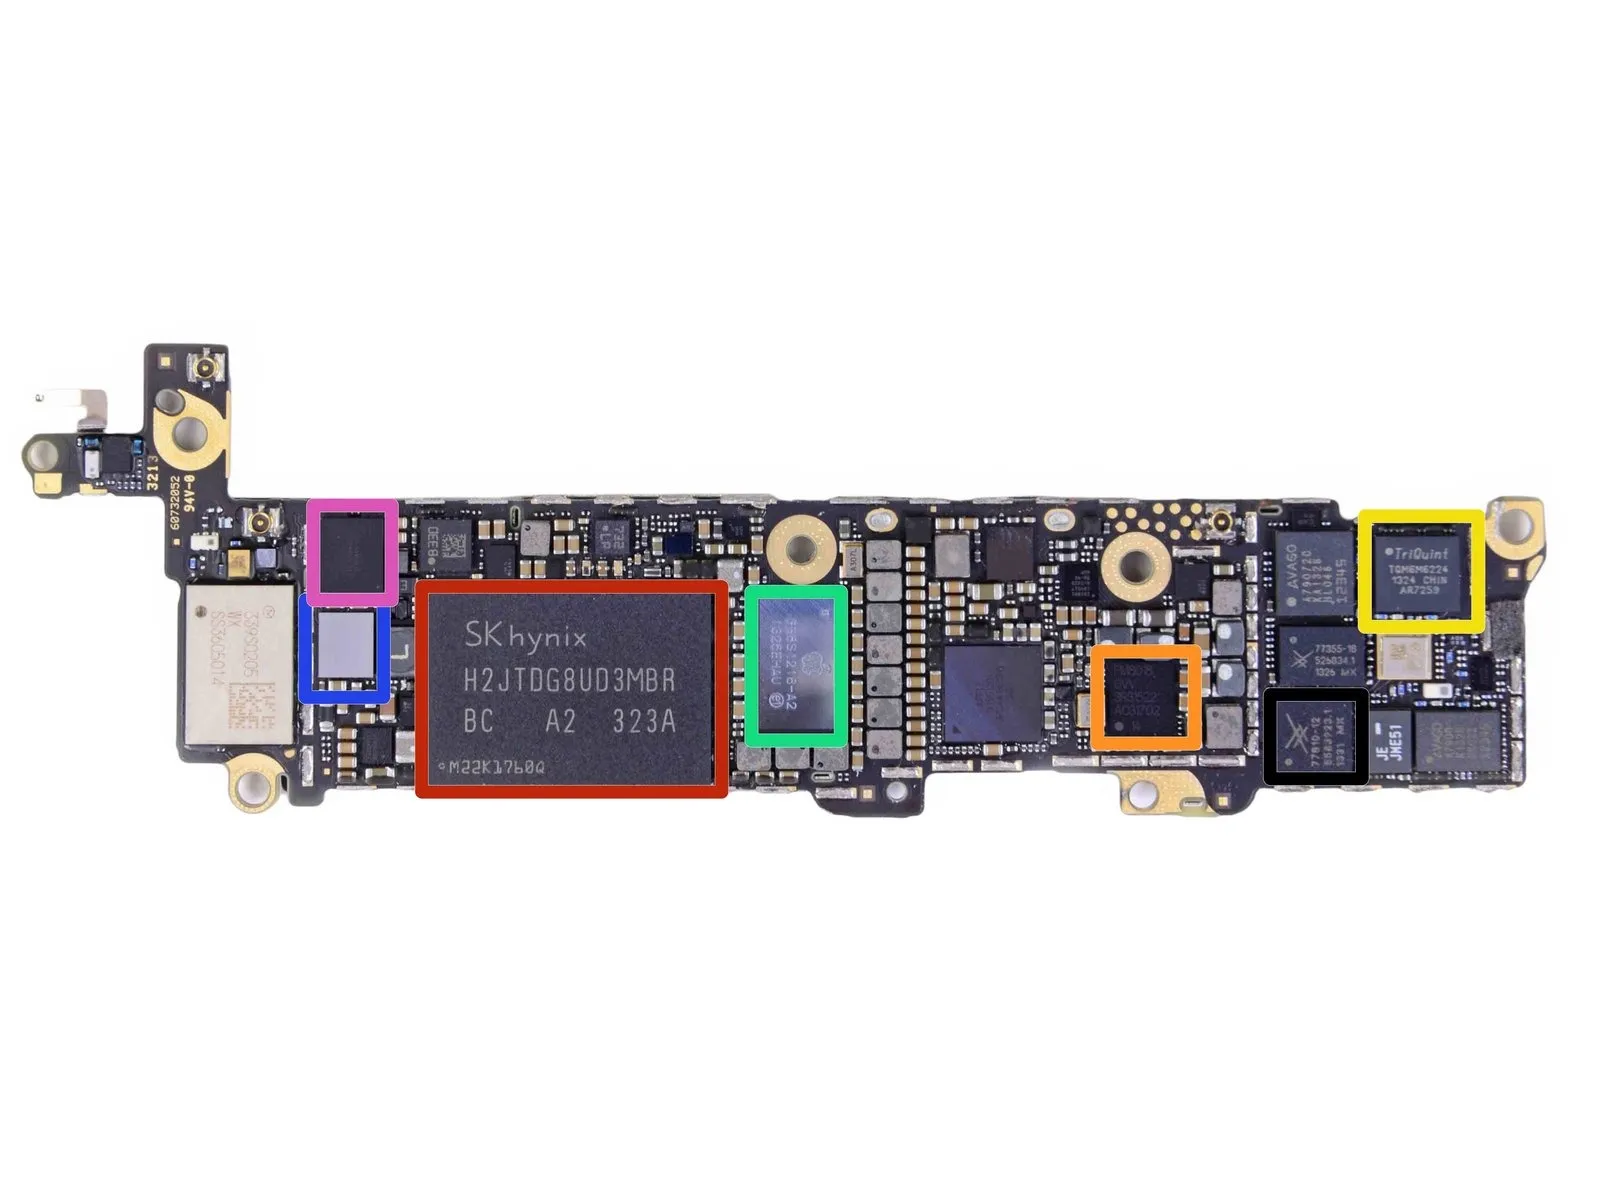
This SK Hynix NAND flash memory module has a capacity of 128 Gigabits, equivalent to 16 Gigabytes, and is identified as model number H2JTDG8UD3MBR.
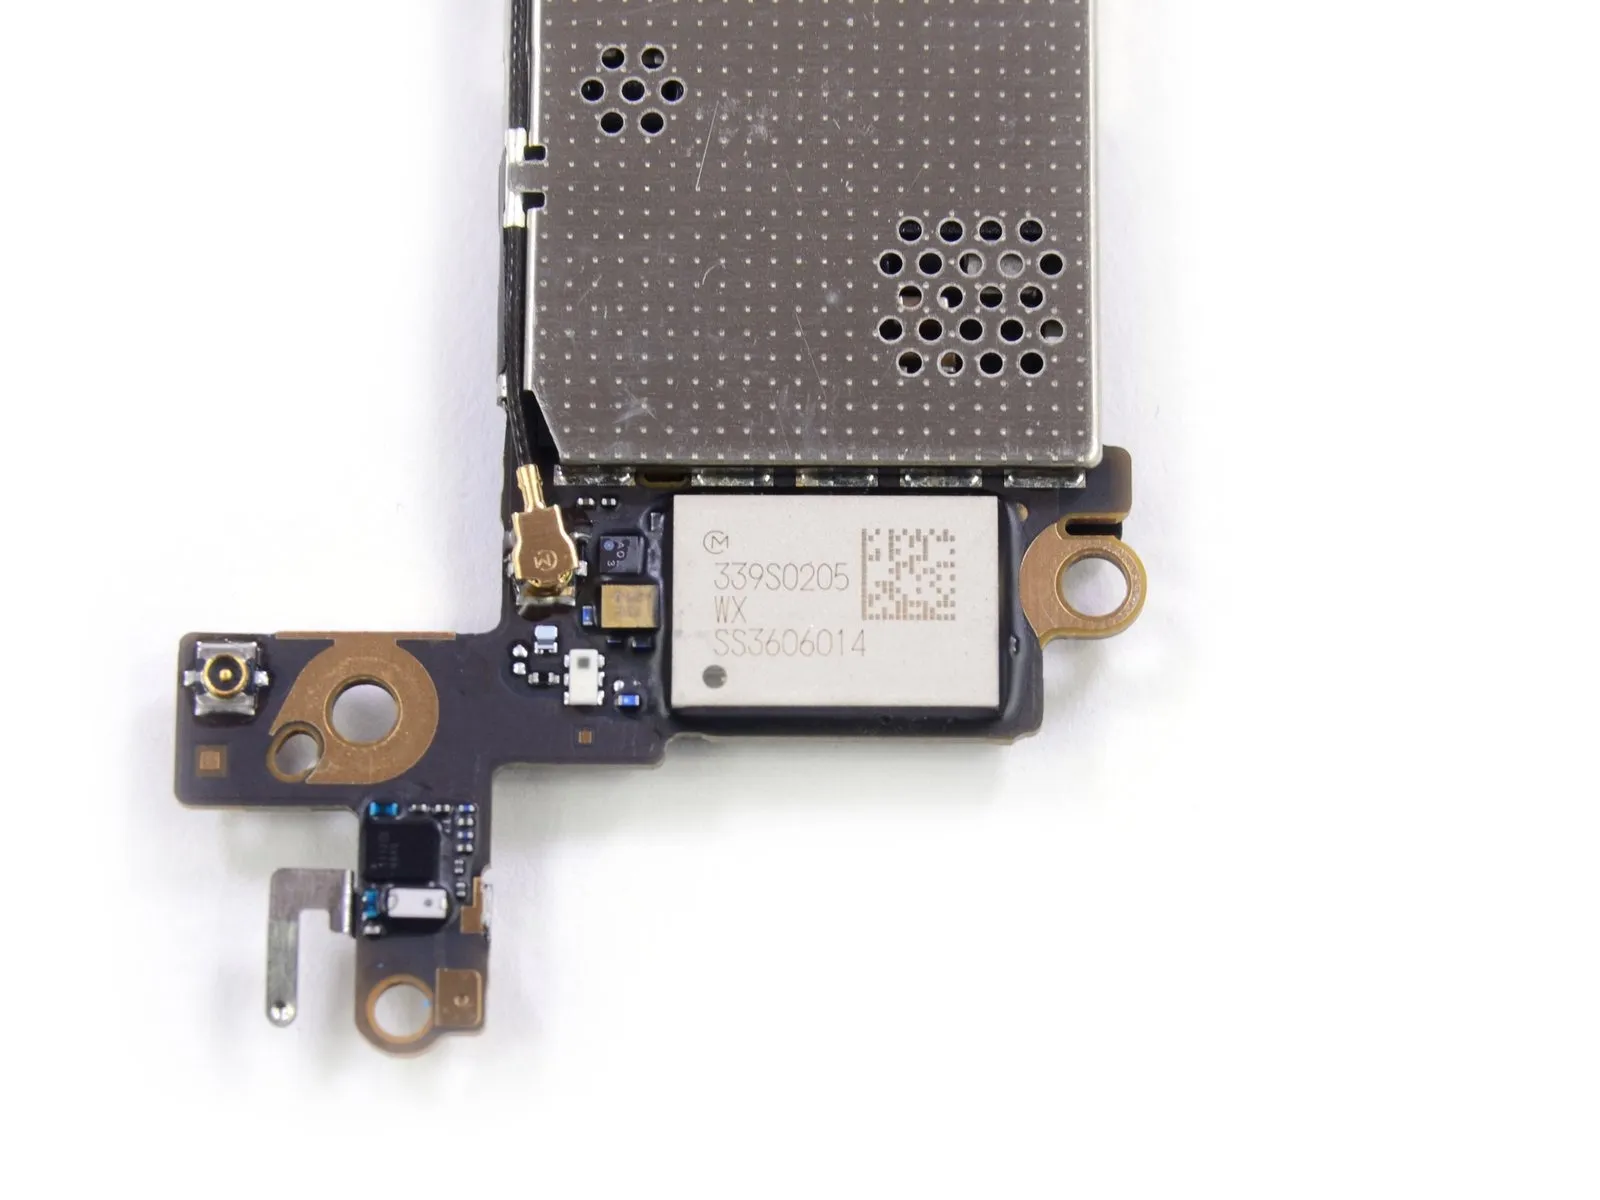
The RF power management integrated circuit is a Qualcomm PM8018.
TriQuint TQM6M6224
Apple part number 338S1216.
The device incorporates a Broadcom BCM5976 touchscreen controller.
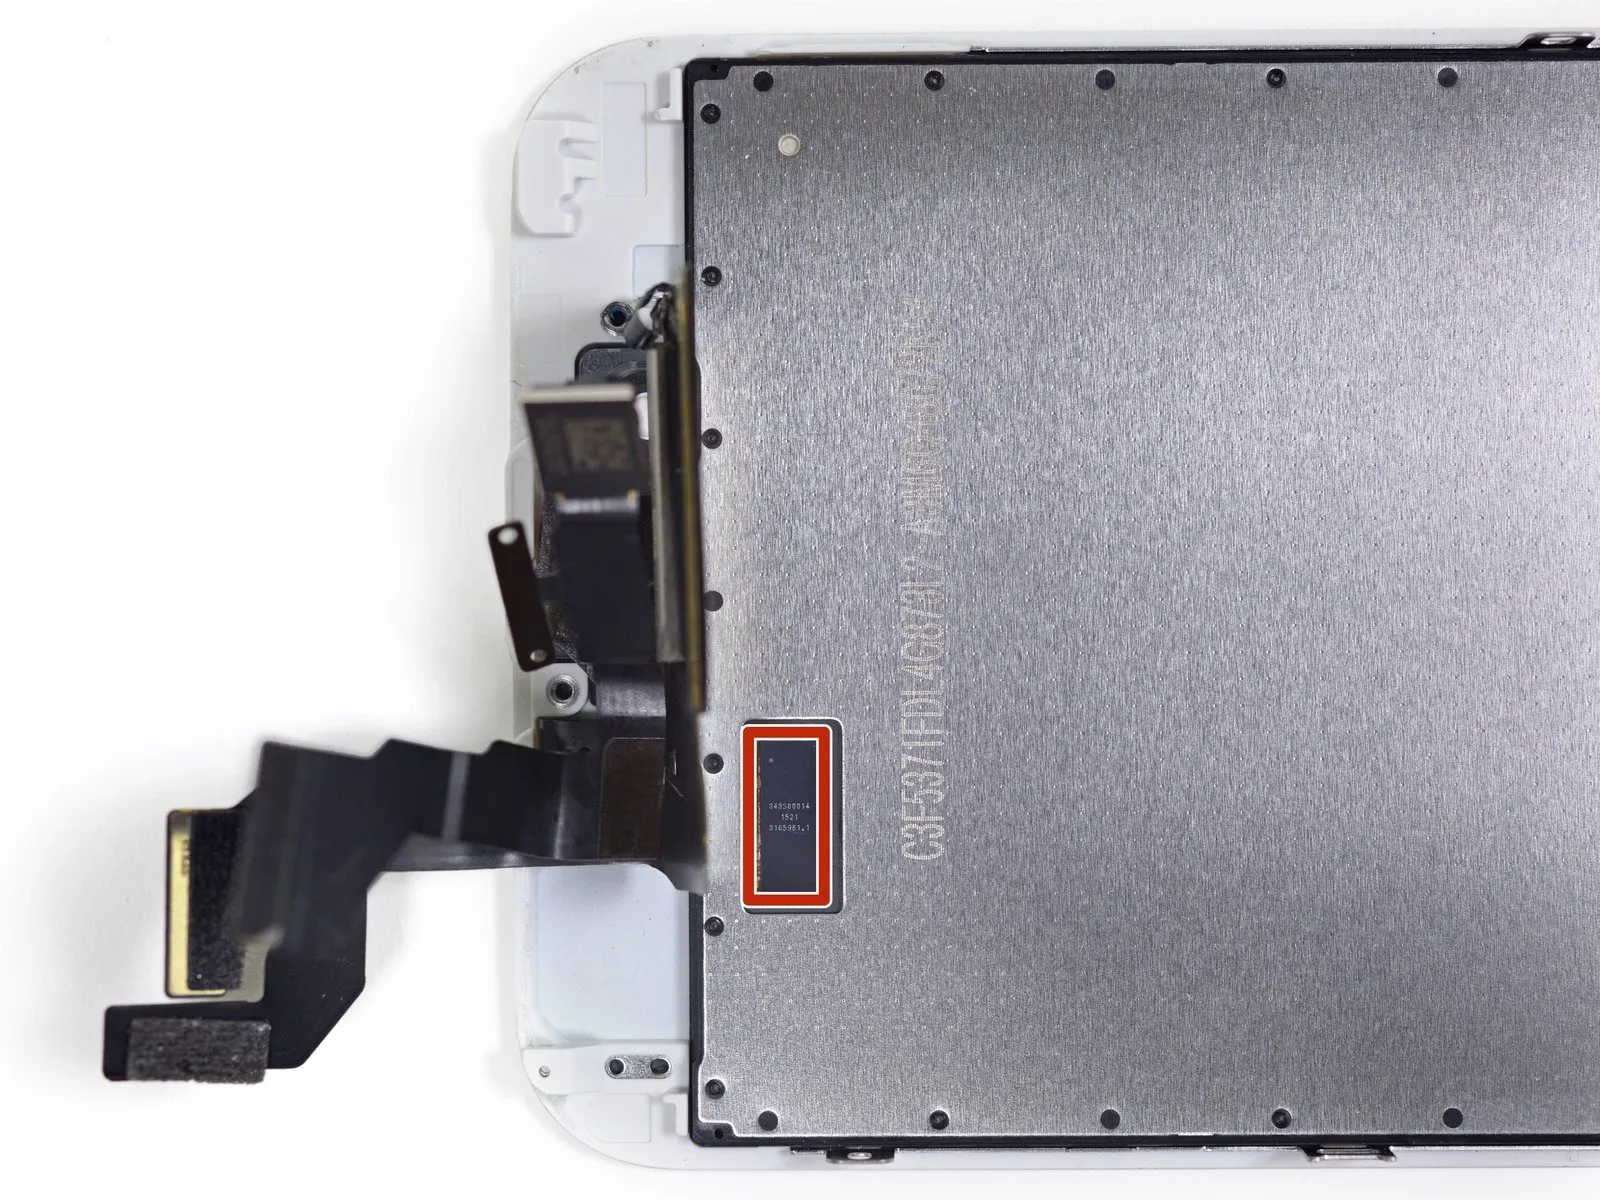
The device incorporates a Texas Instruments 343S0645 touchscreen interface.
Skyworks 77810
Step 14


Skyworks 77355
Avago A790720
Avago A7900
The Apple 338S120L
We extend our sincere gratitude to the Chipworks team for their invaluable assistance in analyzing and understanding the internal components of these devices.
Step 15

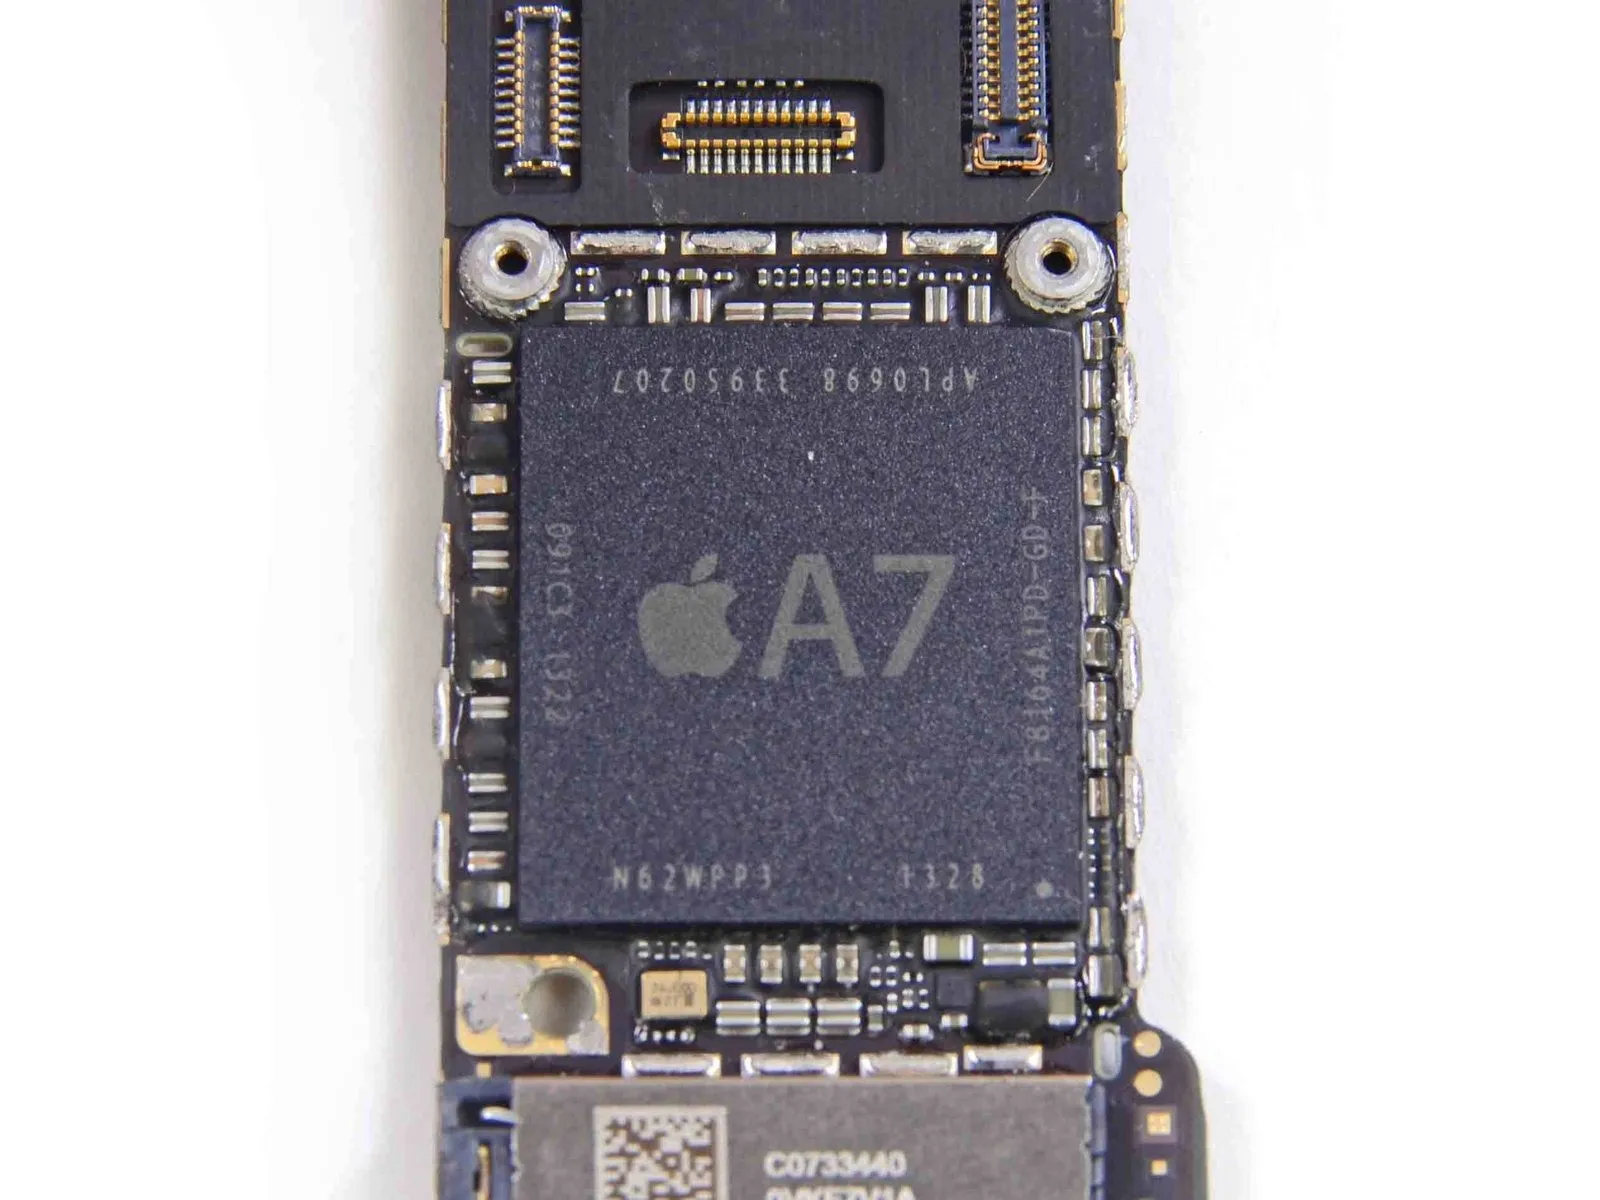
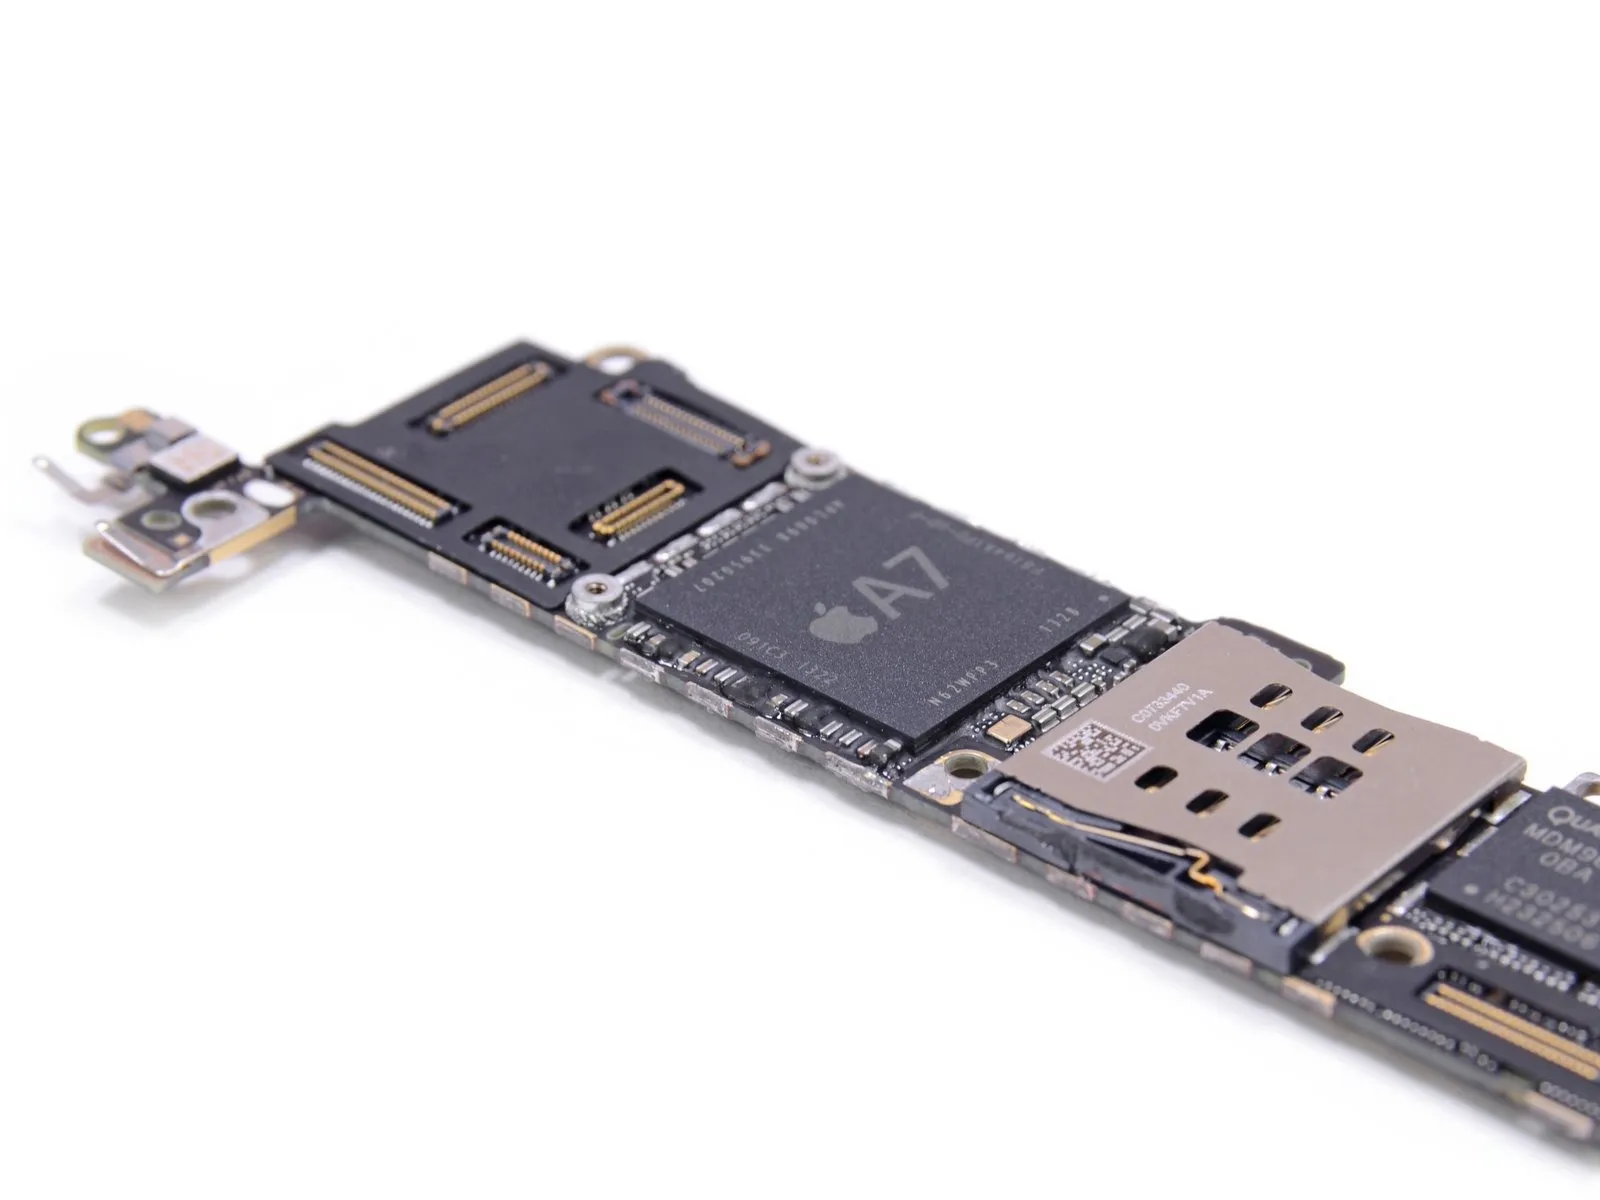
The Apple A7 APL0698 system-on-a-chip, as detailed in a MacRumors article, features RAM identified by the marking F8164A1PD, suggesting a capacity of 1GB.
LTE modem, Qualcomm MDM9615M.
This transceiver, a Qualcomm WTR1605L, supports LTE, HSPA+, CDMA2K, TDSCDMA, EDGE, and GPS functionalities.
Investigation into the location of the M7 coprocessor reveals uncertainty regarding its physical existence as a distinct integrated circuit; it may instead represent expanded capabilities integrated within the A7 chip.
Regardless of its symbolic meaning, the internal construction of the M7 relies on precise assembly techniques and adhesives, demanding careful handling to avoid damage.
The missing M7 component has been located.
The A7 component was manufactured in July.
Step 16
According to manufacturer specifications, the A7 processor delivers a performance level that is double that of the A6 found in the 5 and 5c models.
According to AnandTech's analysis, the A7's introduction of a 64-bit processor within a smartphone primarily delivers performance improvements not due to the 64-bit architecture itself, but because it replaces the older ARMv7 instruction set with the newer ARMv8.
To maximize efficiency and performance while conserving battery power, the ARMv8 instruction set operates on a 64-bit architecture and eliminates backward compatibility with older instruction sets previously supported for the past two decades.
Once the chip is accessed, its manufacturer can be identified.
Step 17
The 1.2MP FaceTime camera is secured by several screws.
The enhanced resolution of the iSight camera's image sensor is a notable feature, but the ability to capture photographs is the core functionality driving the appeal of customized iPhones.
Step 18
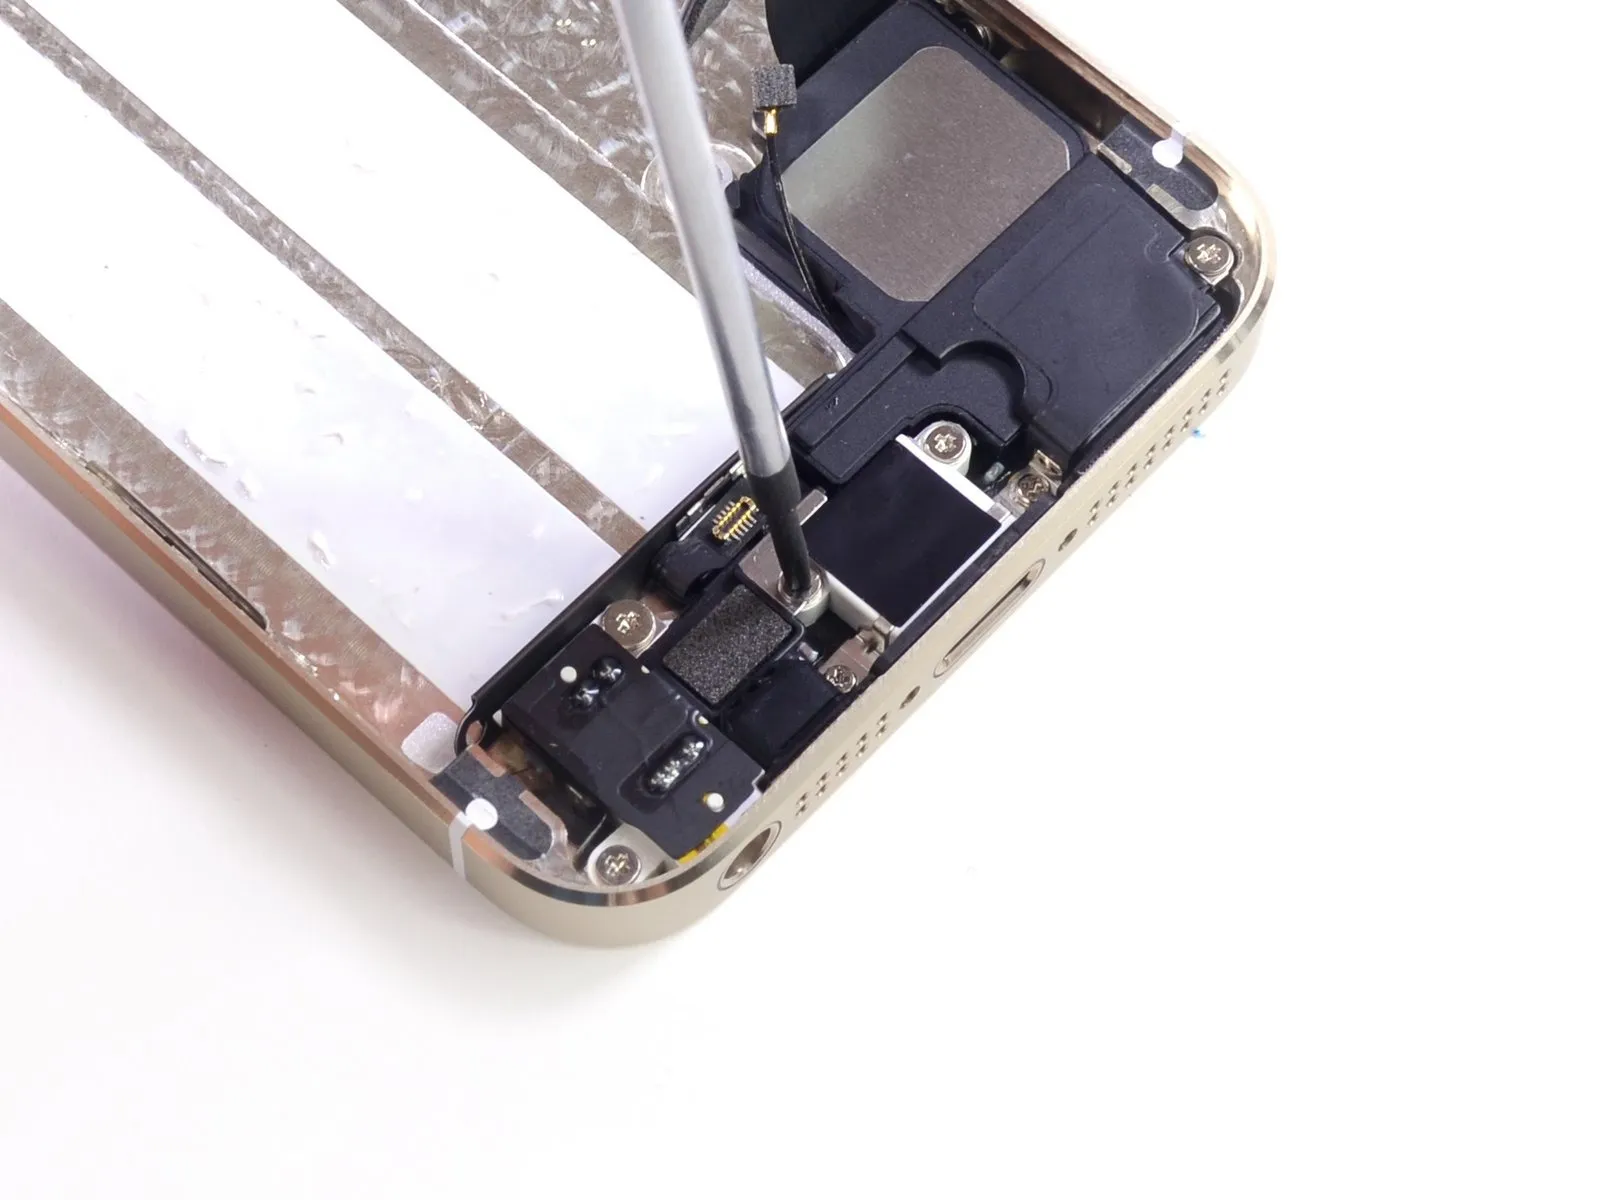
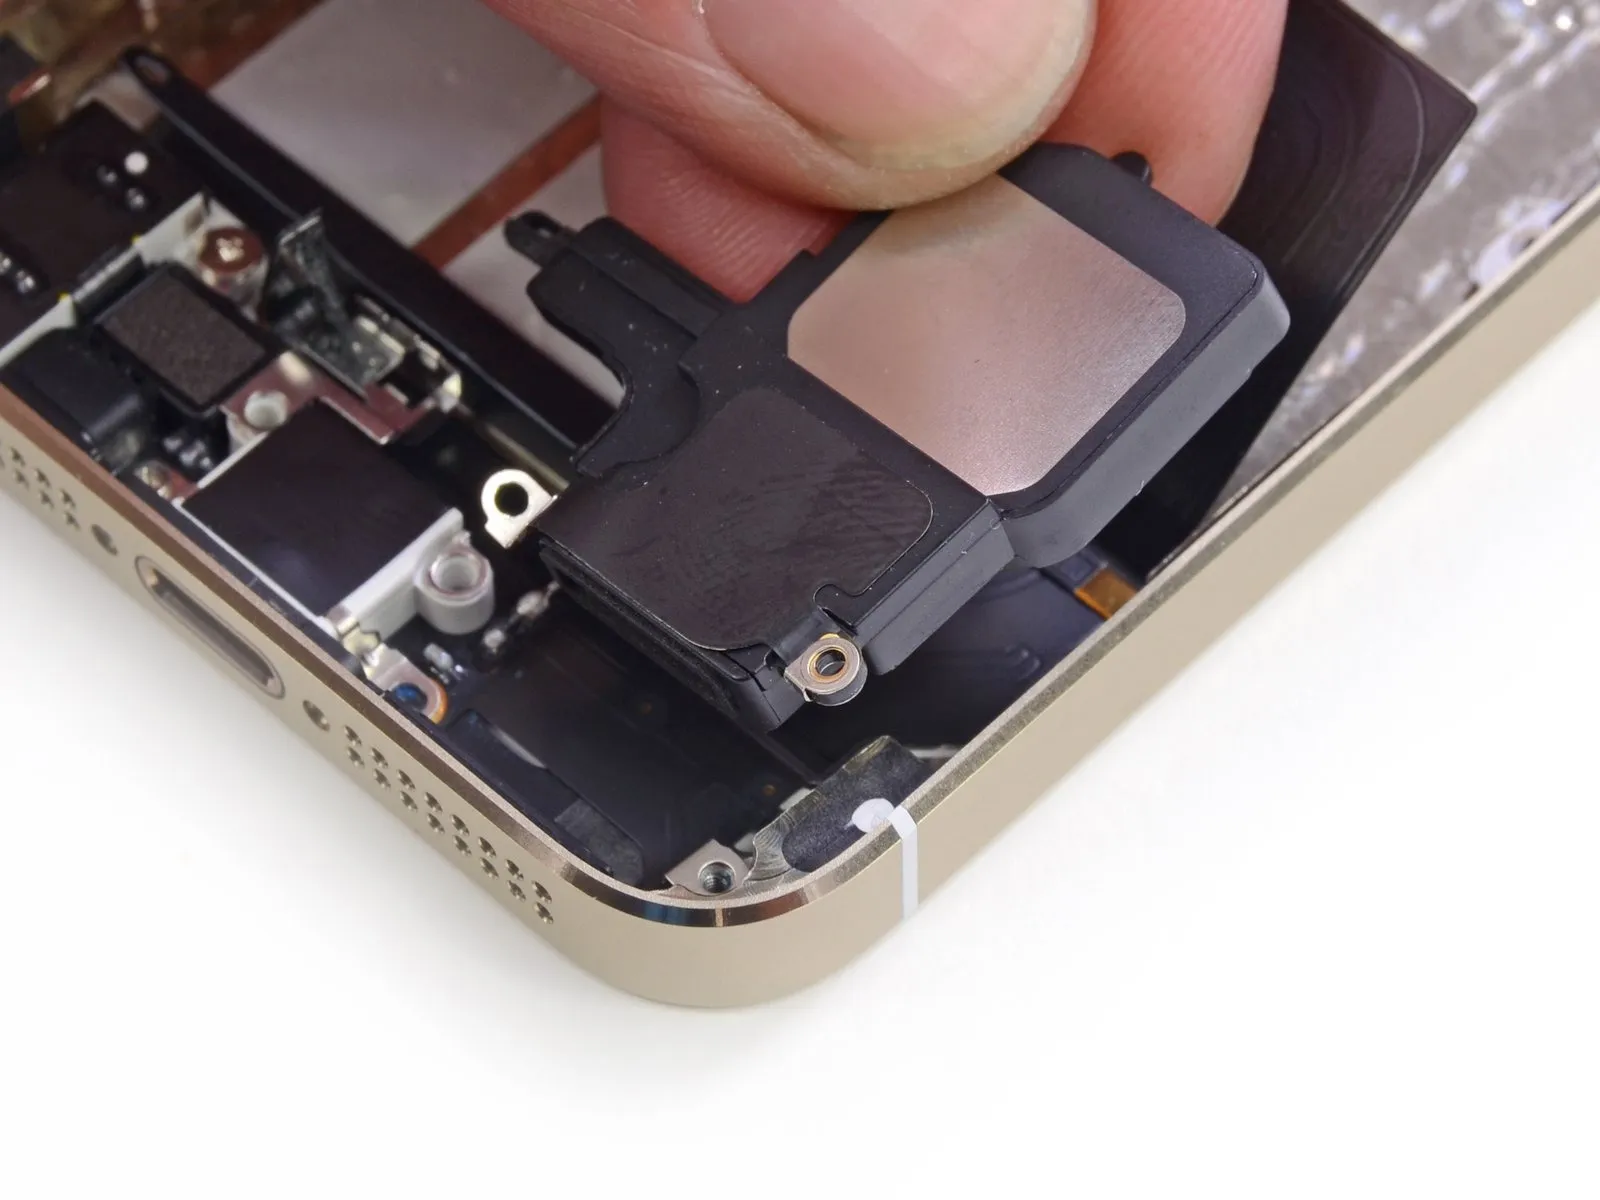
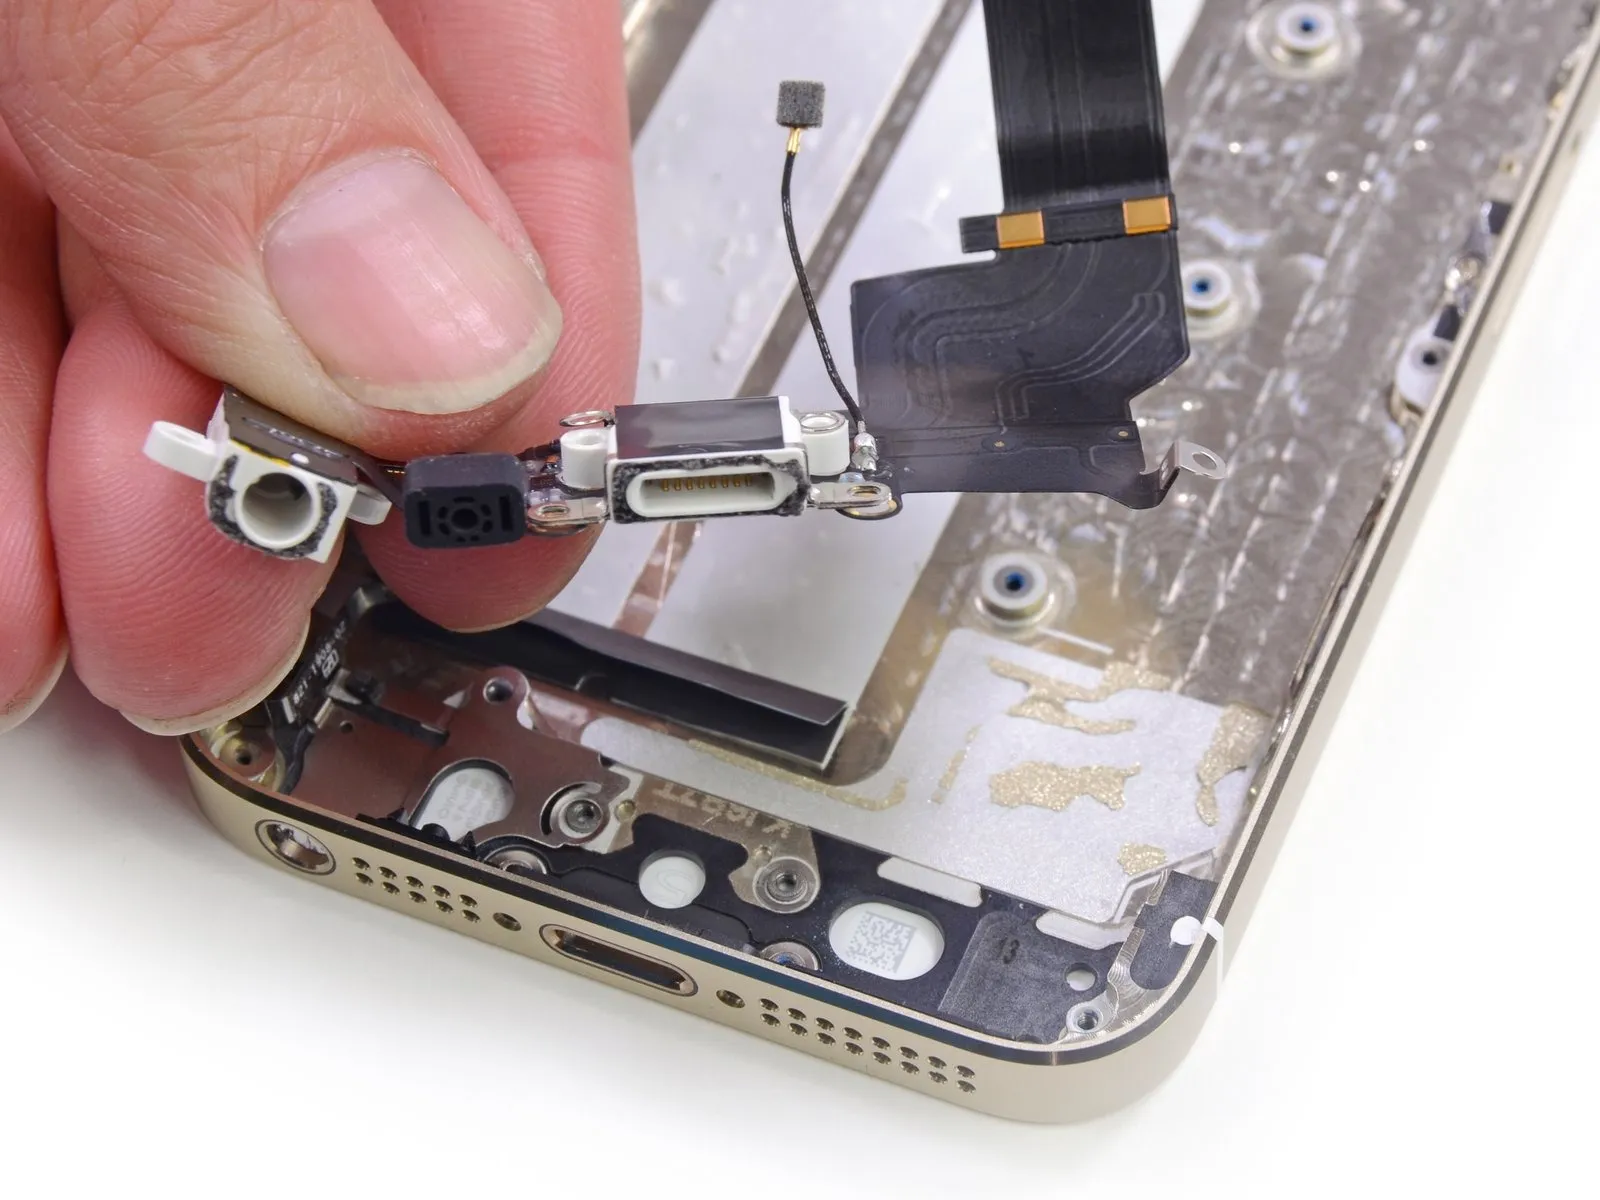
After removing the speaker assembly, the headphone jack, microphone, and Lightning connector unit can be detached with ease.
Due to the non-modular construction, component replacement necessitates addressing several parts simultaneously, mirroring the process used for earlier models.
Step 19
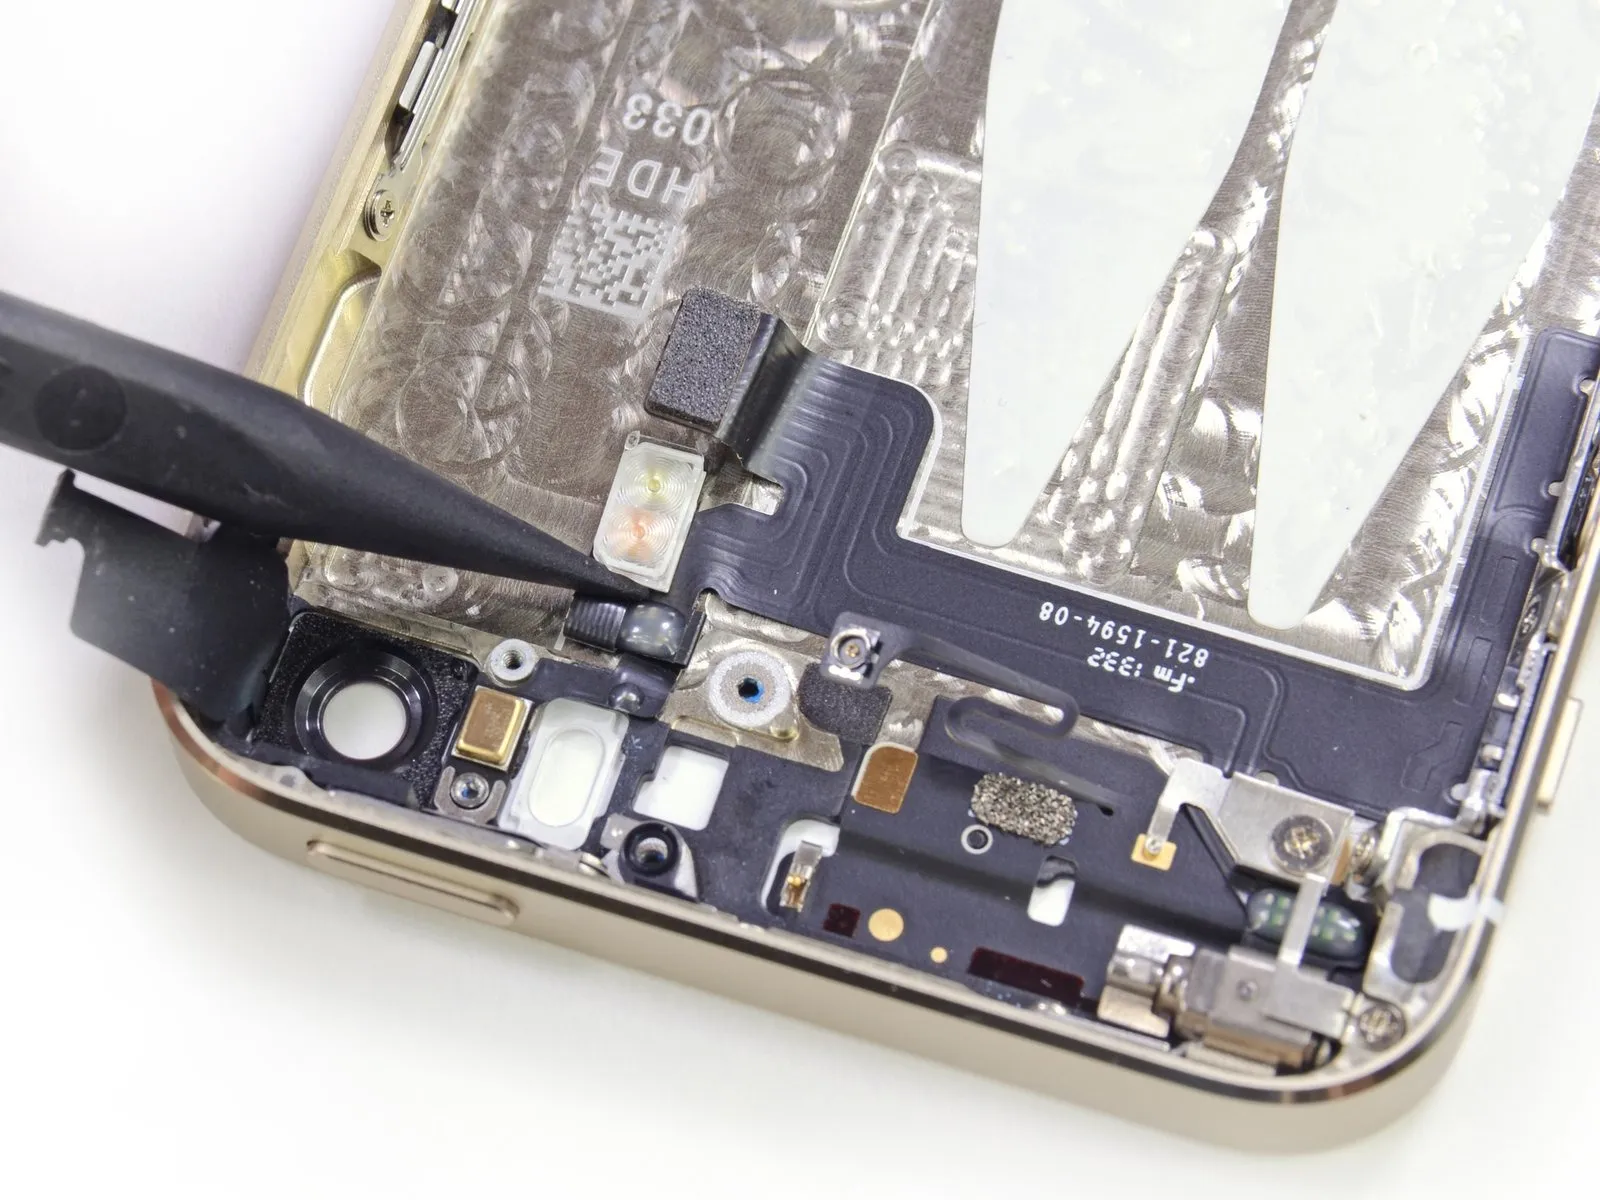
To correct unnatural skin tones caused by flash when photographing at night, the camera utilizes white and amber light-emitting diodes positioned adjacent to the lens.
Step 20

Similar to the iPhone 5 repair process, removing the display assembly initially separates from the device, which makes replacing the screen easier.
Despite not being officially designed for end-user replacement, accessing the battery remains relatively straightforward.
Exercise caution when disassembling the device, as improper handling may damage the fingerprint sensor cable, potentially detaching it from its connector.
Due to the presence of Pentalobe screws securing the exterior casing, accessing the internal components of an iPhone 5s presents a challenge.
Because the front glass, digitizer, and LCD are integrated into a single assembly, replacing any one of these parts necessitates replacing the entire unit, which impacts repair expenses.