iPhone 16 Pro Screen Refurbishment
Addressing a damaged iPhone 16 Pro display presents a financially sensible alternative to replacement, particularly when cracks or other visual impairments are present.Although screen replacement on the iPhone 16 Pro can be complex for some repair specialists, a successful, high-quality outcome is attainable through appropriate tools and methods, avoiding wire severance.This detailed instruction manual will comprehensively guide you through the complete refurbishment procedure for your iPhone 16 Pro screen.
- The process of restoring the iPhone 16 Pro screen involves a sequence of distinct actions, which will be explained in detail.Successful completion of this repair requires careful adherence to each step, ensuring a durable and aesthetically pleasing result.Properly restoring the iPhone 16 Pro screen provides a practical method for addressing display issues and maintaining device functionality.
Step 1 | Precautions
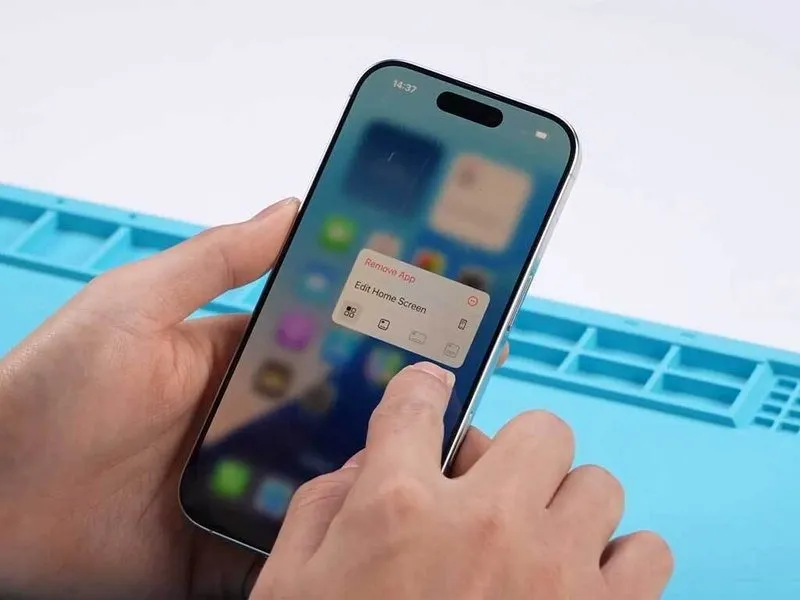


- Disconnect the charging cable from the device and confirm adequate battery power levels.
- Assess the operational status of the iPhone 16 Pro’s touchscreen and visual display components.
- Should all assessments indicate proper functionality, continue with the screen disassembly process.
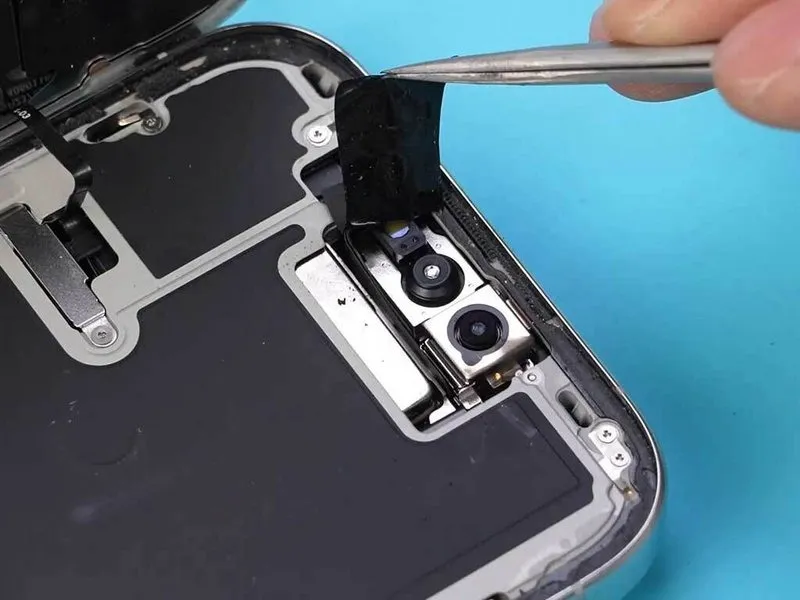
Step 2 | Add Camera Sticker

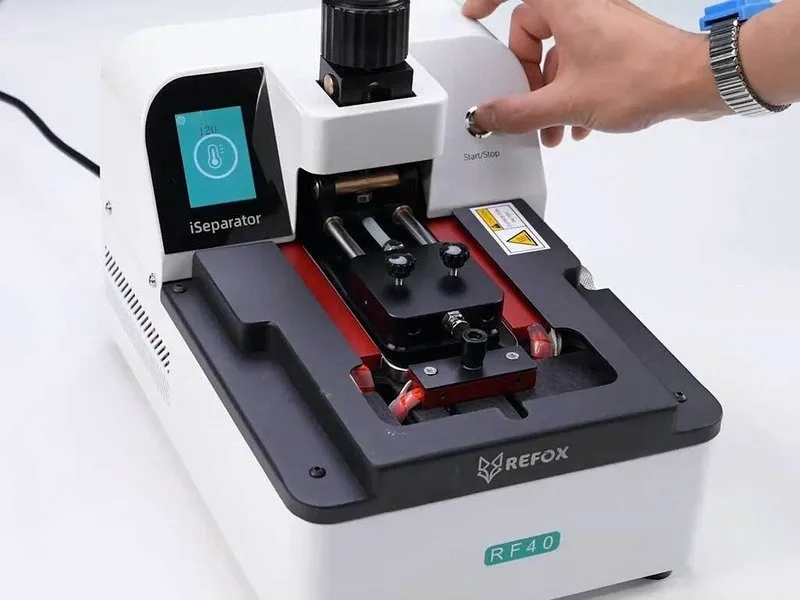
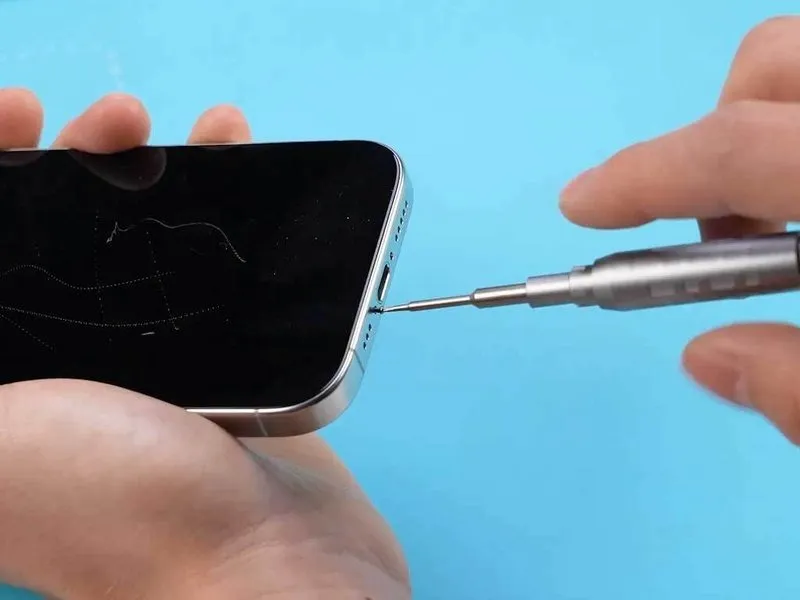
- Prior to commencing any disassembly procedures, ensure the device's power is completely deactivated.
- Employ a specialized tool, specifically a Pentalobe Screwdriver, for the removal of the lower fastening screws.The REFOX RF40 iSeparator is utilized to expedite the screen detachment process.To safeguard the front-facing camera module, apply a protective adhesive covering before proceeding with laser separation.
- Camera protection is achieved by adhering a sticker, preventing potential damage during the subsequent steps.
- The application of this protective sticker is a preparatory measure, facilitating a more controlled disassembly.
- Completion of this camera protection step is a prerequisite for successful execution of the disassembly process.The next phase of the repair, designated as step 4, is dependent on the successful completion of the camera protection.Proper disassembly is contingent upon the prior application of the camera protective sticker.
Step 3 | Screen Treatment


- Employ a focused ultraviolet laser system, like a DALI K300 model, to perform the necessary surface modification on the display panel.
- Choose the correct visual guide or template within the ultraviolet laser equipment’s controls to guarantee uniform exposure across the complete screen area.
- Verify proper operational status of the display following the laser treatment process through a thorough inspection.
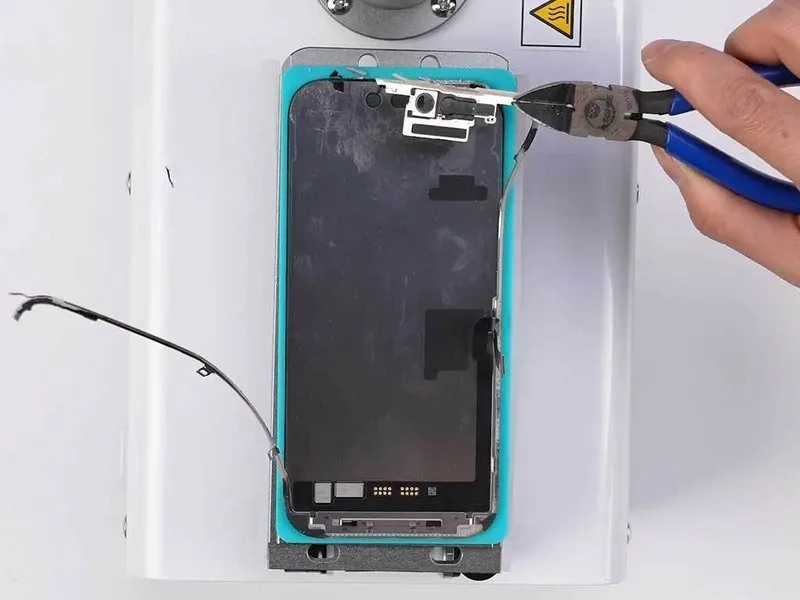
Step 4 | Disassemble the Phone
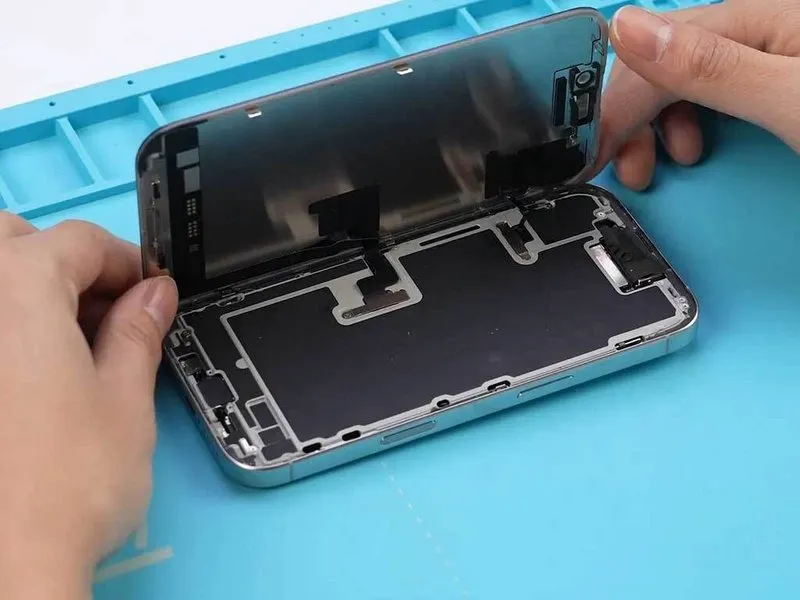

- To access the rear side, separate the display panel from the iPhone 16 Pro's chassis.
- Carefully remove the protective enclosure shielding the camera module.
- Extract the front sensor component from its location.
- Because the frame bezel of iPhone 15 and 16 models is permanently affixed using an injection molding process, conventional disassembly techniques pose a significant risk of causing flex fractures.Employing laser ablation provides a more secure and simplified approach to frame separation.This laser-based technique minimizes the likelihood of structural damage during the disassembly of the frame.
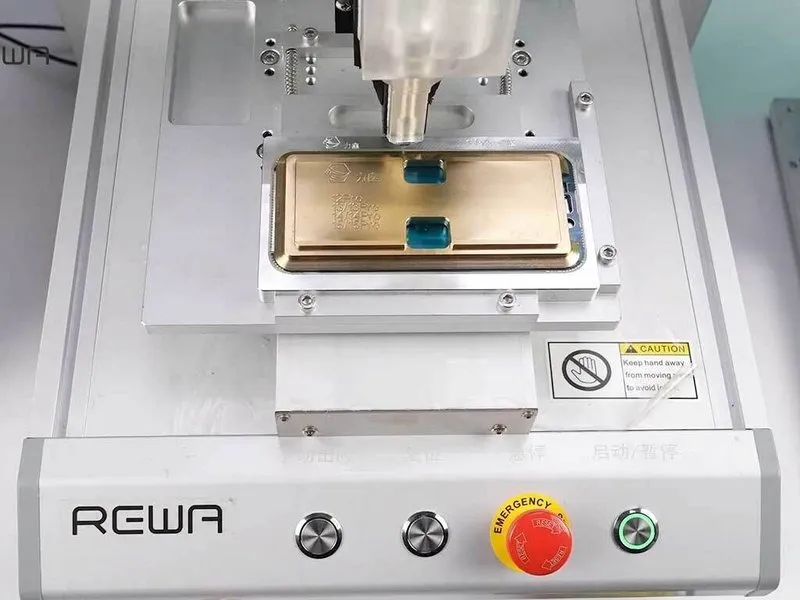
Step 5 | Remove the Frame

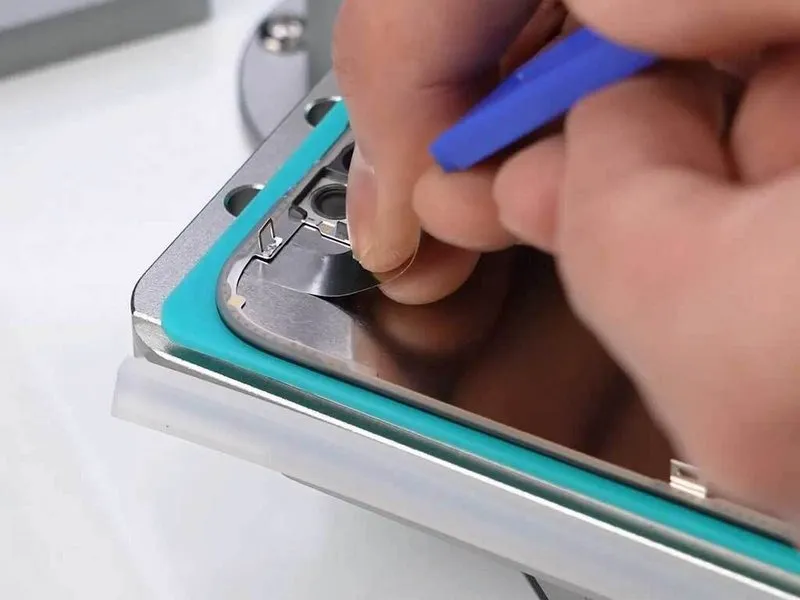
- Properly position the display within the glass separation apparatus and apply downward pressure to activate the vacuum.
- Verify that the designated lower and upper temperature settings are accurate.
- Employing a flexible blade, carefully maneuver around the perimeter of the display's surrounding frame.A pliable blade is necessary for this step.The surrounding frame was detached to mitigate the formation of air pockets beneath the display.
- Removal of the frame prevents the appearance of bubbles on the display surface.Following frame detachment, meticulously eliminate all traces of adhesive.Complete removal of adhesive is essential for proper reassembly.
- Thoroughly cleanse the area where the frame was attached.Residual adhesive must be completely removed.Ensure the adhesive residue is completely gone.
Step 6 | Separate Front Glass


- To avoid wire damage and enhance safety, apply a protective film as an alternative to wire severance.
- Employ alcohol as a cleaning agent during all repair procedures.
- Eliminate adhesive and OCA remnants through the application of an electric glue remover or alternative techniques.
Step 7 | Install New Front Glass

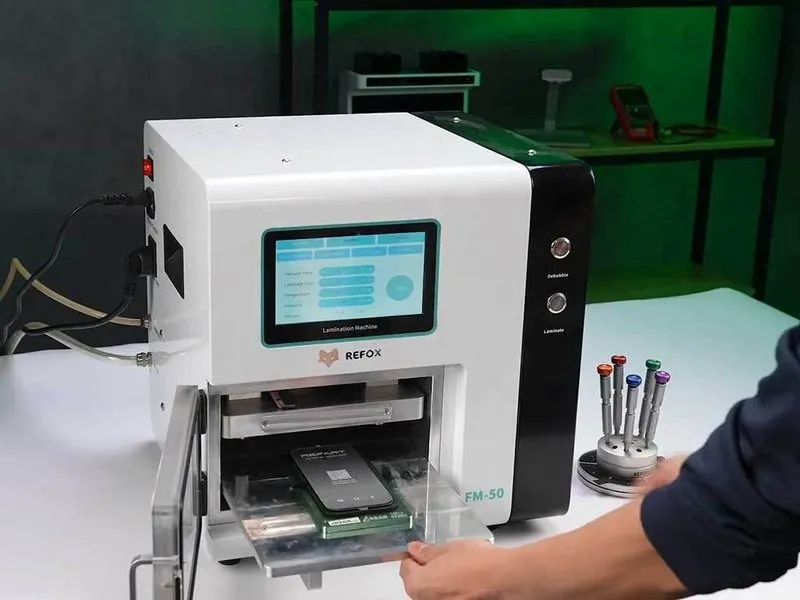

- Employ a dust-free hood during the installation of the replacement front glass to maintain a pristine working area, devoid of contaminants.A precision alignment mold is essential for accurate positioning, minimizing the potential for air pockets resulting from incorrect handling.The screen must undergo lamination within a specialized laminating machine to bond the layers securely.
- To eliminate any trapped air, the screen should be moved to a debubbling chamber following the lamination step.
- Operational inaccuracies during alignment can lead to the formation of air bubbles, which the alignment mold helps to prevent.
- Laminating the screen is crucial for ensuring a strong and durable bond between the layers, requiring the use of a dedicated machine.
Step 8 | Install New Frame
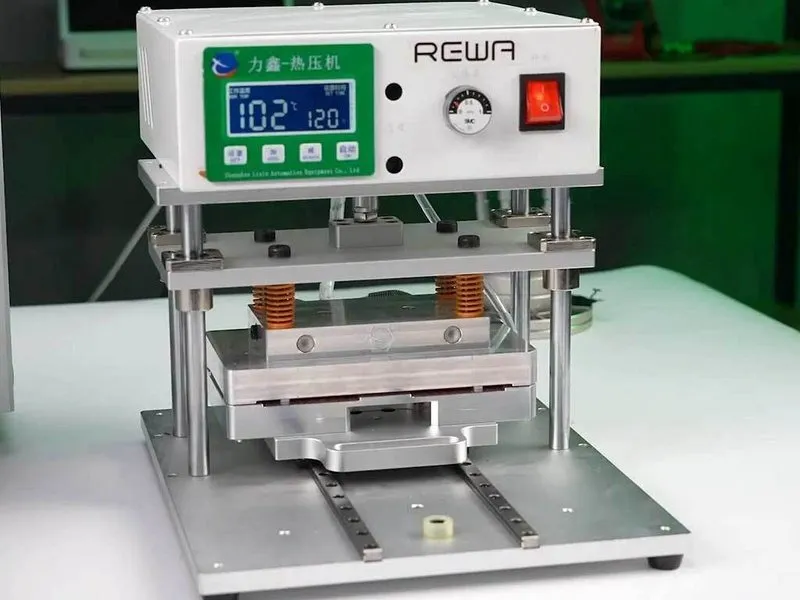

- Employing an automatic glue dispenser facilitates the accurate and uniform application of adhesive, promoting reliable adhesion and minimizing potential inaccuracies from hand application.Manual adhesive application remains a viable option if an automatic dispenser is unavailable.A heat press machine should be utilized to apply pressure and firmly affix the frame.
- Following the completion of frame installation and subsequent pressing, a verification of secure attachment is essential.
- Confirm proper frame security after the pressing process to guarantee a robust and stable bond.
Step 9 | Final Result
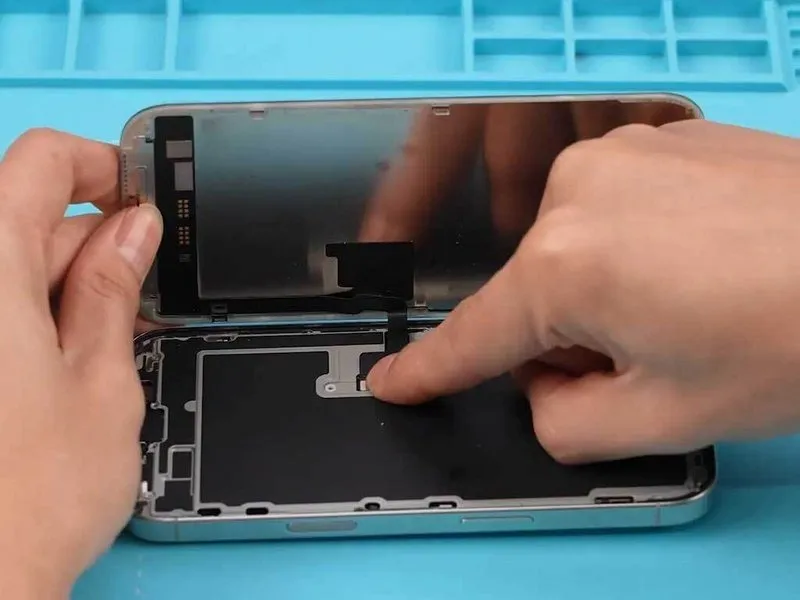
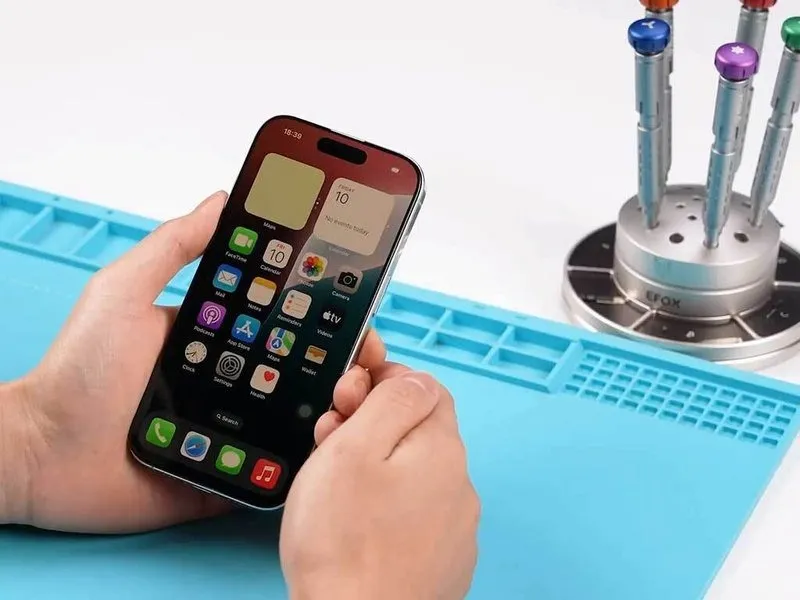
- Establish a connection between the display assembly and the device's main body, subsequently detaching the protective adhesive backing.Verify the functionality of the display panel through observation and testing.Reintegrate the components of the iPhone 16 Pro, signifying the completion of the refurbishment process.The display component requires secure attachment to the device's chassis, followed by the removal of the adhesive label.Confirm the operational status of the display unit through a functional assessment.
- Successful device restoration is indicated by the reassembly of the iPhone 16 Pro.A secure interface must be established between the display and the phone's core structure, accompanied by the removal of the protective film.Validate the display's performance to guarantee correct operation.
- The iPhone 16 Pro should now be reassembled, marking the conclusion of the repair.To proceed, the display needs to be linked with the phone, and the adhesive backing must be discarded.Assess the display's performance to confirm its proper operation.