iPhone 14 Plus Screen Replacement
If your iPhone 14 Plus screen is cracked, not responding to touch, or not showing a picture when powered on, use this guide to restore your iPhone to working order with a new screen, also known as a display assembly.
This guide was created using the A2886 (international) model. If you're fixing a different iPhone 14 Plus model, there may be some visual discrepancies, but the procedure should be the same.
Note: On iOS 17.6 and earlier, True Tone and auto brightness functionality are disabled after a screen replacement, even when using an original Apple screen. Face ID is also disabled unless the iPhone is running iOS 15.2 or newer. On the latest iOS version, you can calibrate your new screen using Apple's Repair Assistant to restore True Tone functionality. This may happen automatically.
- You'll need replacement adhesive to reattach the screen when reassembling the device.
- Your device will function normally but will most likely lose its IP (Ingress Protection) rating.
Step 1 | Remove the pentalobe screws
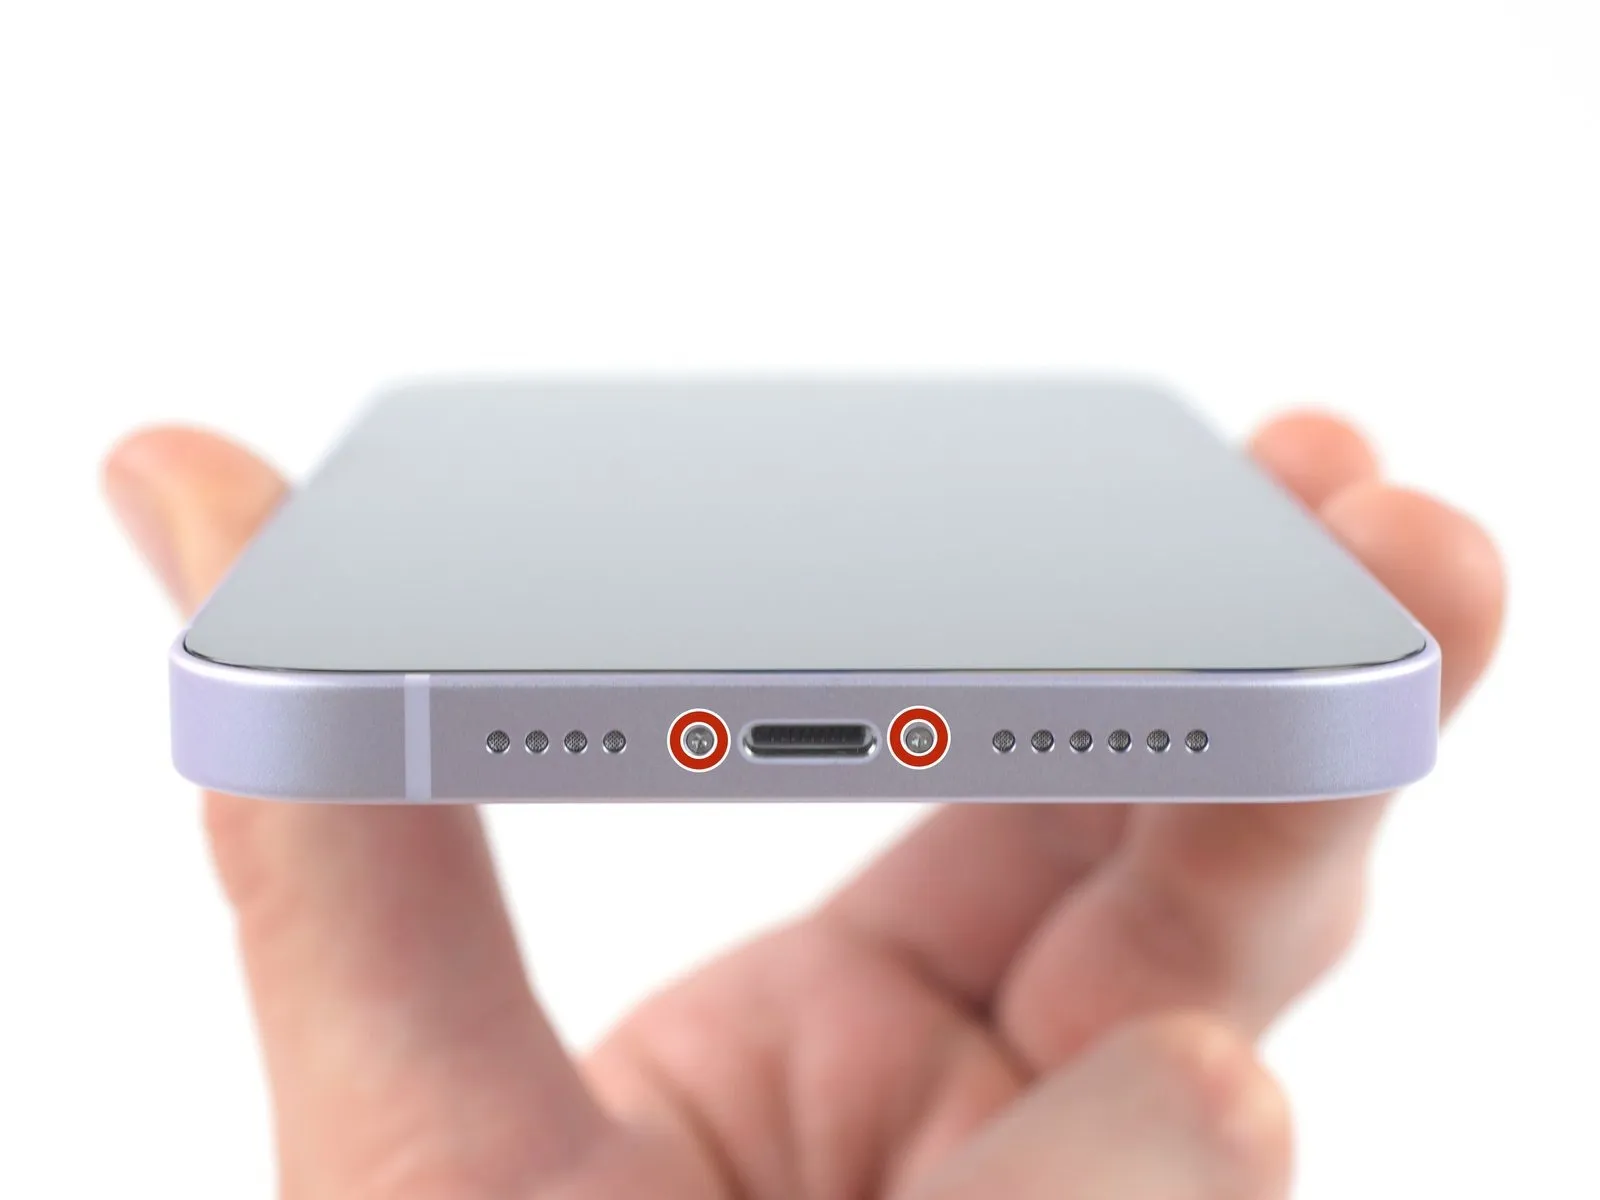

- Power off your iPhone before beginning disassembly.
- Remove the two 6.8 mm-long pentalobe P2 screws at the bottom edge of the iPhone.
Step 2 | Mark your opening picks


- If inserted too far, an opening pick can damage your device. Follow this step to mark your pick and prevent damage.
Measure 3 mm from the tip and mark the opening pick with a permanent marker. - You can also mark the other corners of the pick with different measurements.
- Alternatively, tape a coin to a pick 3 mm from the tip.
Step 3 | Tape over any cracks


- If your iPhone has a cracked screen, keep further breakage contained and prevent bodily harm during your repair by taping over the glass.
Lay overlapping strips of clear packing tape over the iPhone's screen until the whole face is covered. - Wear safety glasses to protect your eyes from any glass shaken free during the repair.
- If you can't get the suction cup to stick in the next few steps, fold a strong piece of tape (such as duct tape) into a handle and lift the screen with that instead.
- If all else fails, you can superglue the suction cup to the screen.
Step 4 | Heat the bottom edge

- Use a hair dryer or a heat gun to heat the bottom edge of the iPhone until the screen is slightly too hot to touch.
Never leave your heat gun in one spot for an extended period of time.
Step 5 | Insert an opening pick
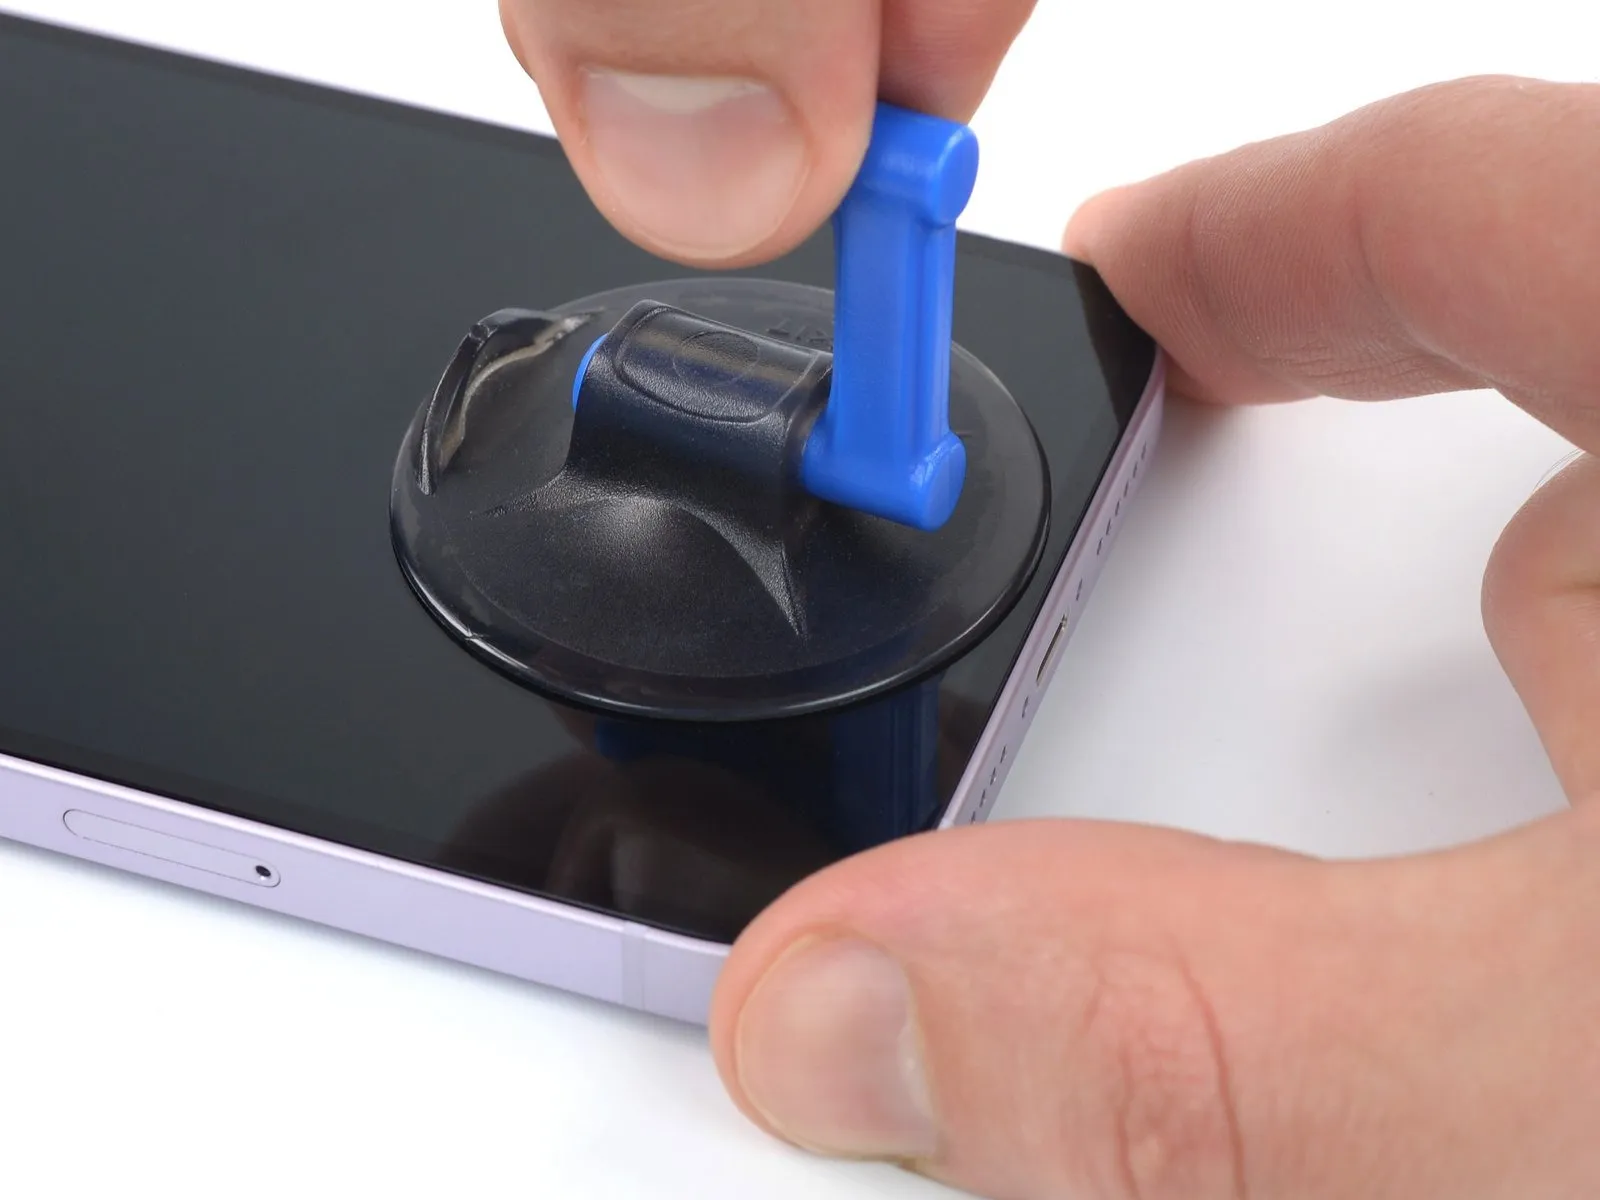
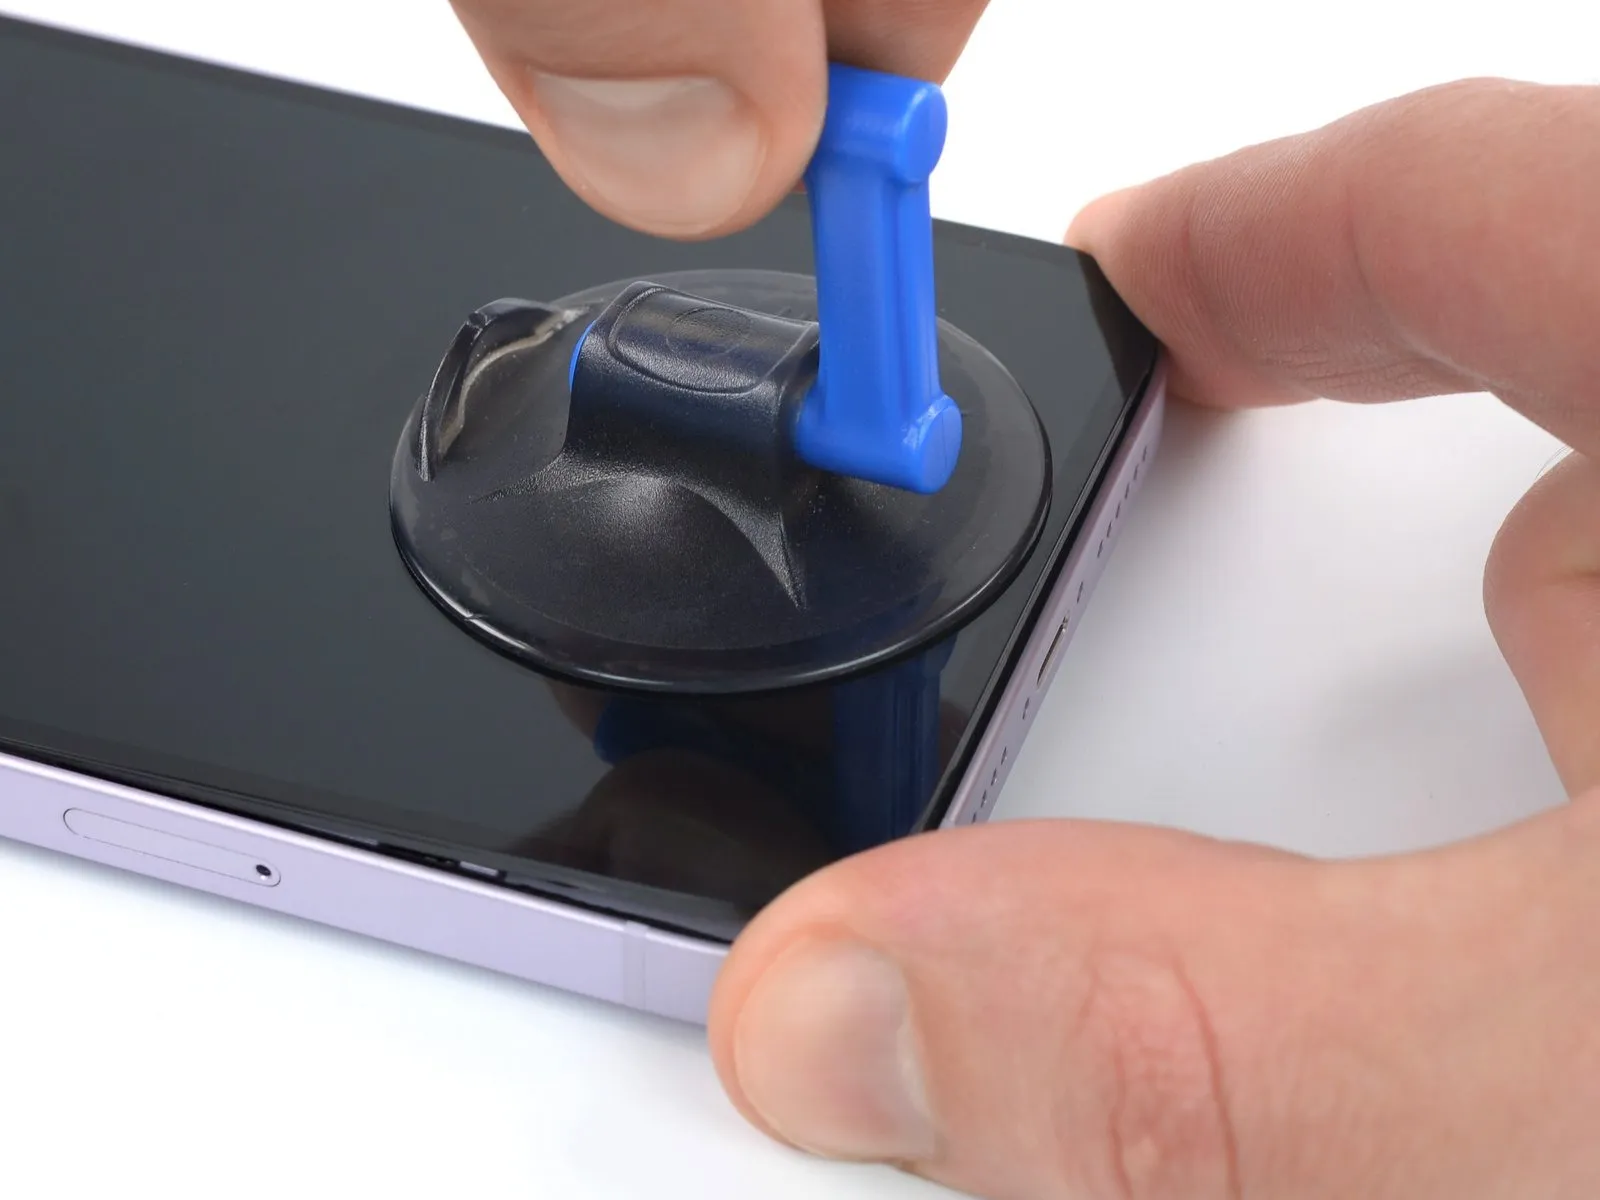
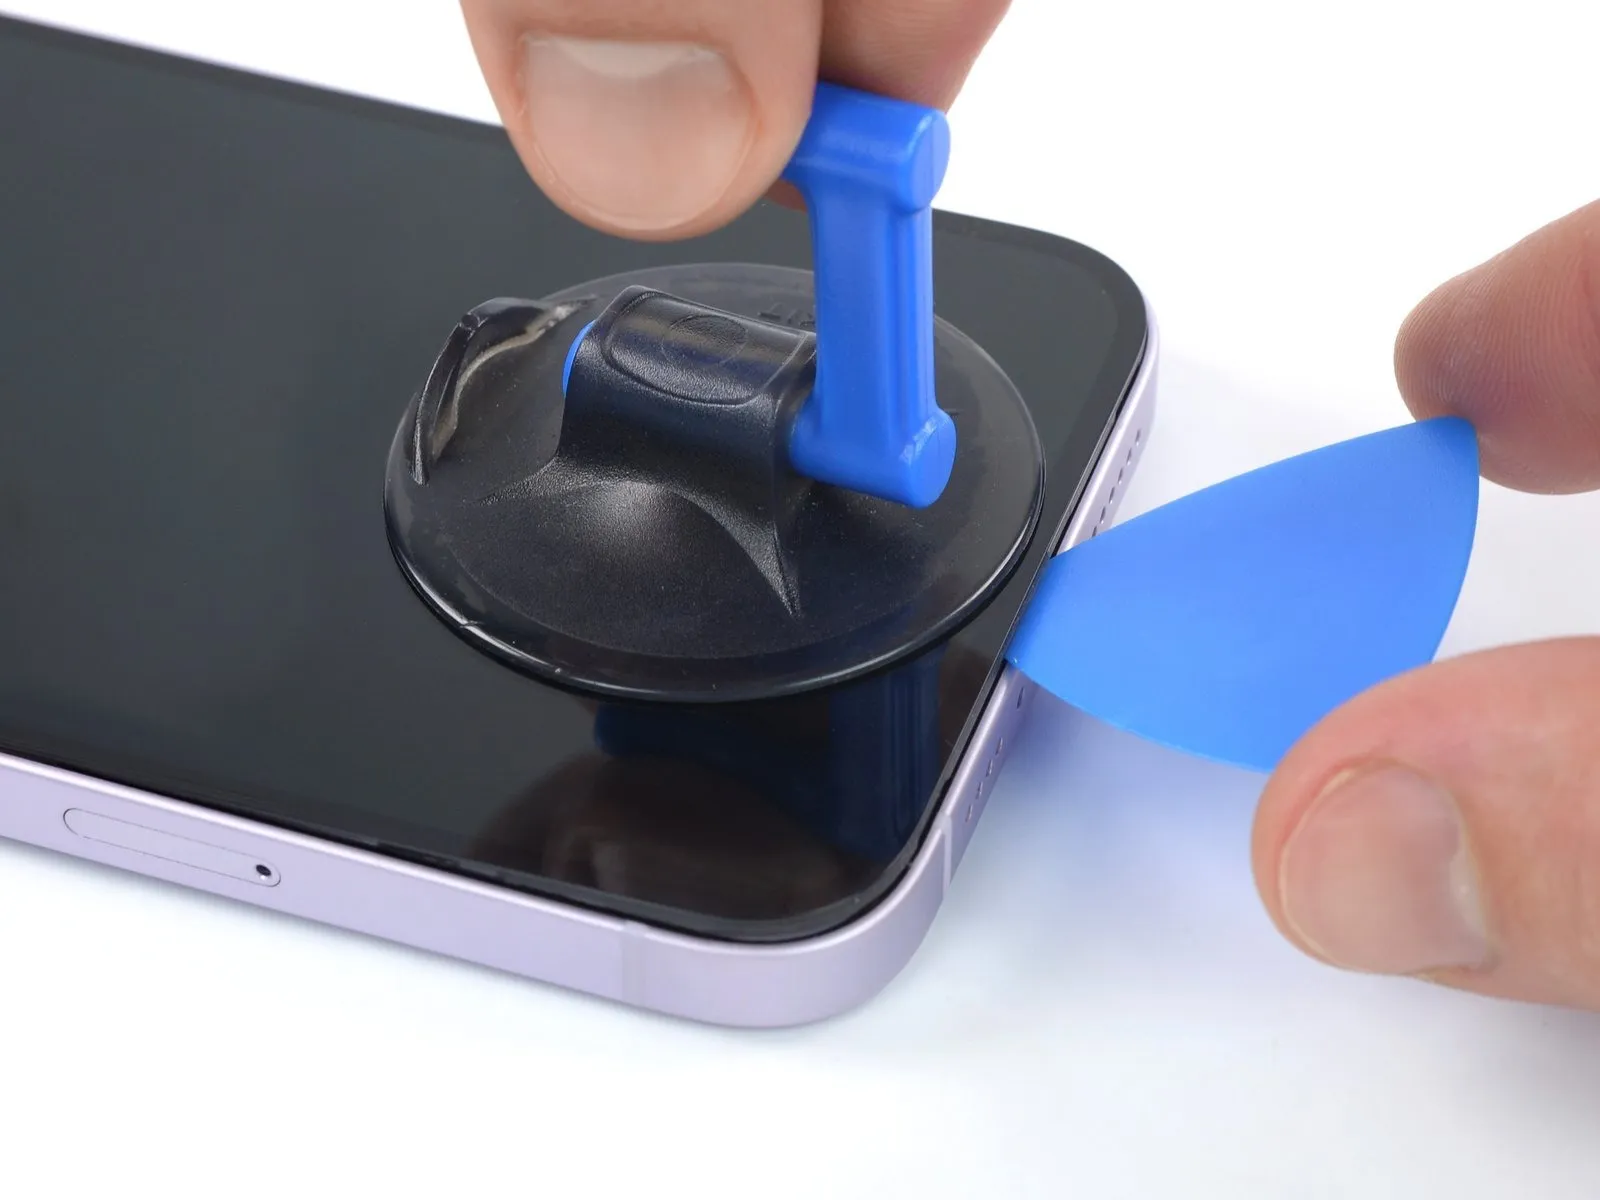
- Apply a suction handle to the bottom edge of the phone, while avoiding the very edge of the glass.
- Pull up on the suction cup with firm, constant pressure to create a slight gap between the screen and the frame.
- Insert an opening pick into the gap under the screen's plastic bezel.
- The watertight adhesive holding the screen in place is very strong; creating this initial gap takes a significant amount of force. If you're having a hard time opening a gap, apply more heat, and gently rock the screen up and down to weaken the adhesive until you create enough of a gap to insert your tool.
Step 6 | Heat the right edge


Step 7 | Separate the right adhesive
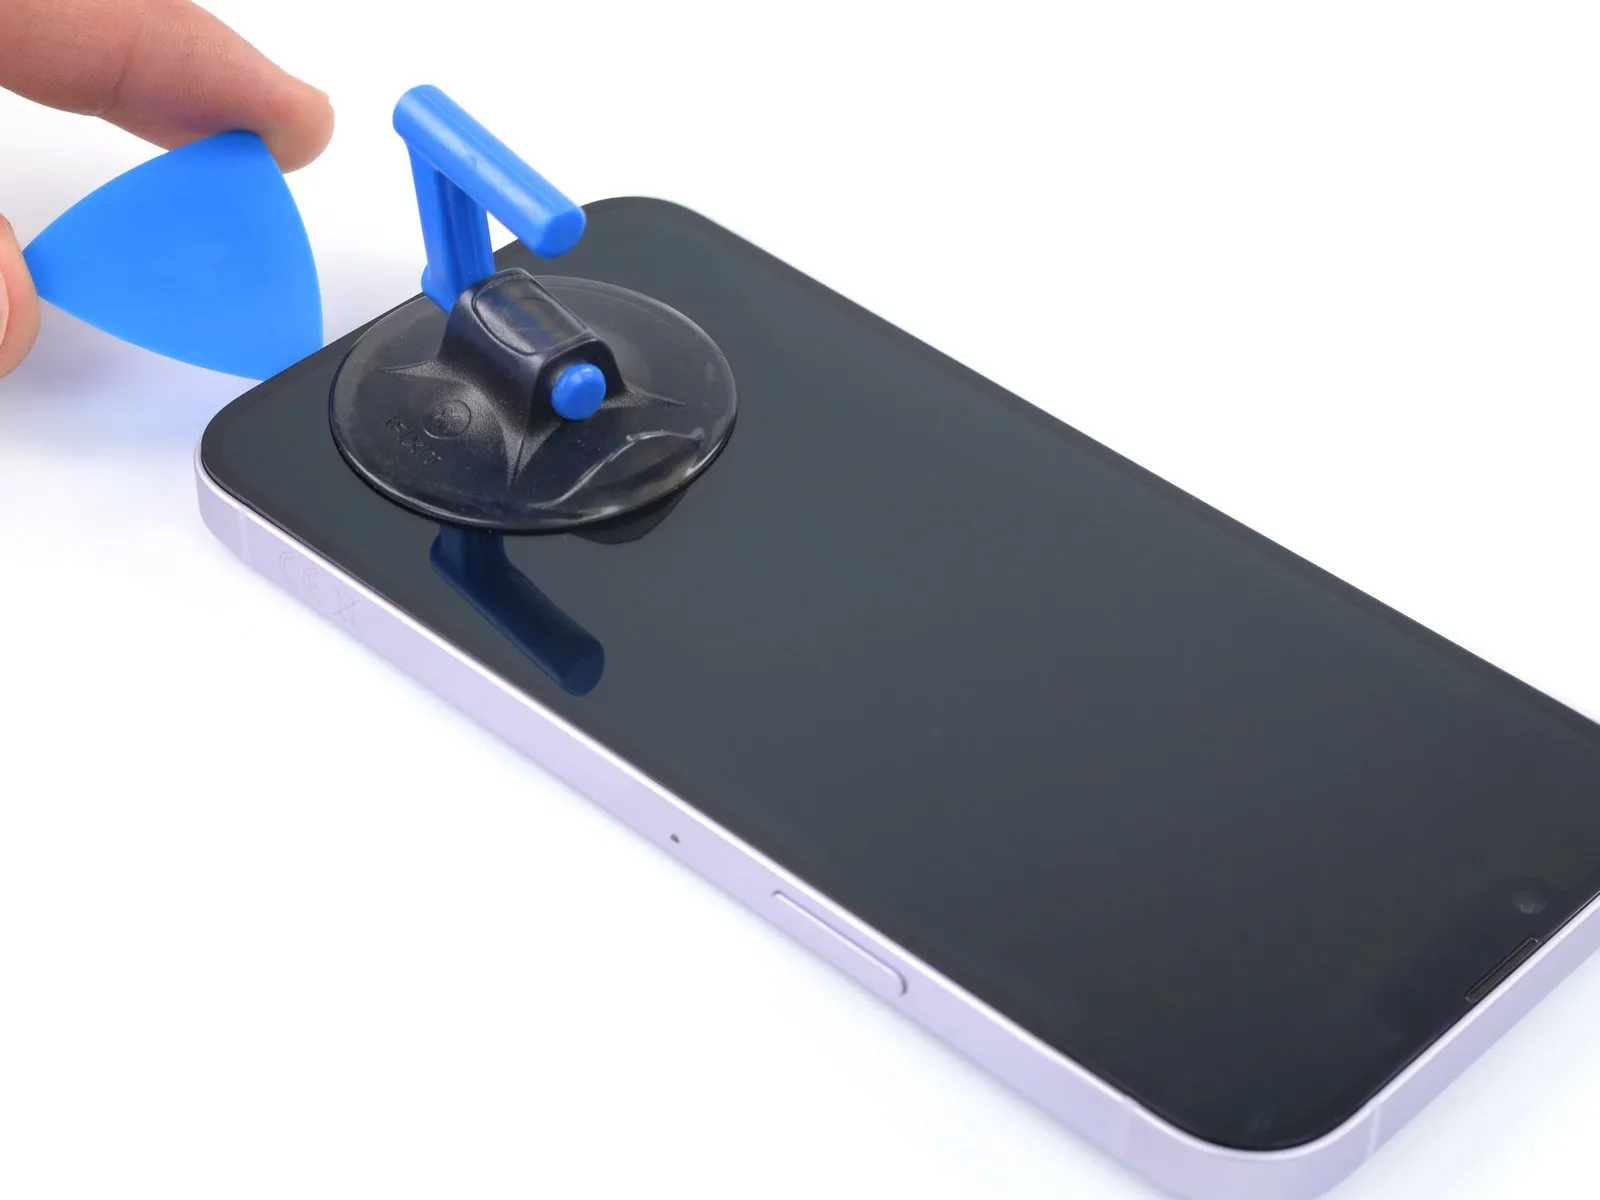
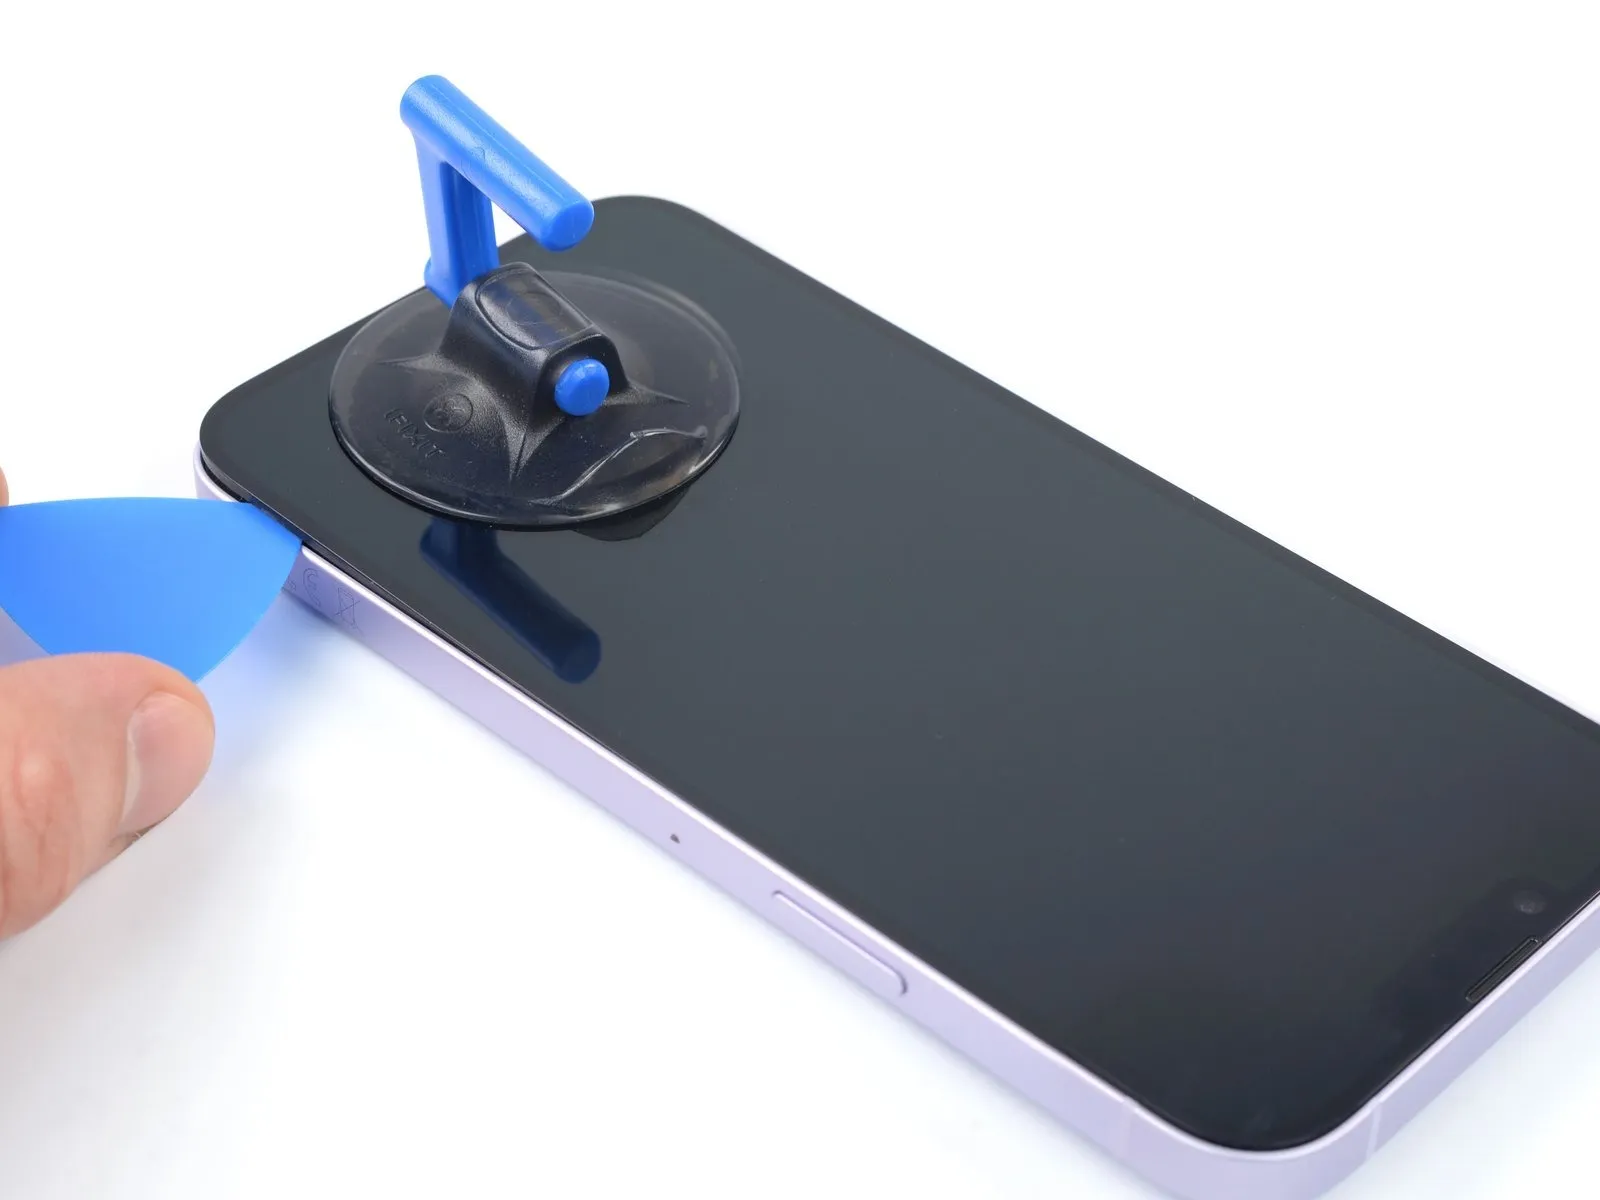
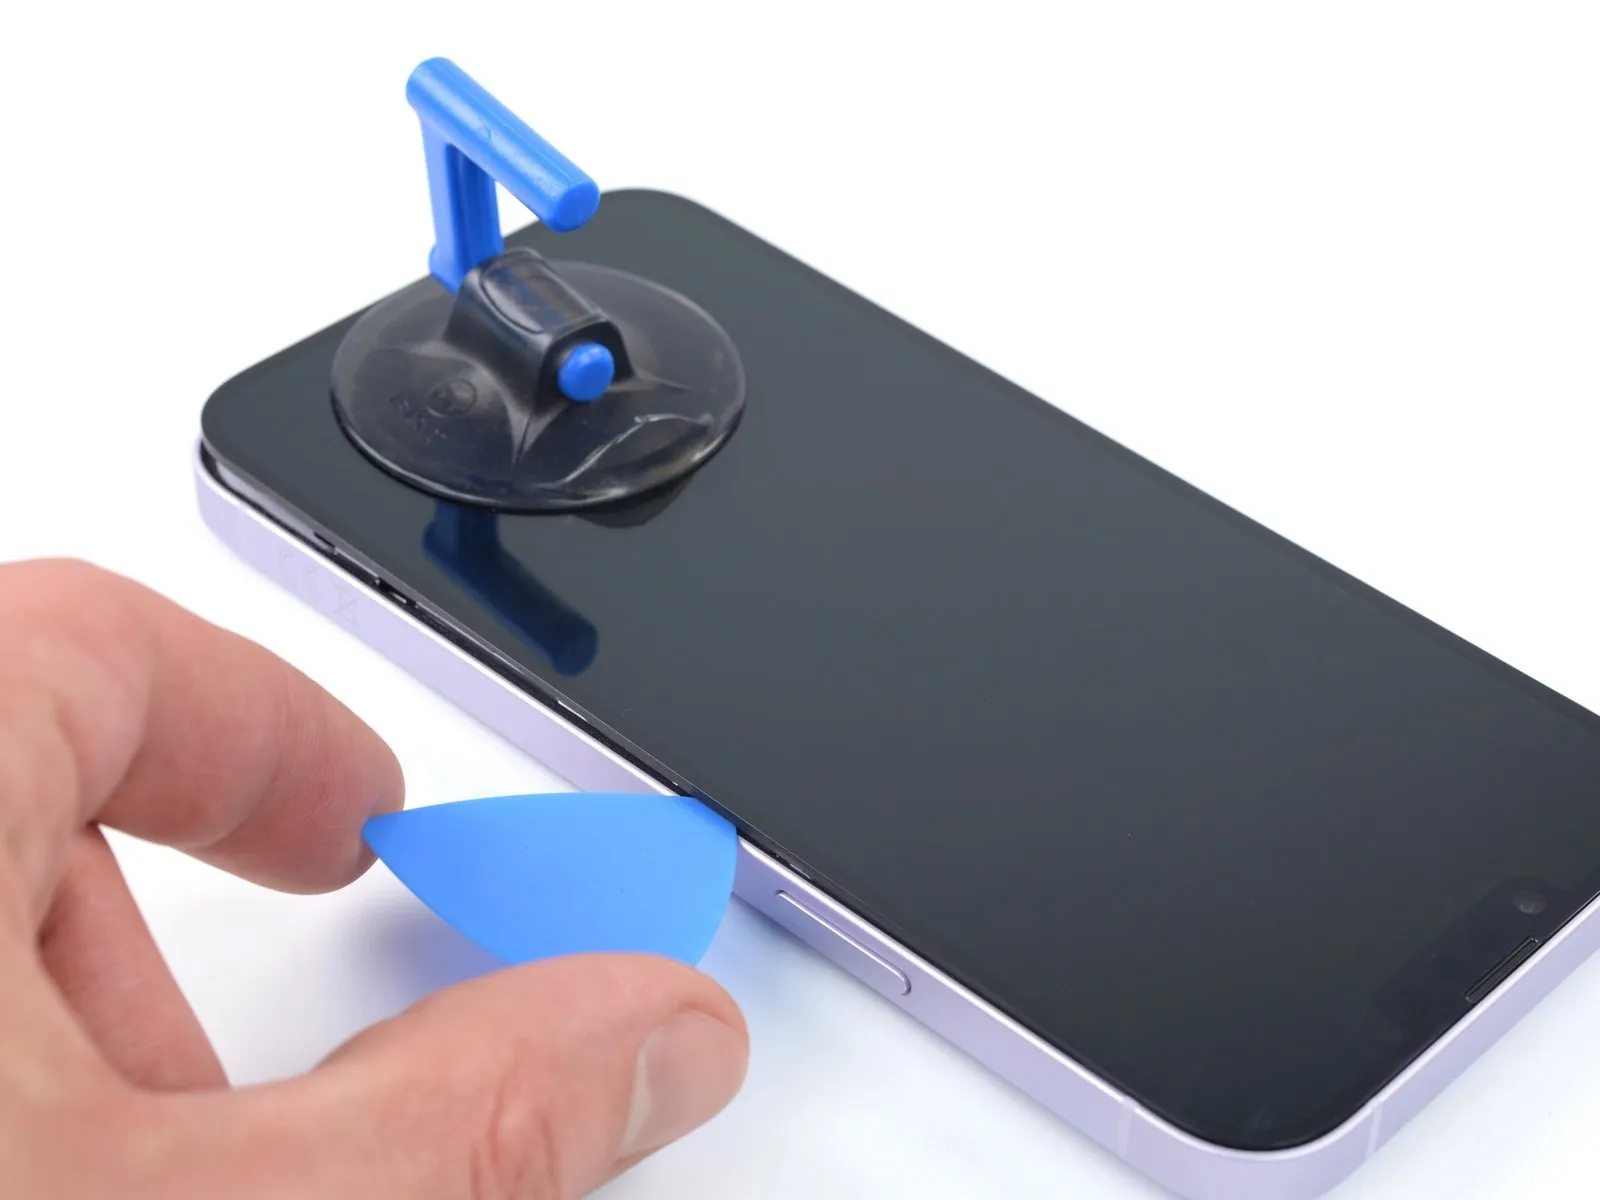
- Slide the opening pick around the bottom right corner of the iPhone to separate its adhesive.
- Continue sliding up the right edge of the iPhone until you reach the top right corner.
- Do not insert your pick more than 3 mm, as you may damage internal components.
- Leave the pick in the top right corner before continuing.
Step 8 | Heat the top edge

Step 9 | Slice the top edge adhesive


- Slide the opening pick around the top right corner of the iPhone to separate the top adhesive.
- Do not insert your pick more than 3 mm, as you may damage the top sensors.
- Leave the pick in the top left corner before continuing.
Step 10 | Heat the left edge


Step 11 | Separate the left adhesive


- Do not insert your pick deeper than 2 mm here, as you may damage the cables.
- Rotate your pick around the top left corner of the screen.
- Slide your pick to the bottom left corner of the screen to separate the adhesive.
- If you're having trouble separating the adhesive, reheat the left edge.
Step 12 | Open the iPhone

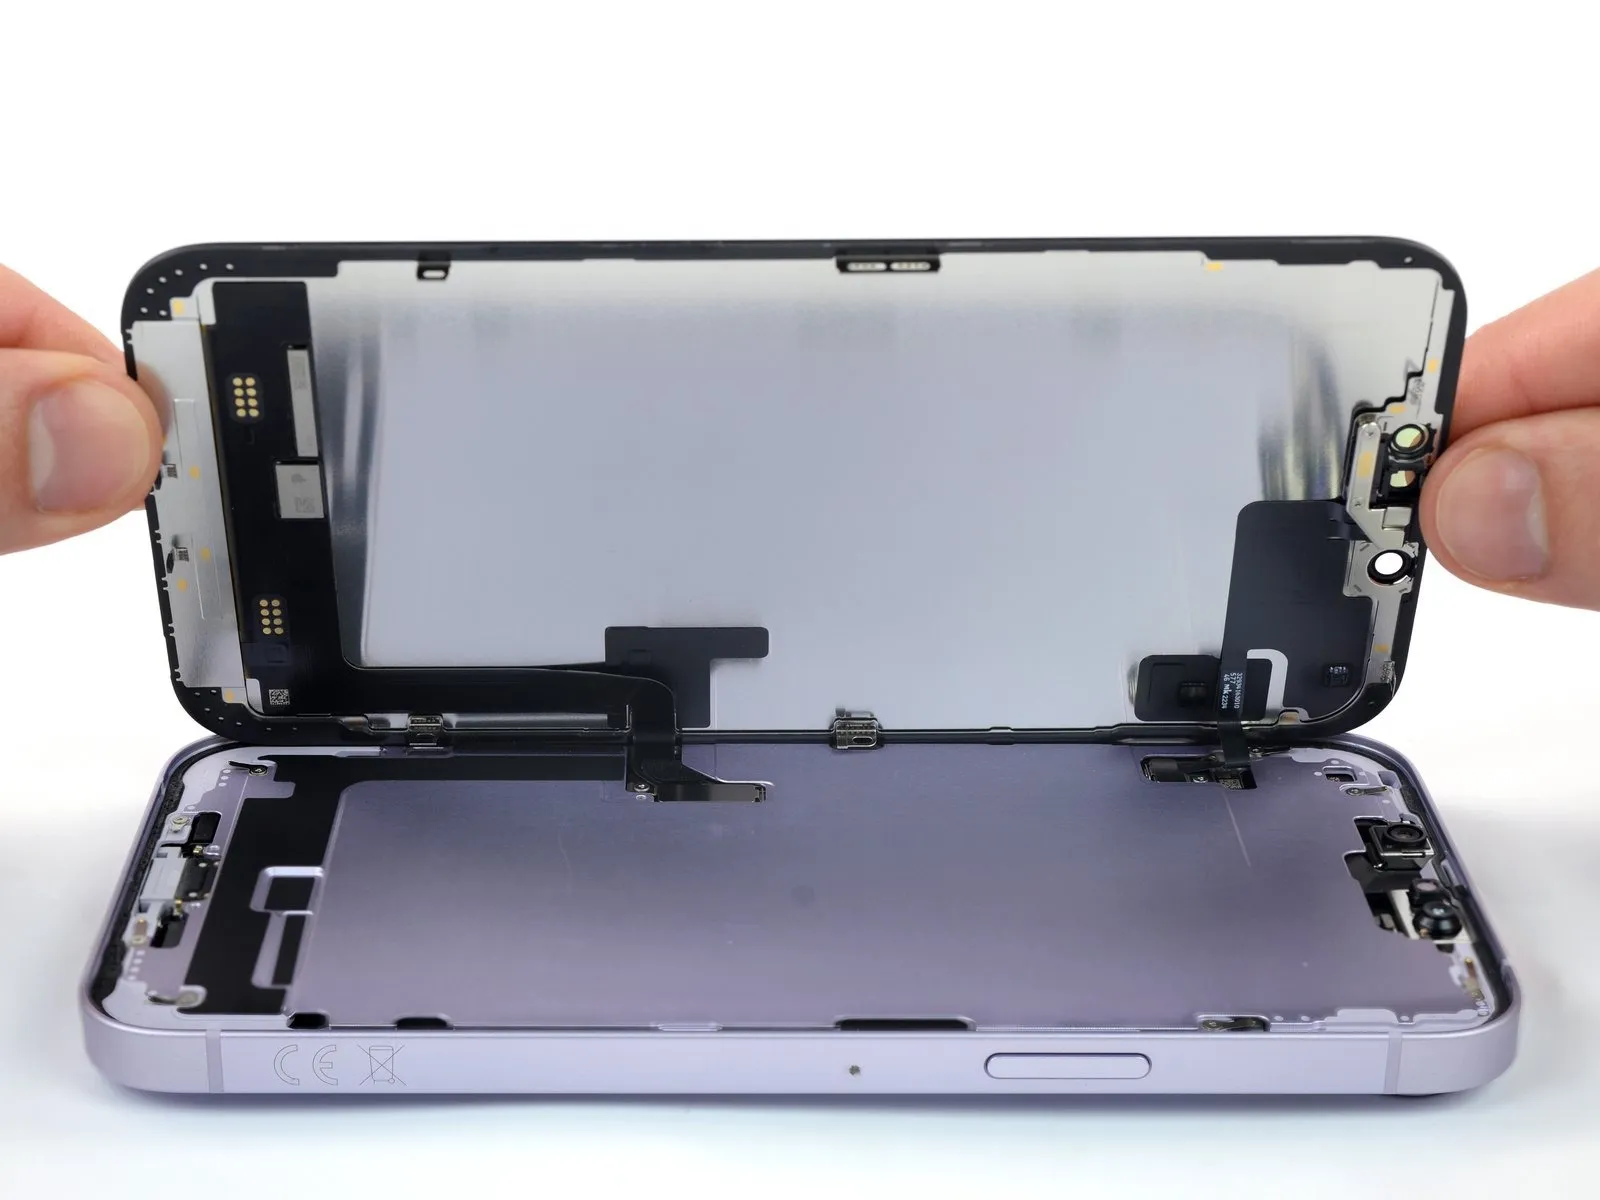
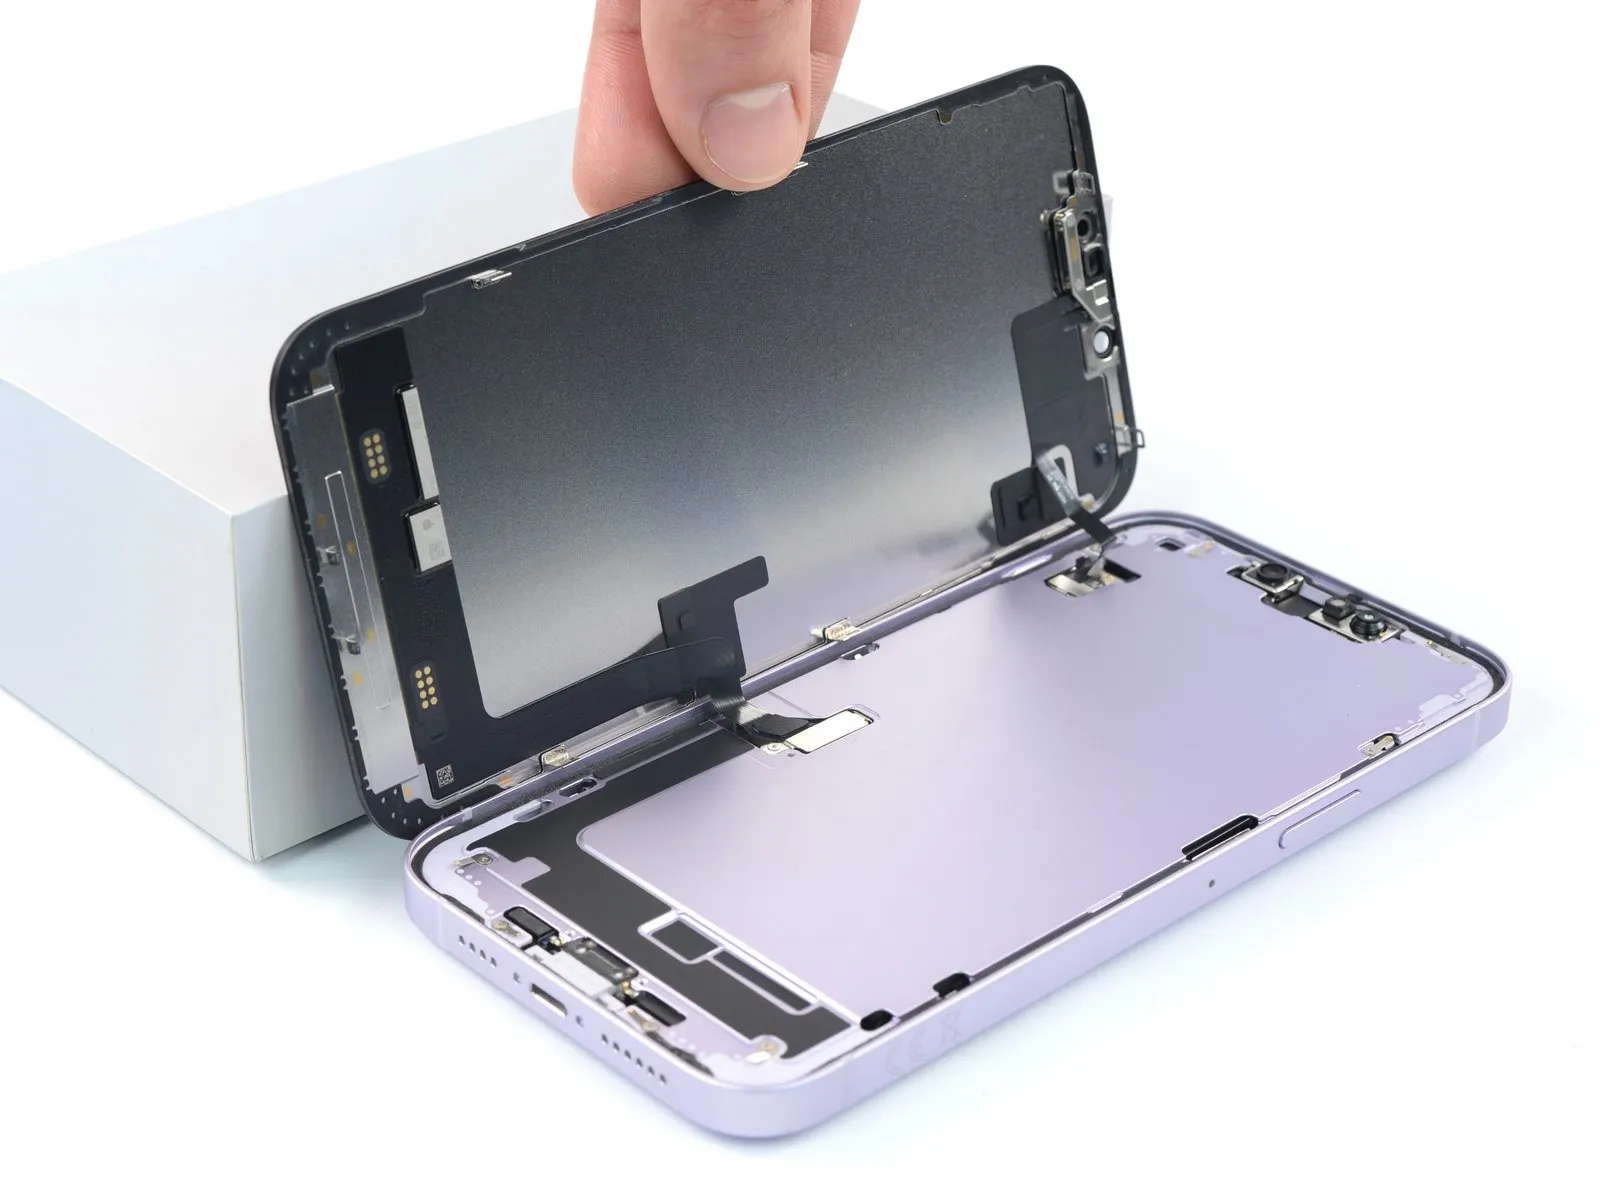
- Rotate your iPhone so the right edge faces you.
- Open your iPhone by swinging the screen up from the right side, like the front cover of a book.
- Lean the screen against something to keep it propped up while you're working on the phone.
- If you don't have anything at hand to lean the screen against, your suction handle can do the trick.
- During reassembly, lay the screen in position, align the clips along the top edge, and carefully press the top edge into place before snapping the rest of the screen down. If it doesn't click easily into place, check the condition of the clips around the perimeter of the screen and make sure they aren't bent.
Step 13 | Unfasten the display connector bracket screw
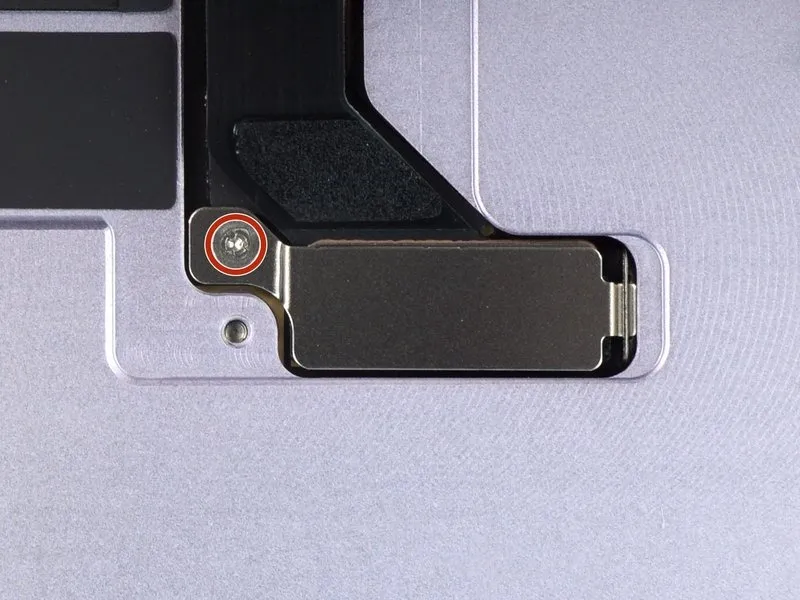
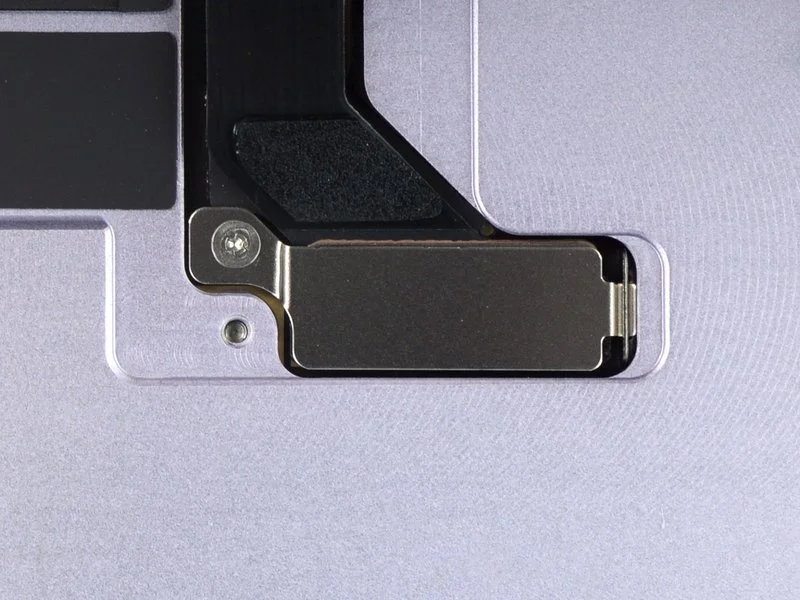
- Use a Y000 screwdriver to remove the 0.8 mm-long screw securing the display connector bracket.
Throughout this repair, keep track of each screw and make sure it goes back exactly where it came from to avoid damaging your iPhone.
During reassembly, this is a good point to power on your iPhone and test all functions before you seal the screen in place. Be sure to power your iPhone back down completely before you continue working.
Step 14 | Remove the display connector bracket

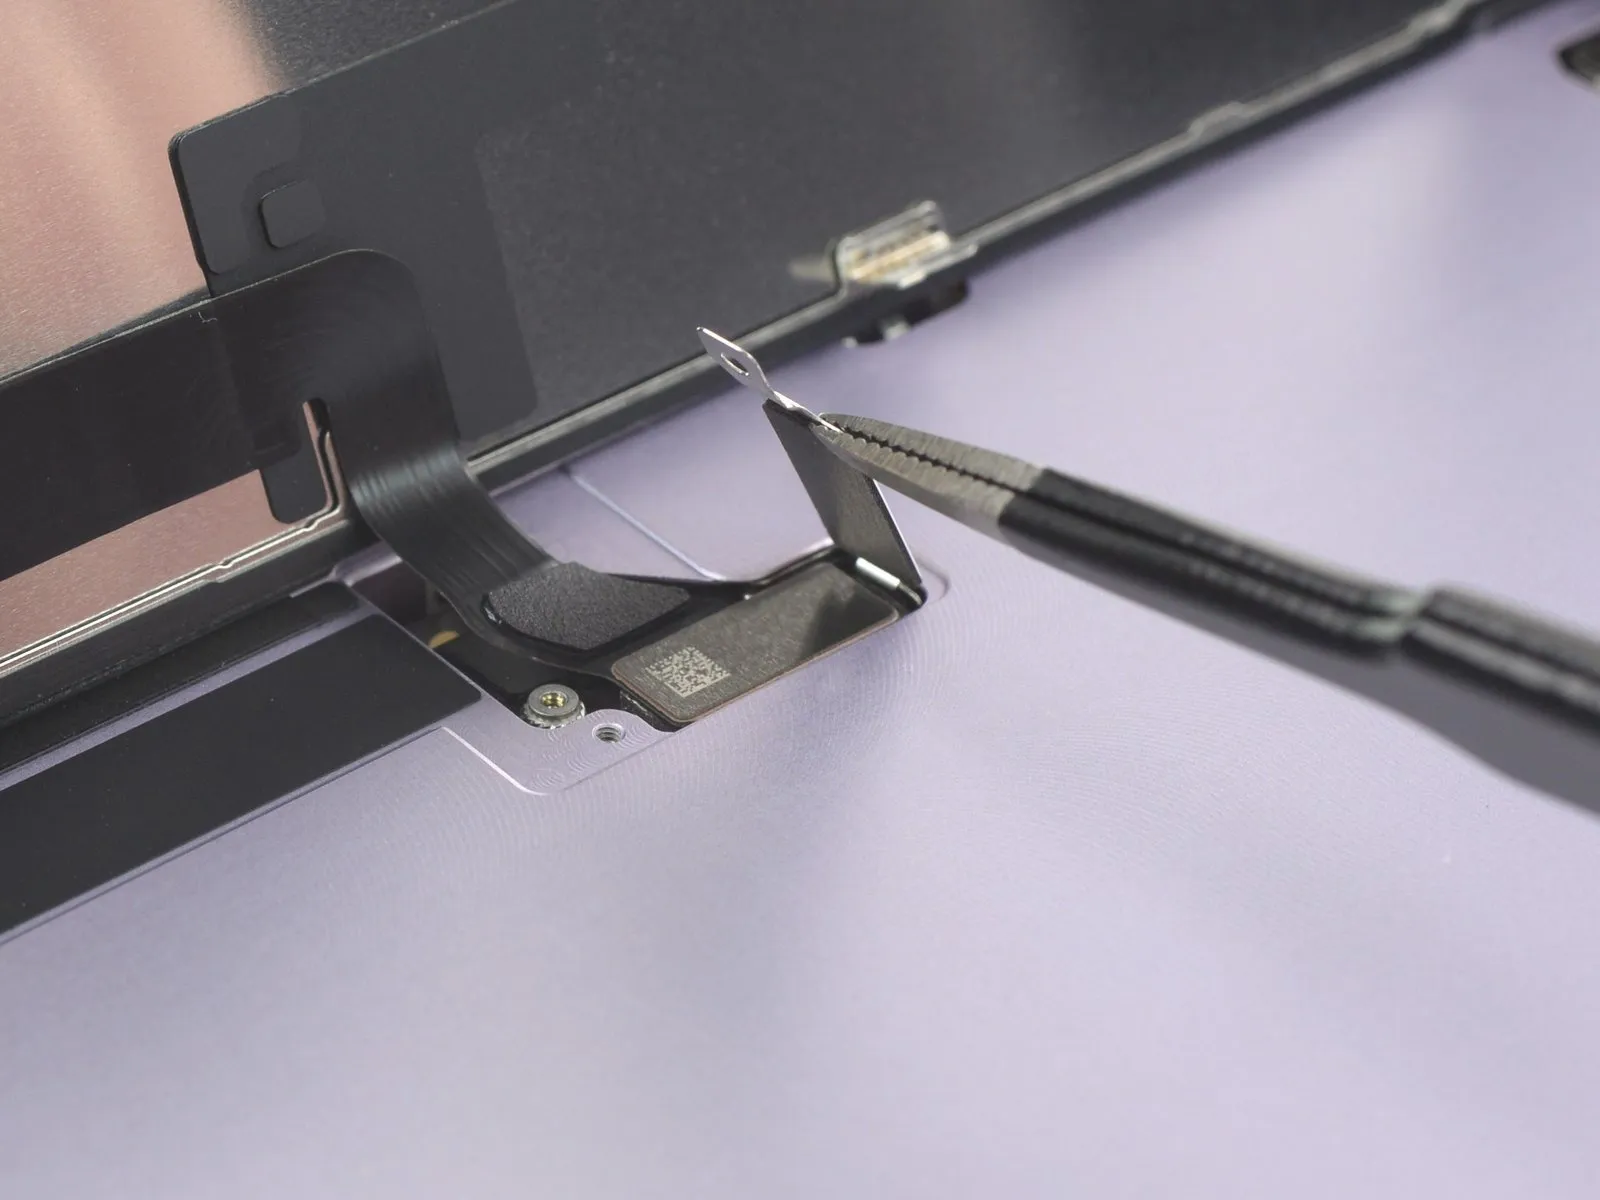
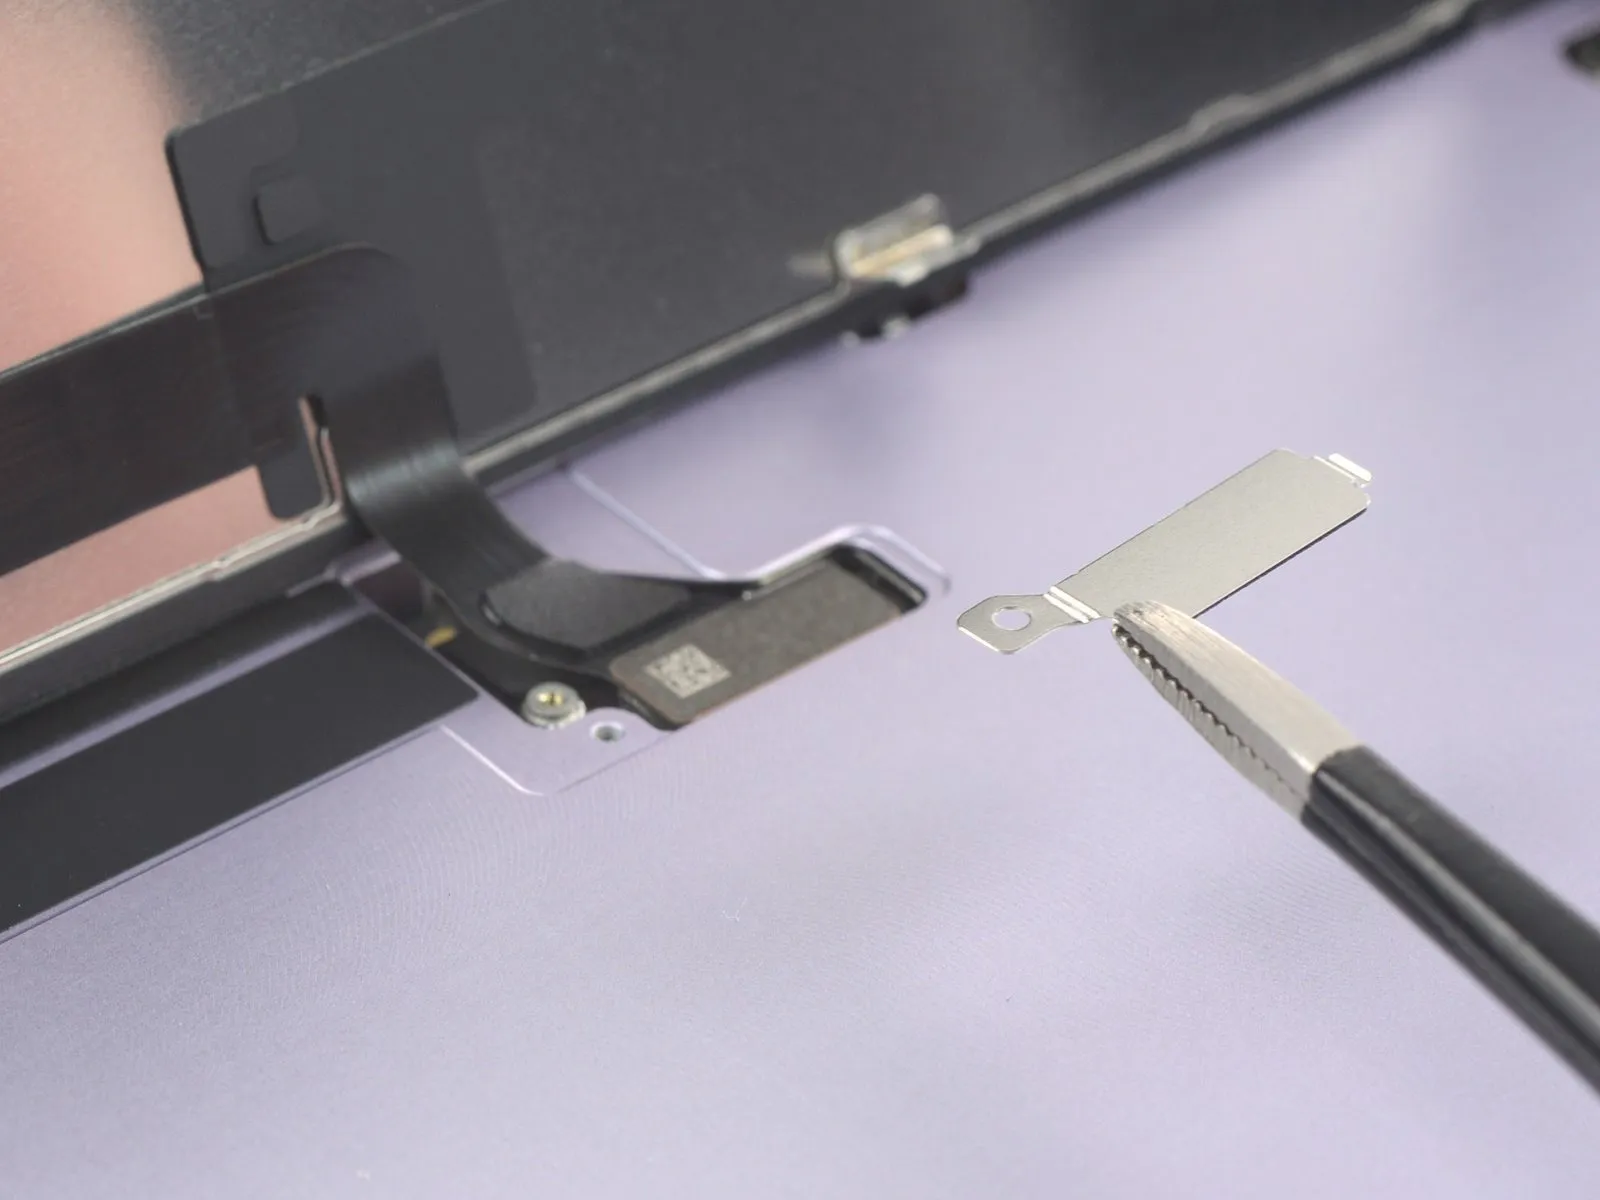
- Grasp the screw hole end of the connector bracket with a pair of tweezers.
- Lift the bracket slightly to loosen the latch on the other edge.
- Remove the display connector bracket.
During reassembly, make sure the bracket latches properly.
Step 15 | Disconnect the display connector

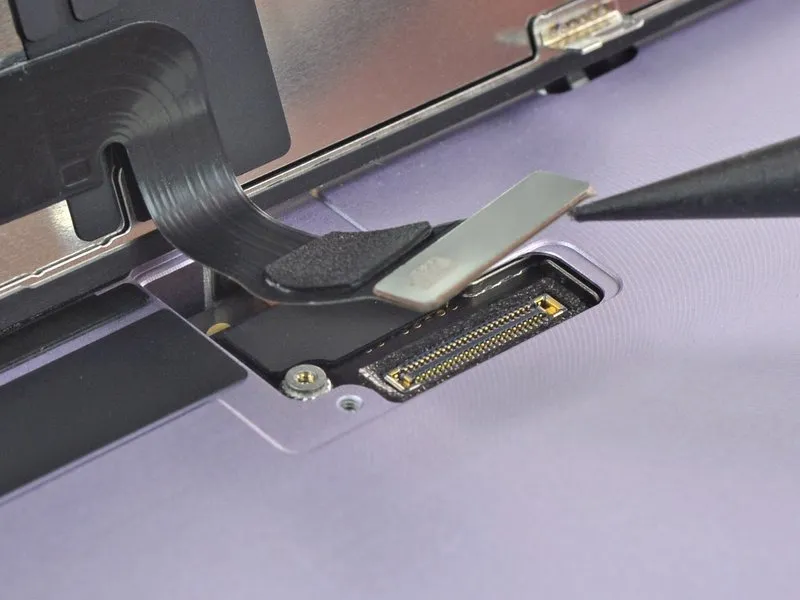
- Use the pointed end of a spudger to disconnect the display cable by prying the connector straight up from its socket.
To re-attach press connectors like this one, carefully align and press down on one side until it clicks into place, then repeat on the other side. Do not press down on the middle.
If the connector is misaligned, the pins can bend, causing permanent damage.
Step 16 | Unfasten the front sensor connector bracket
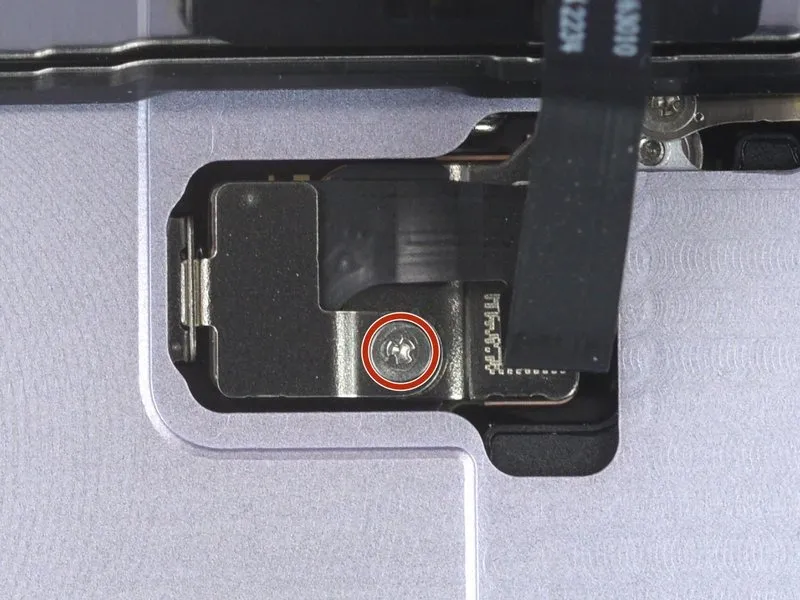
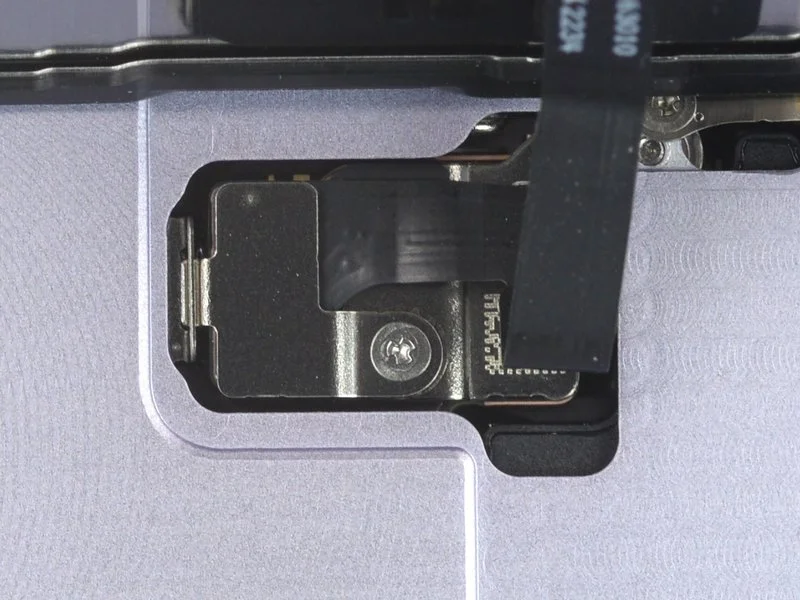
- Use a Y000 screwdriver to remove the 1 mm-long screw securing the front sensor connector bracket.
Step 17 | Remove the front sensor connector bracket

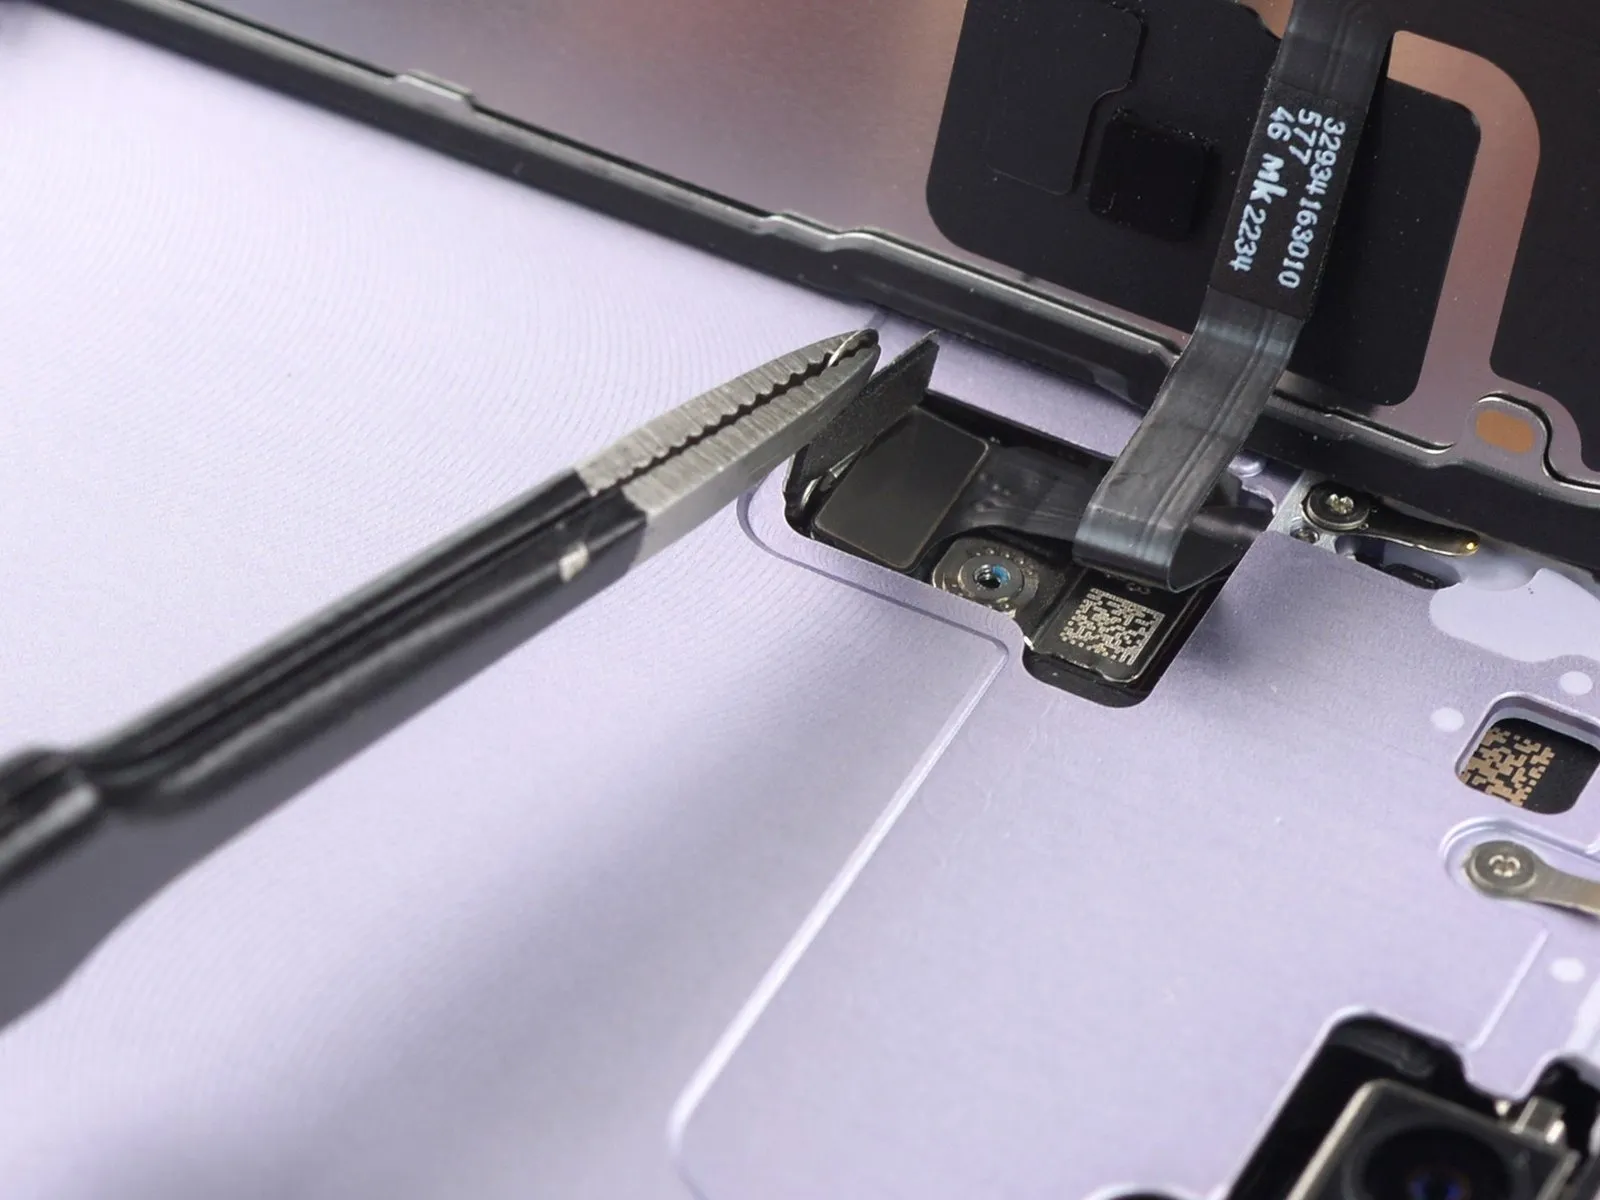
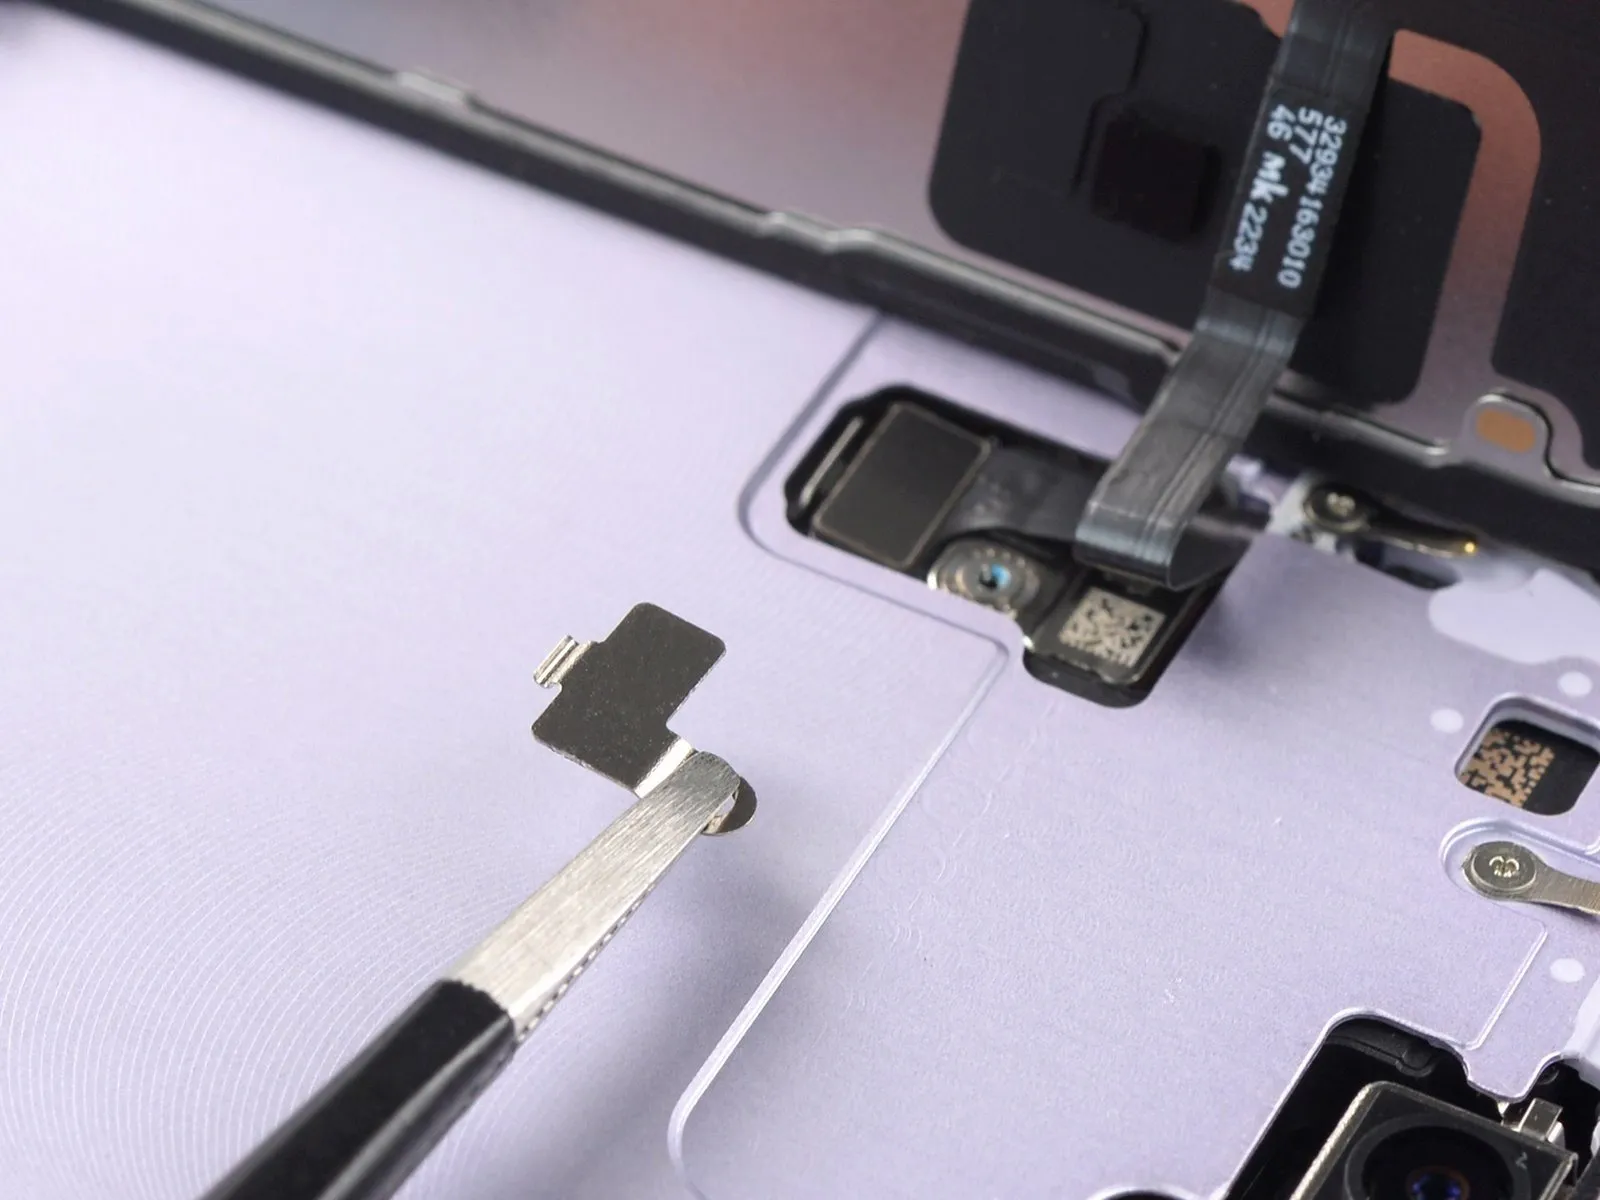
- Grasp the screw hole end of the connector bracket with a pair of tweezers.
- Lift the bracket slightly to loosen the latch on the other edge.
- Remove the front sensor connector bracket.
- During reassembly, make sure the bracket latches properly.
Step 18 | Disconnect the front sensor connector cable
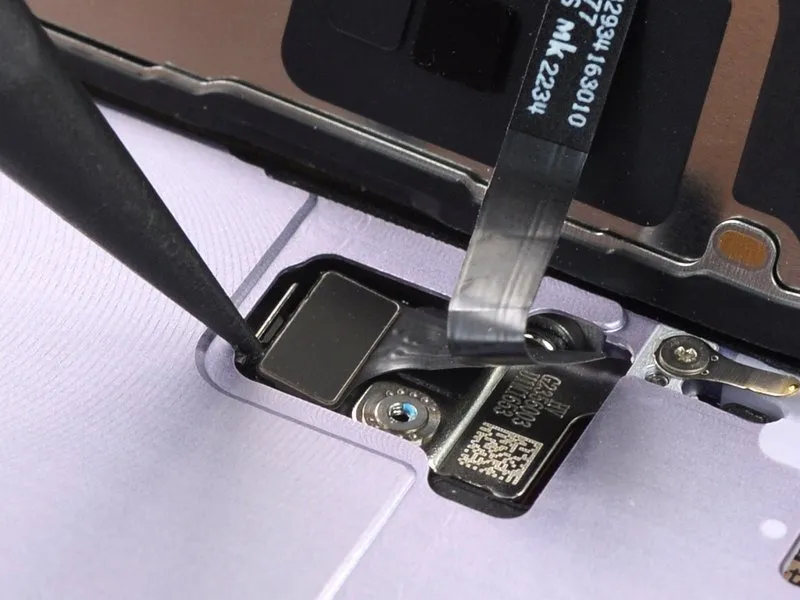
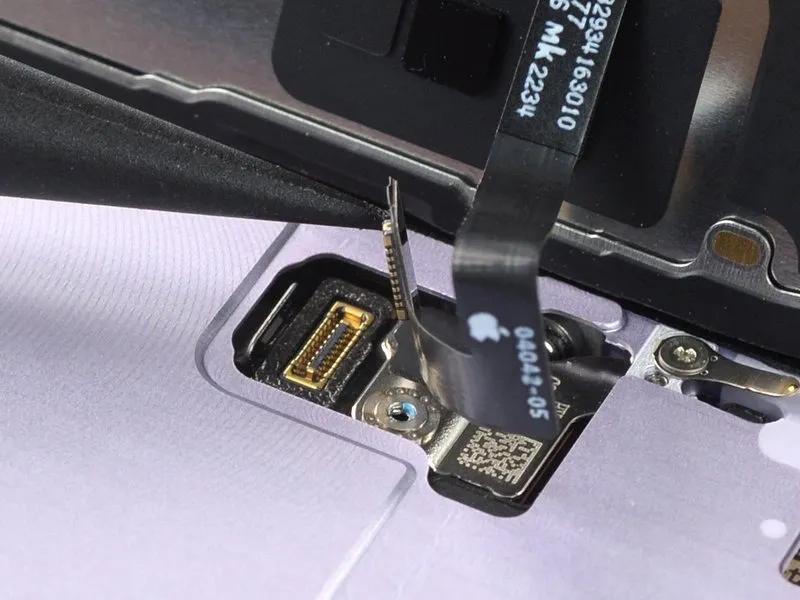
Use the pointed end of a spudger to disconnect the front sensor cable by prying the connector straight up from its socket.
Step 19 | Remove the screen
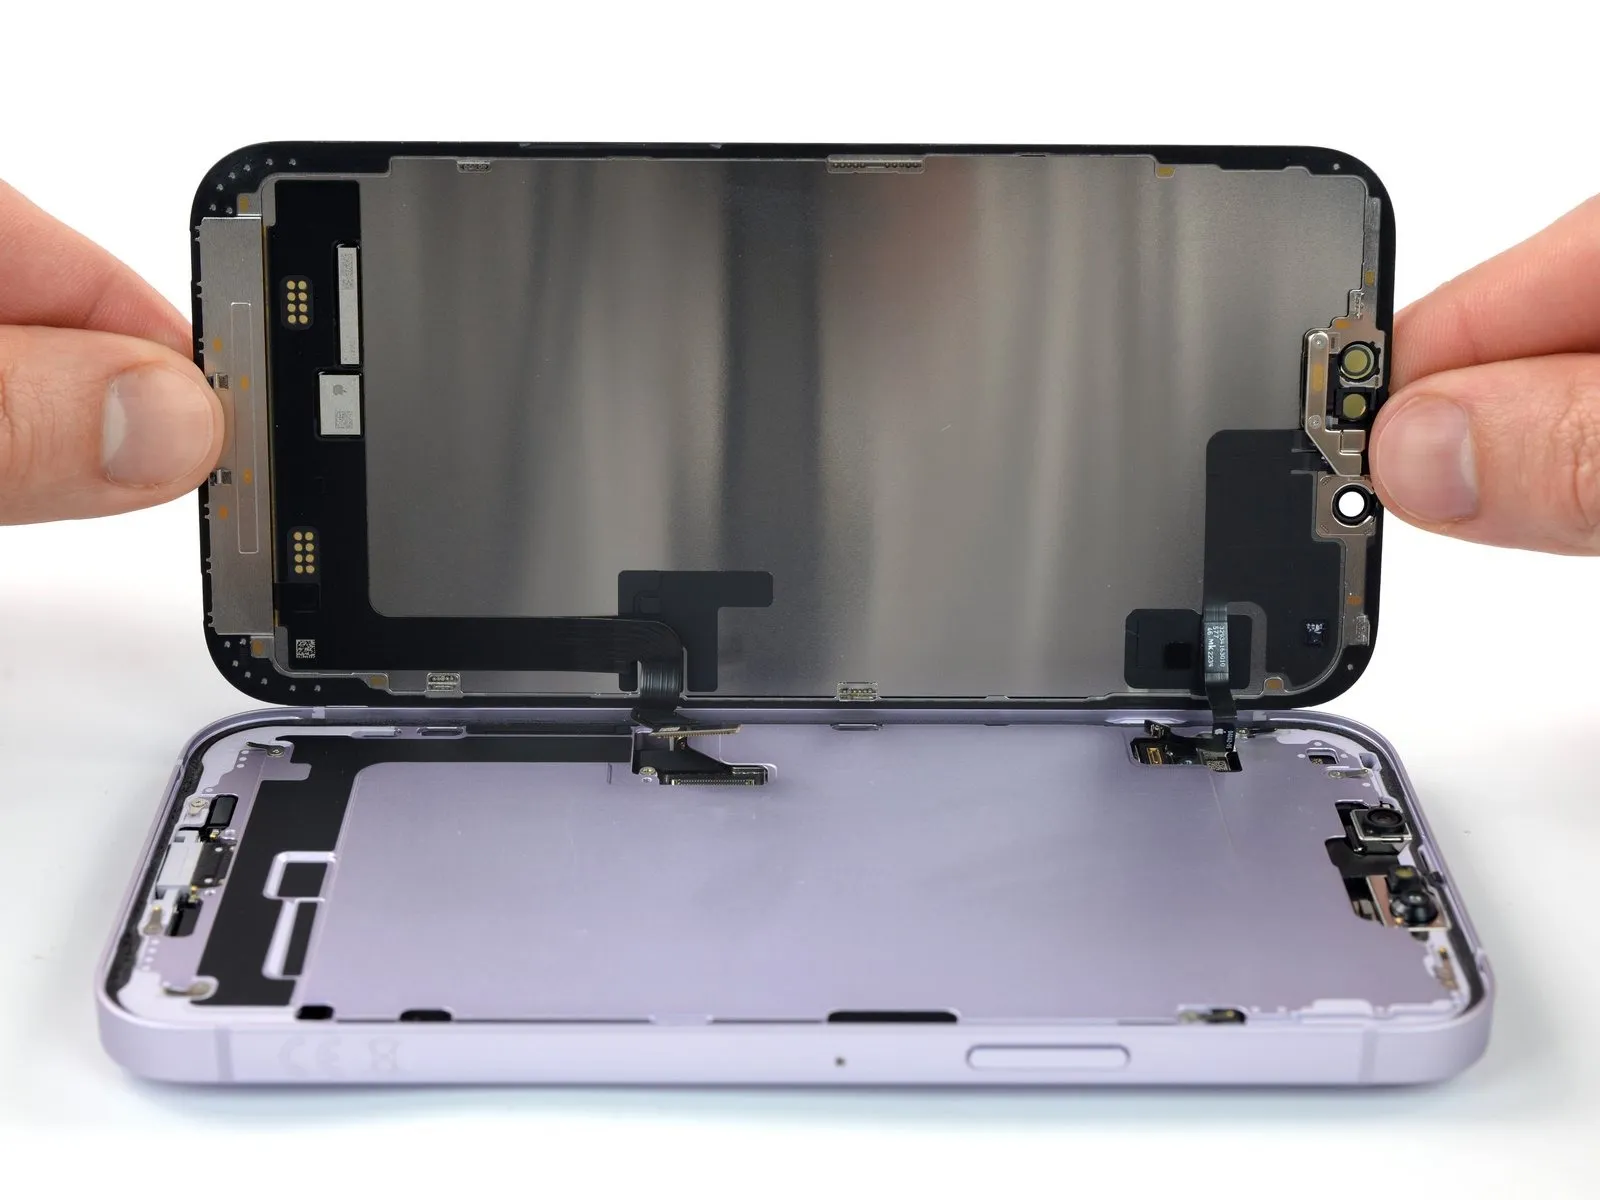
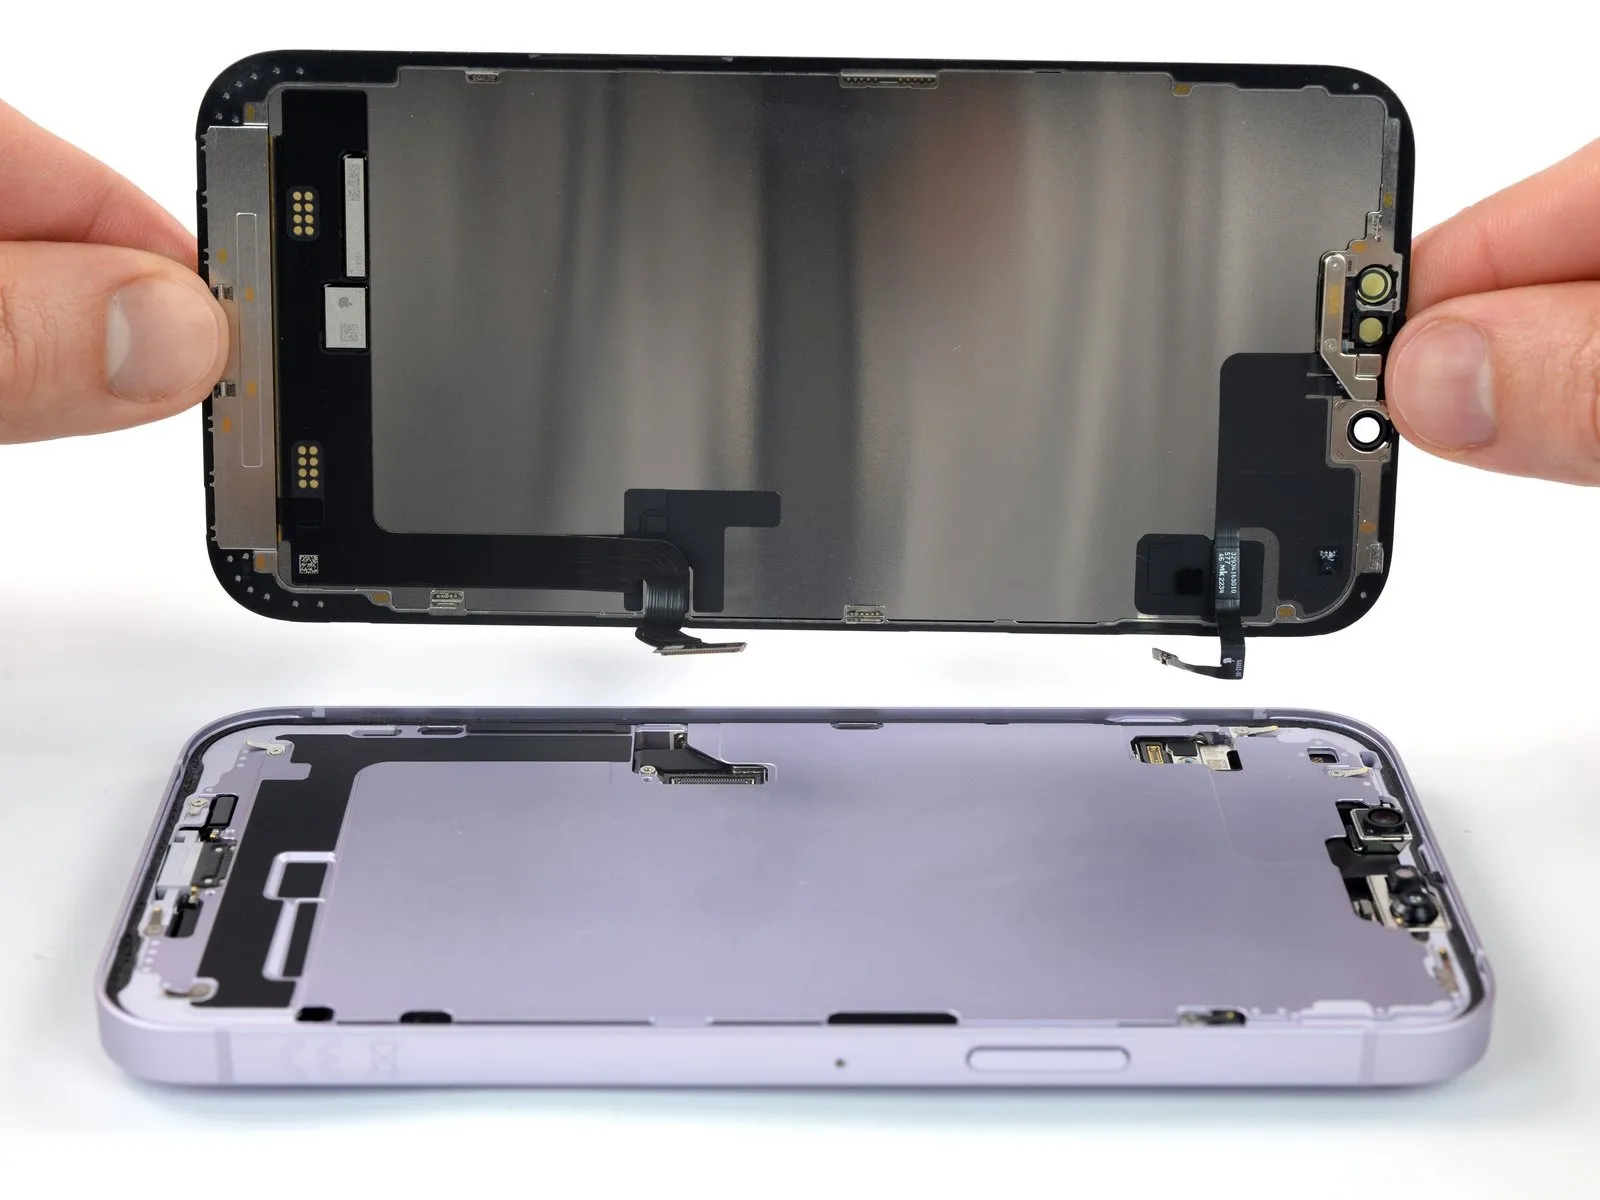
- Remove the screen.
- Apply new adhesive where necessary after cleaning the relevant areas with isopropyl alcohol (>90%).
- During reassembly, pause here if you wish to replace the screen adhesives.
Step 20 | Unfasten the front sensor bracket
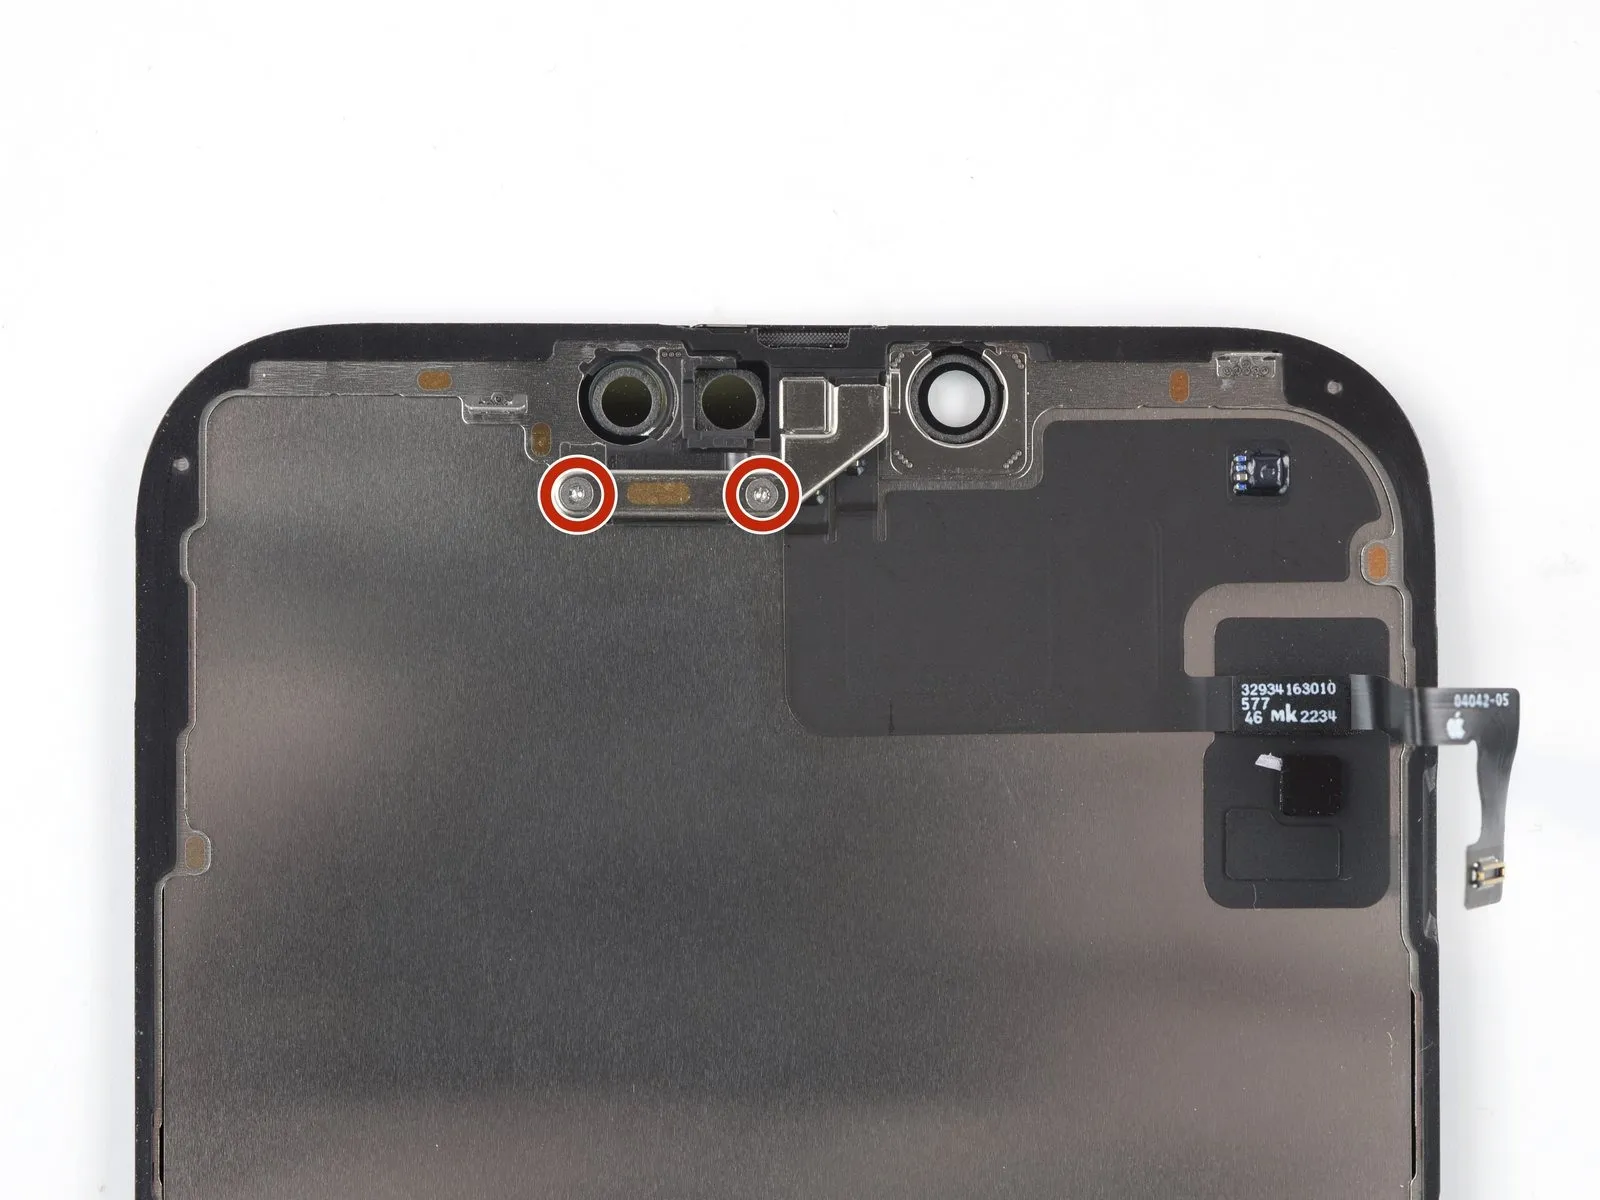
The remaining steps demonstrate how to transfer the front sensor assembly to a new screen. If your replacement screen comes with the assembly pre-installed, skip these steps.
Use a Y000 screwdriver to remove the two 1.4 mm-long screws securing the sensor assembly bracket.
Step 21 | Remove the front sensor bracket
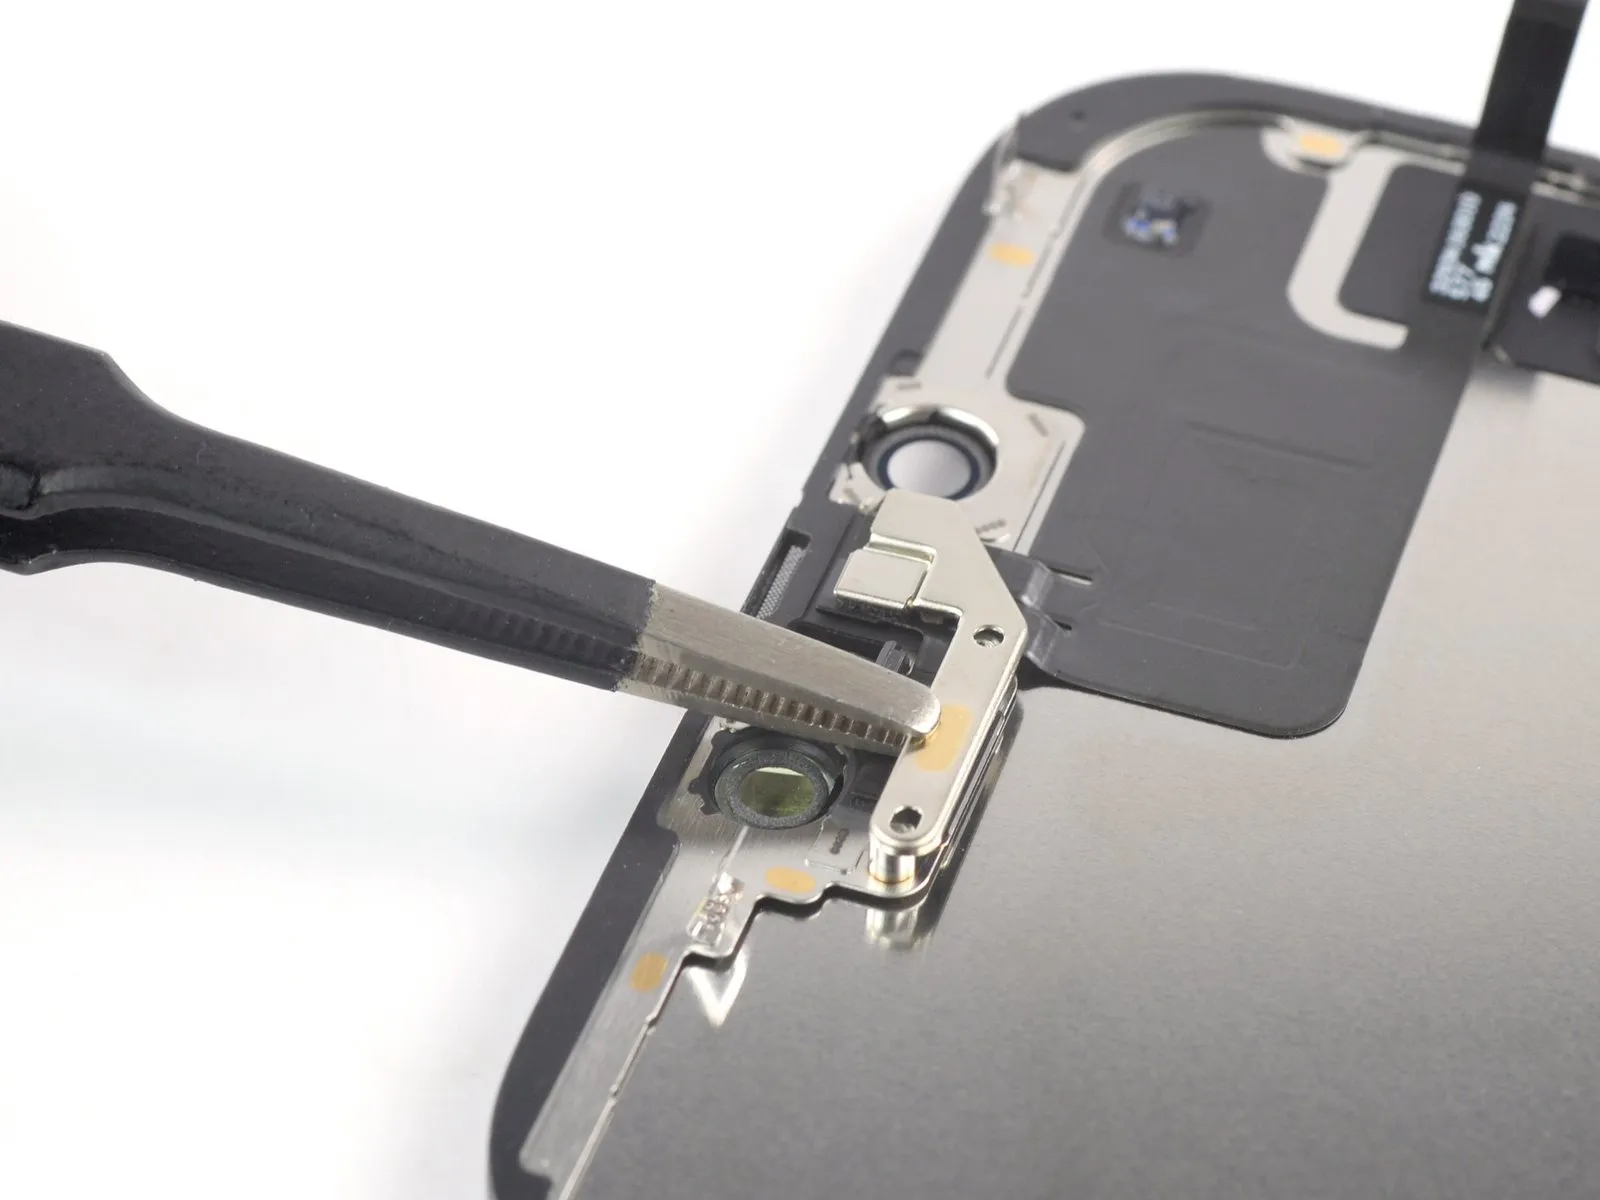
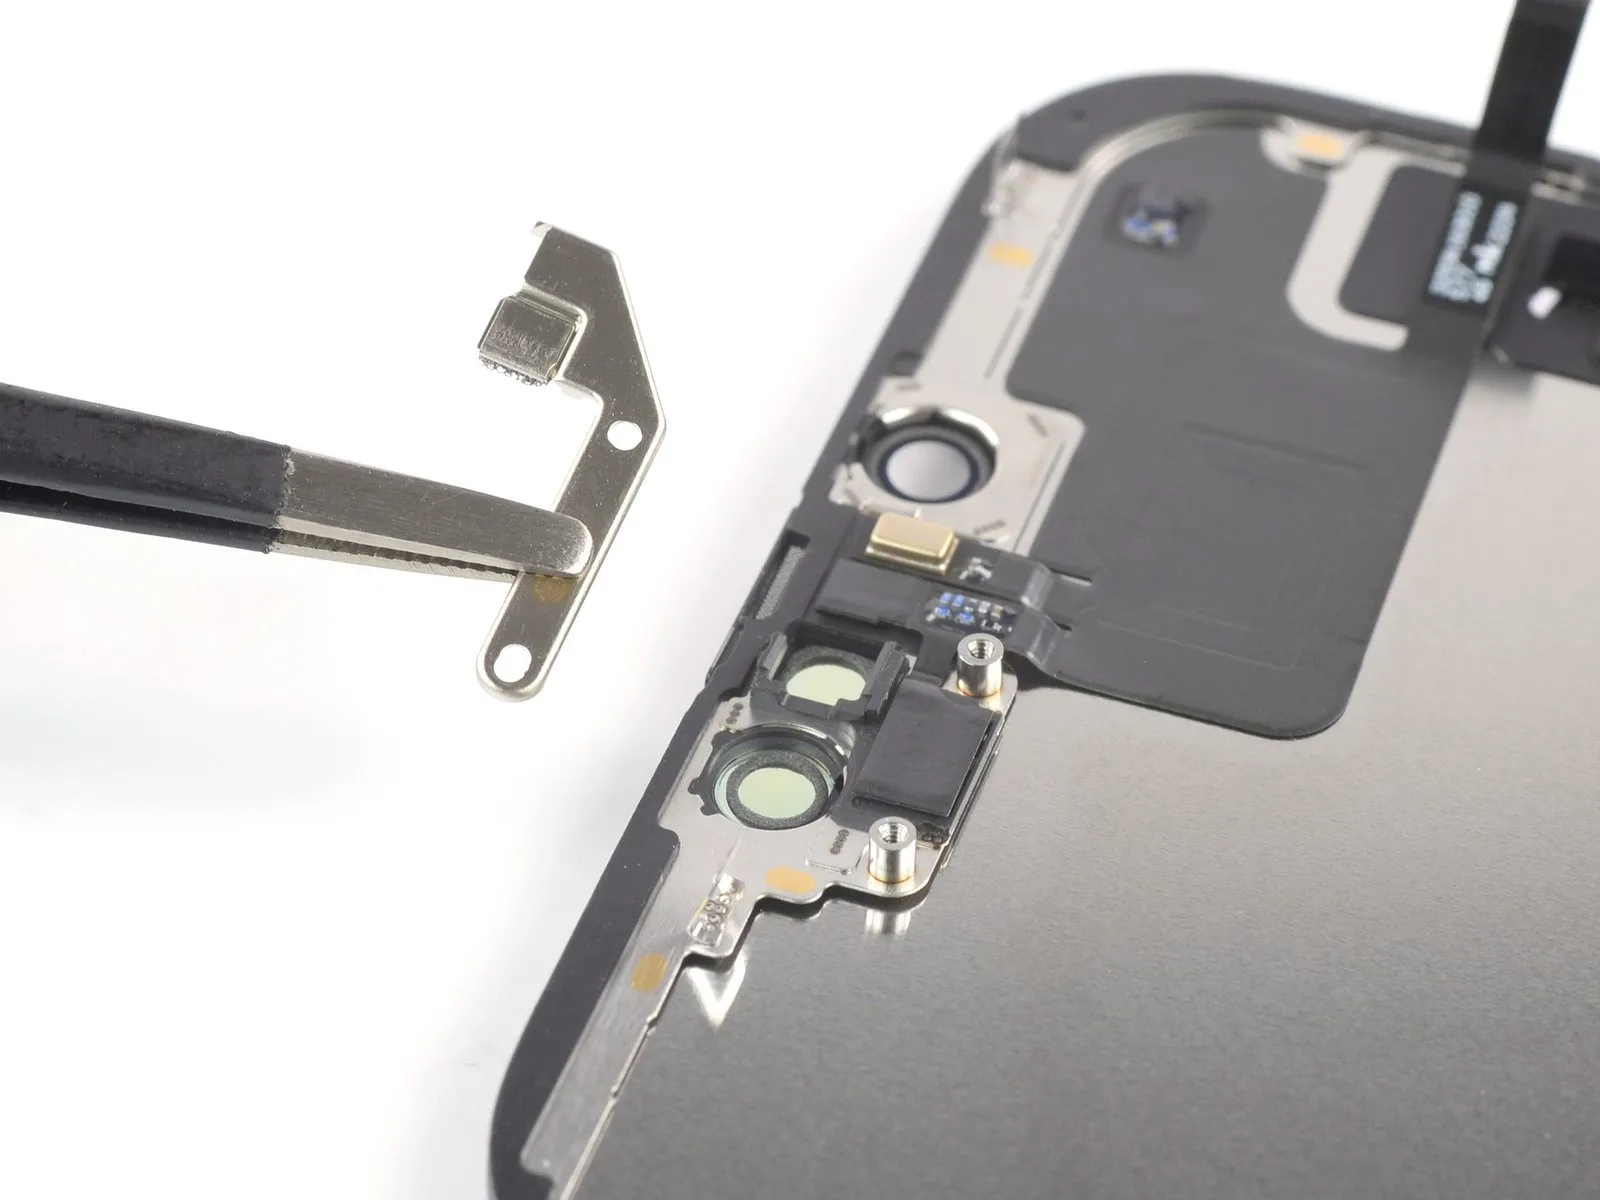
- Use tweezers, or your fingers, to remove the front sensor assembly bracket.
Step 22 | Heat the front sensor assembly
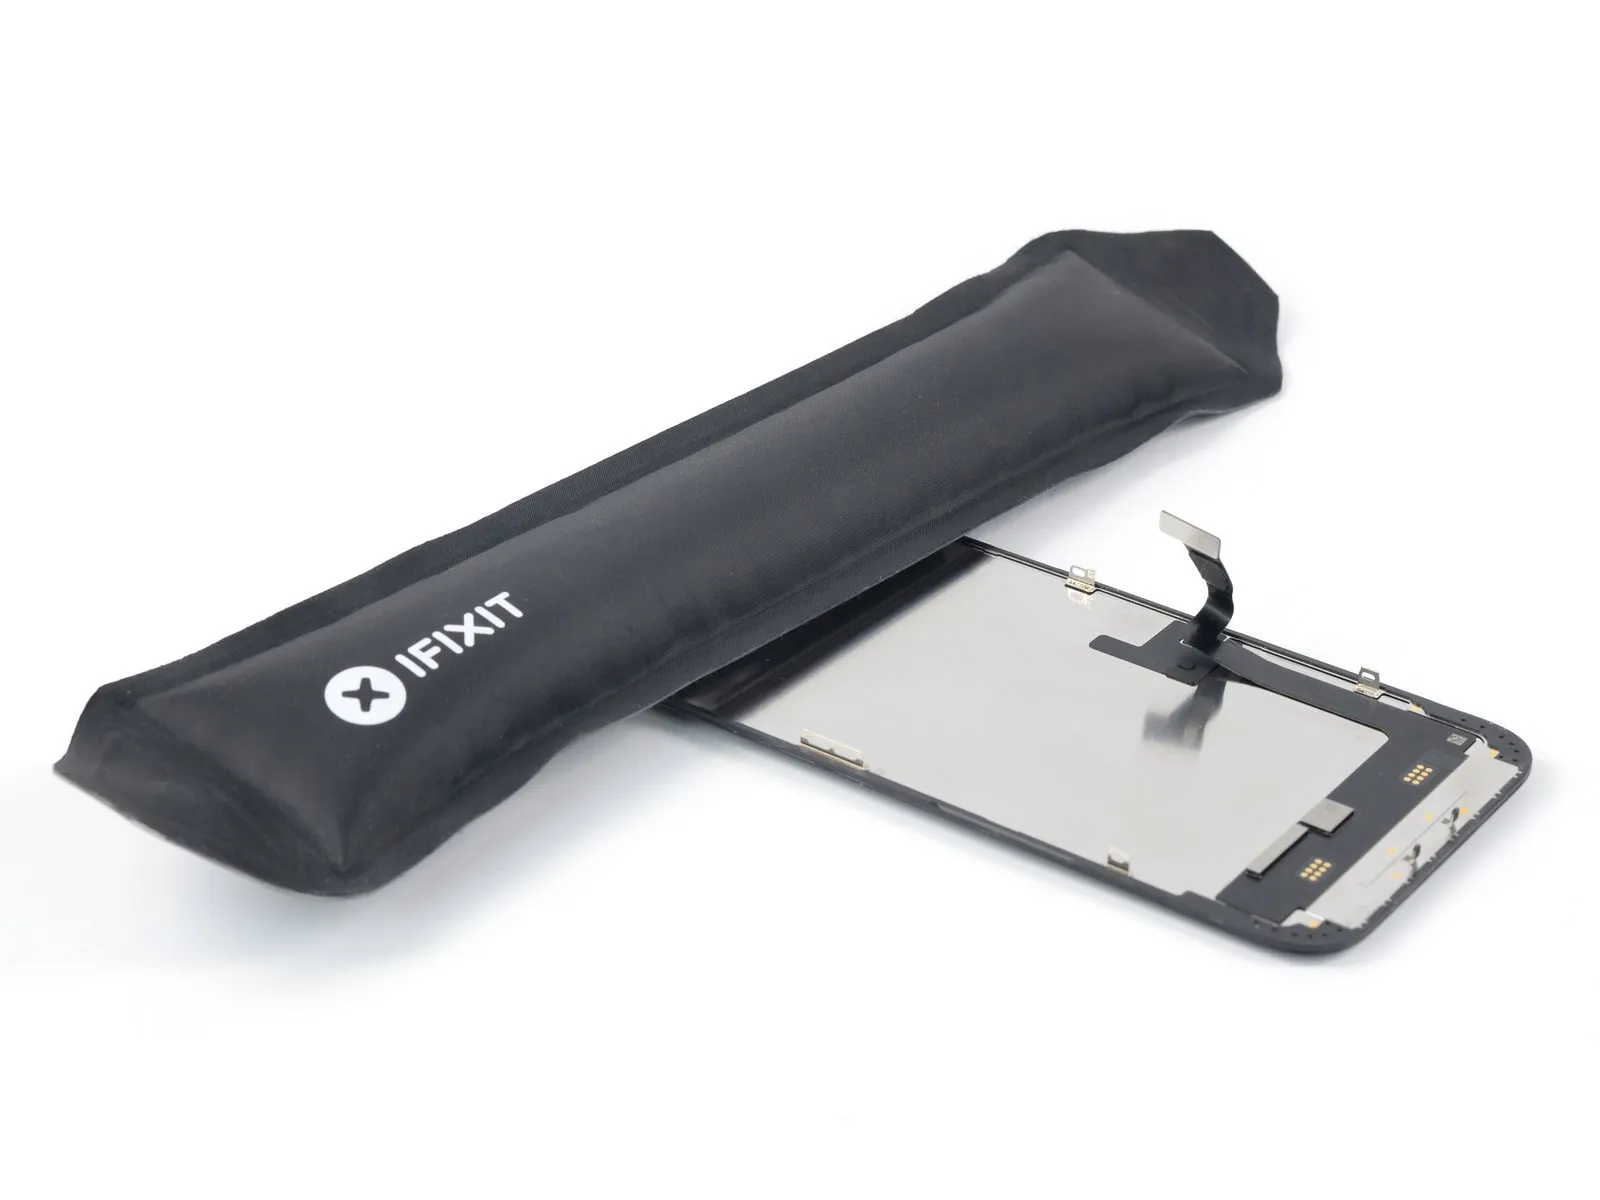
- Heat an iOpener and apply it to the top edge of the screen for two minutes. A hair dryer, heat gun, or hot plate may also be used, but be careful not to overheat the phone—the display is susceptible to heat damage.
Step 23 | Disconnect the ambient light sensor
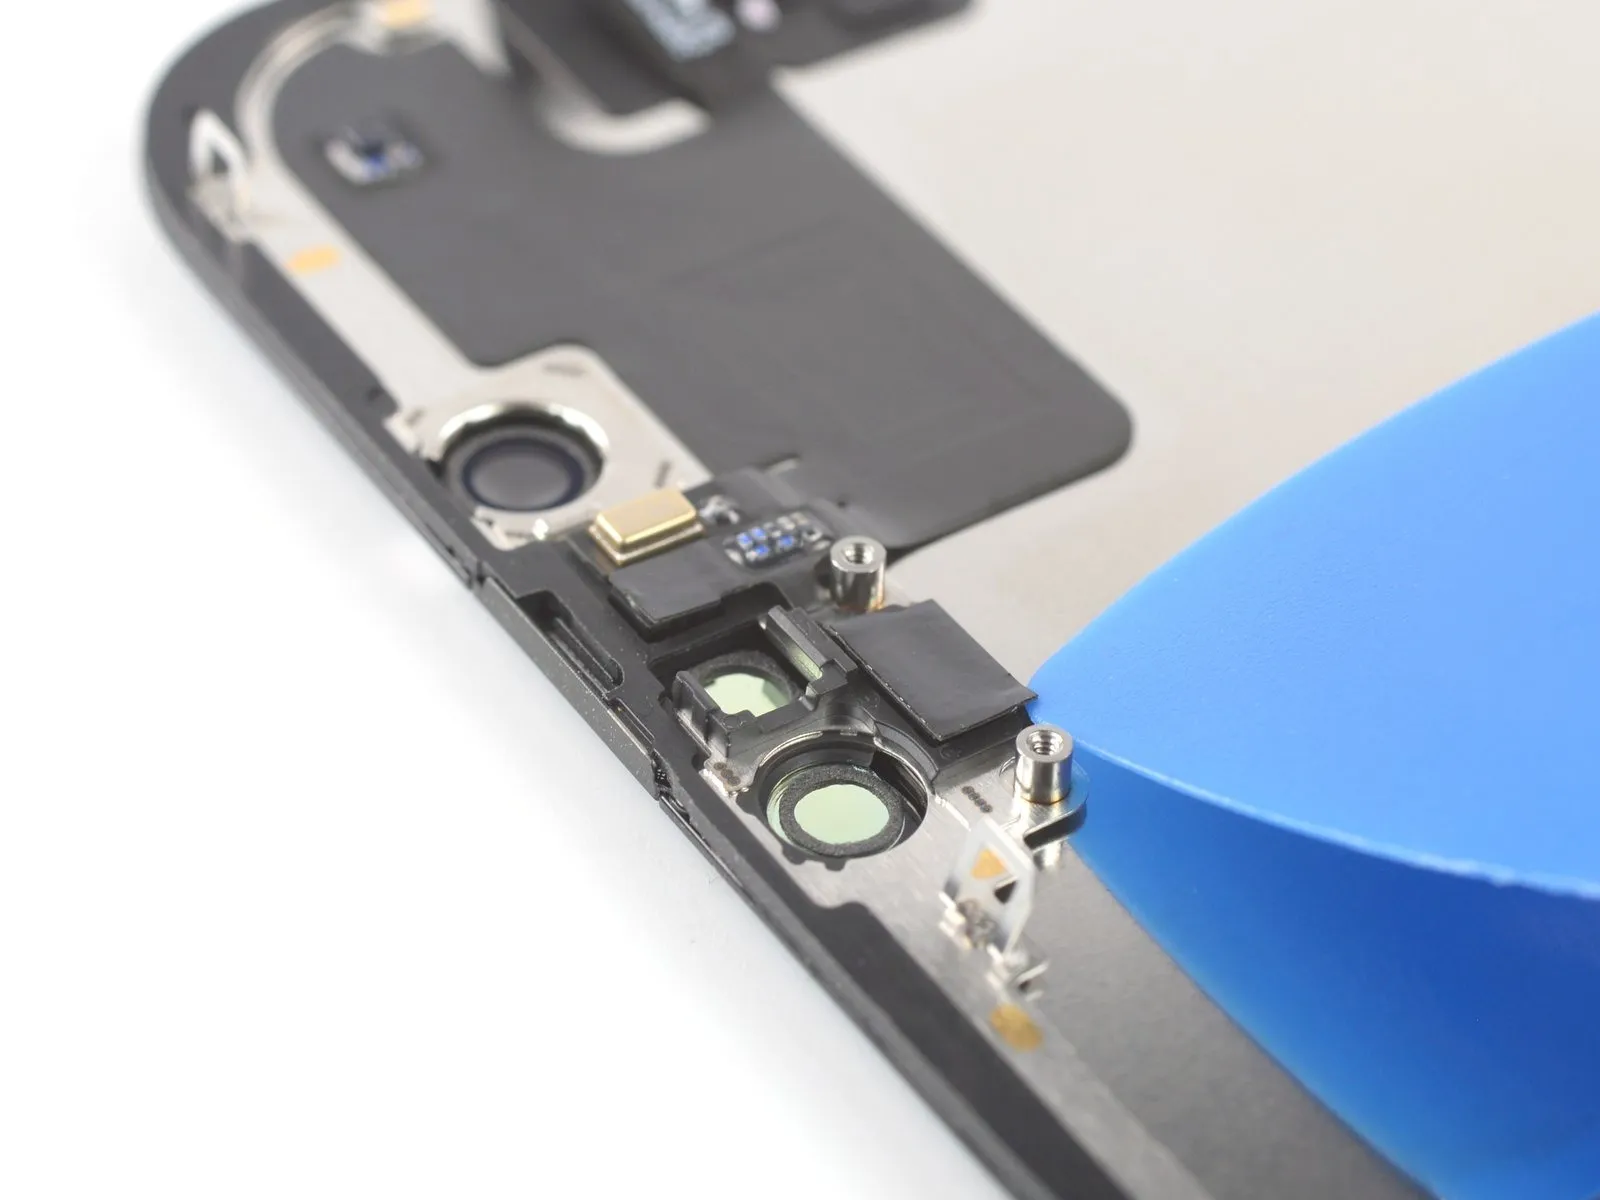
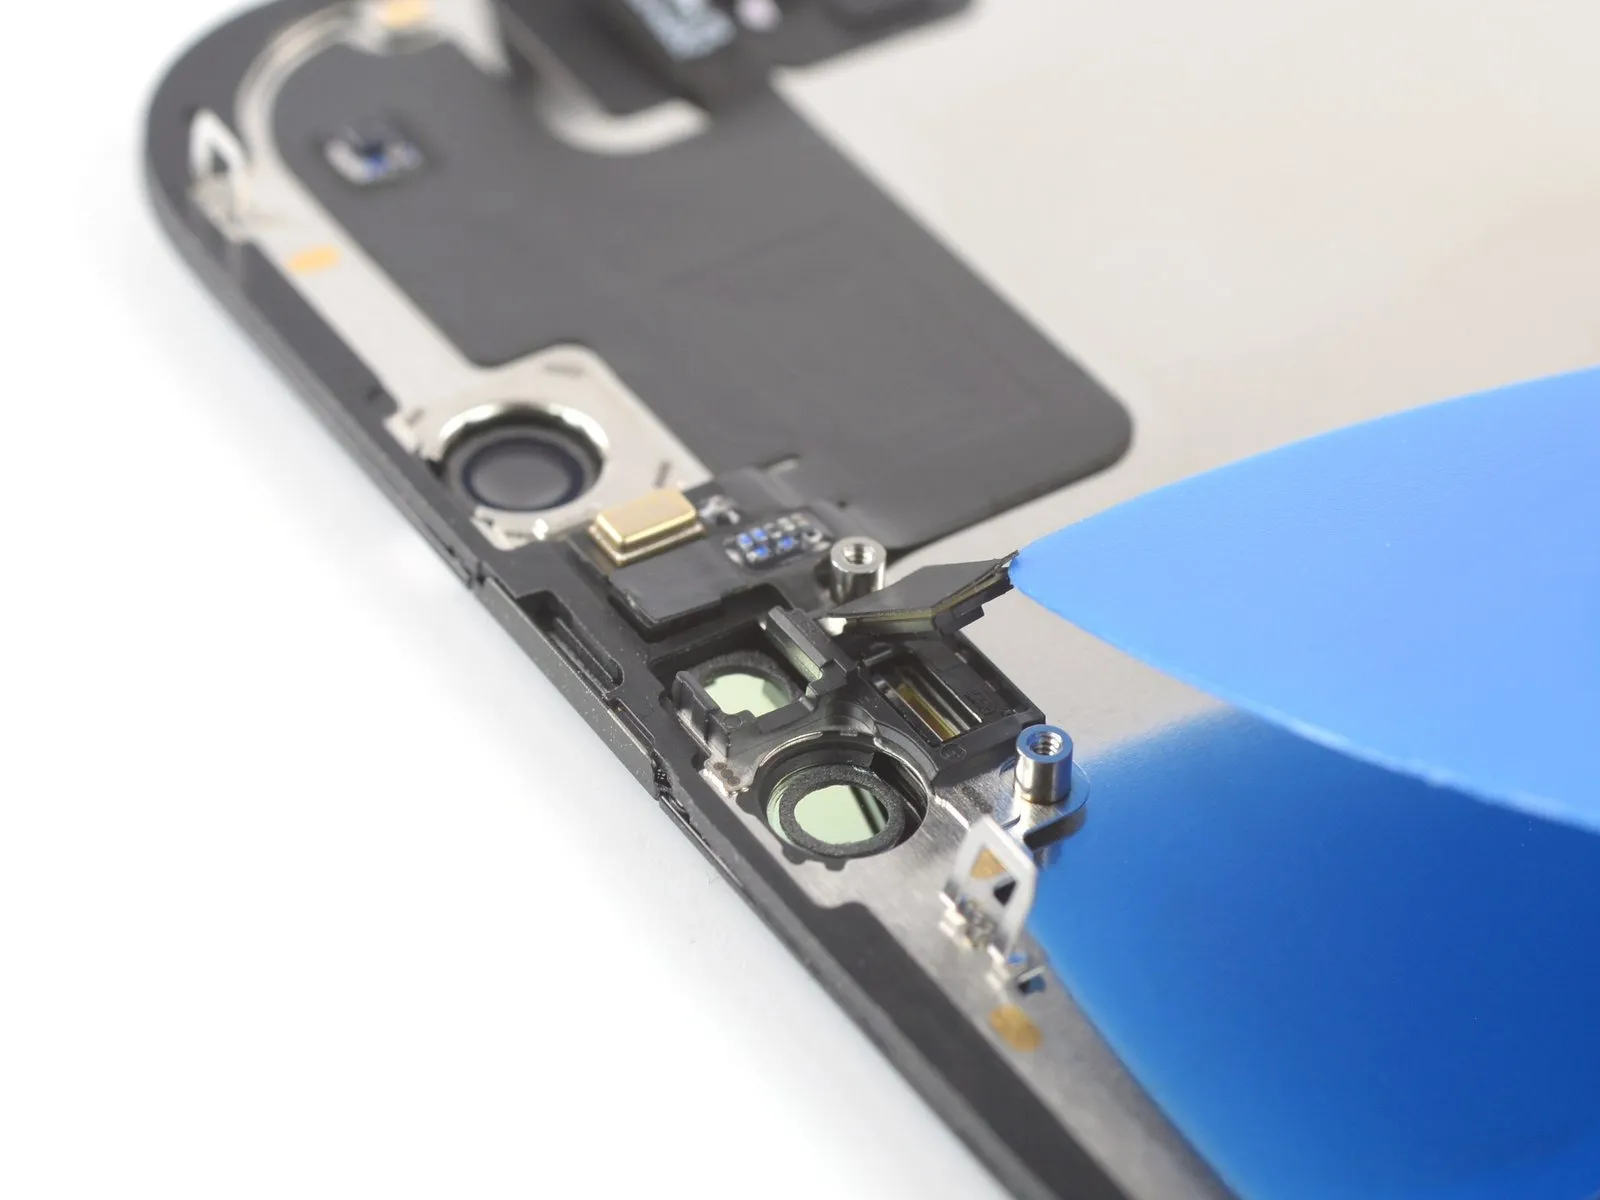
- Insert an opening pick between the ambient light sensor and its recess on the screen. Pry up with the pick to separate the ambient light sensor from the screen.
Step 24 | Disconnect the proximity sensor

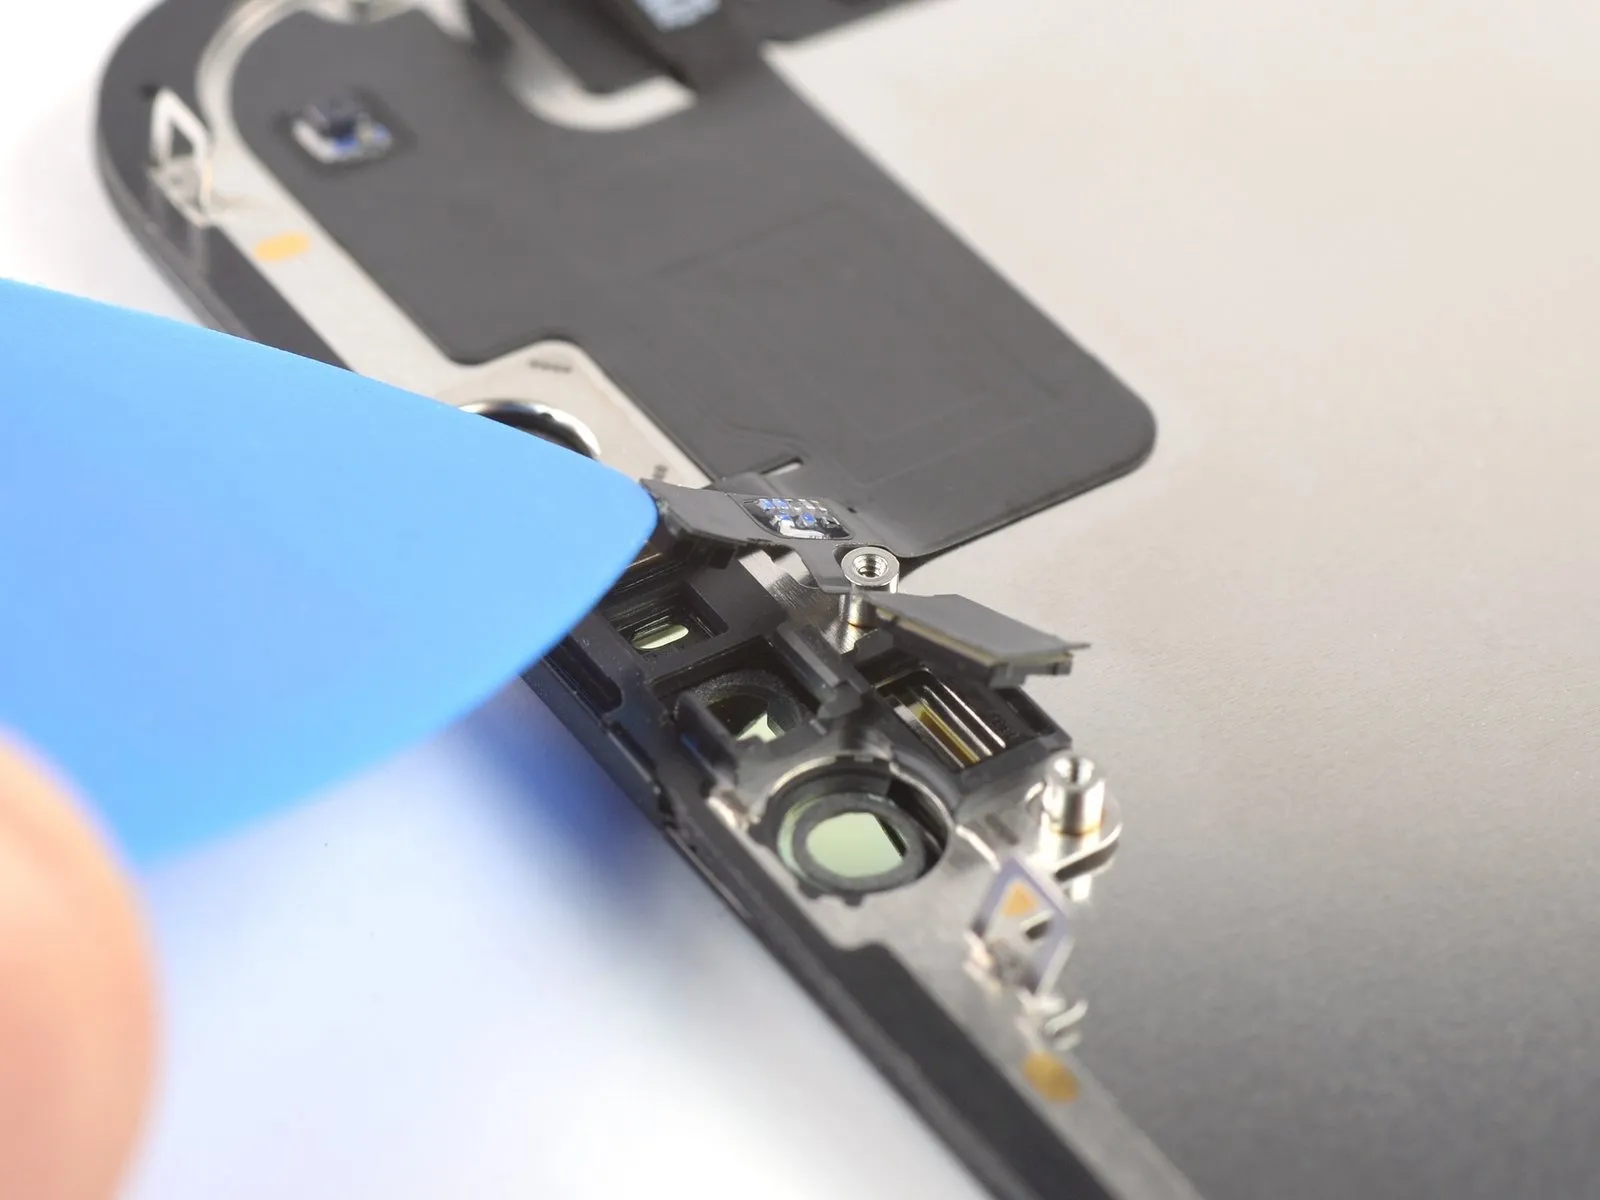
- Insert an opening pick between the proximity sensor and its recess on the screen. Pry up with the pick to separate the proximity sensor from the screen.
Step 25 | Reposition the proximity sensor

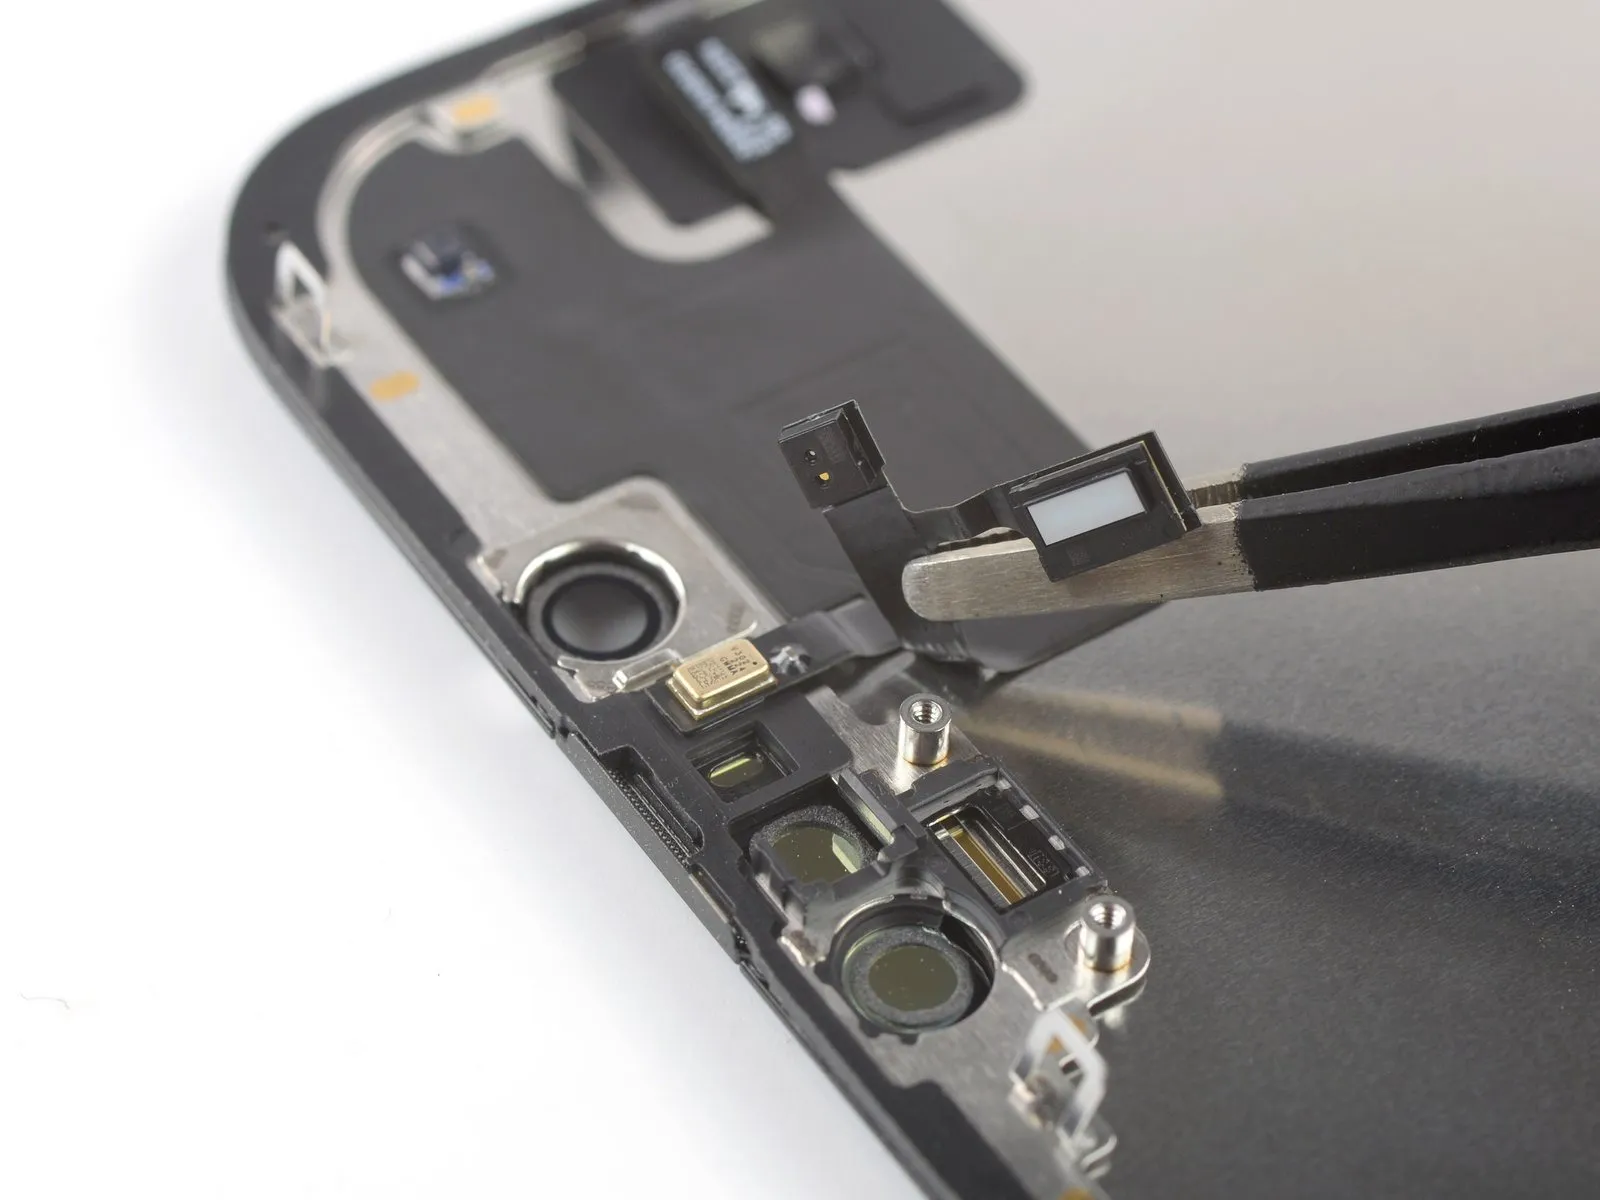
- Use tweezers, or your fingers, to move the proximity sensor cable away from the screen.
Step 26 | Disconnect the microphone

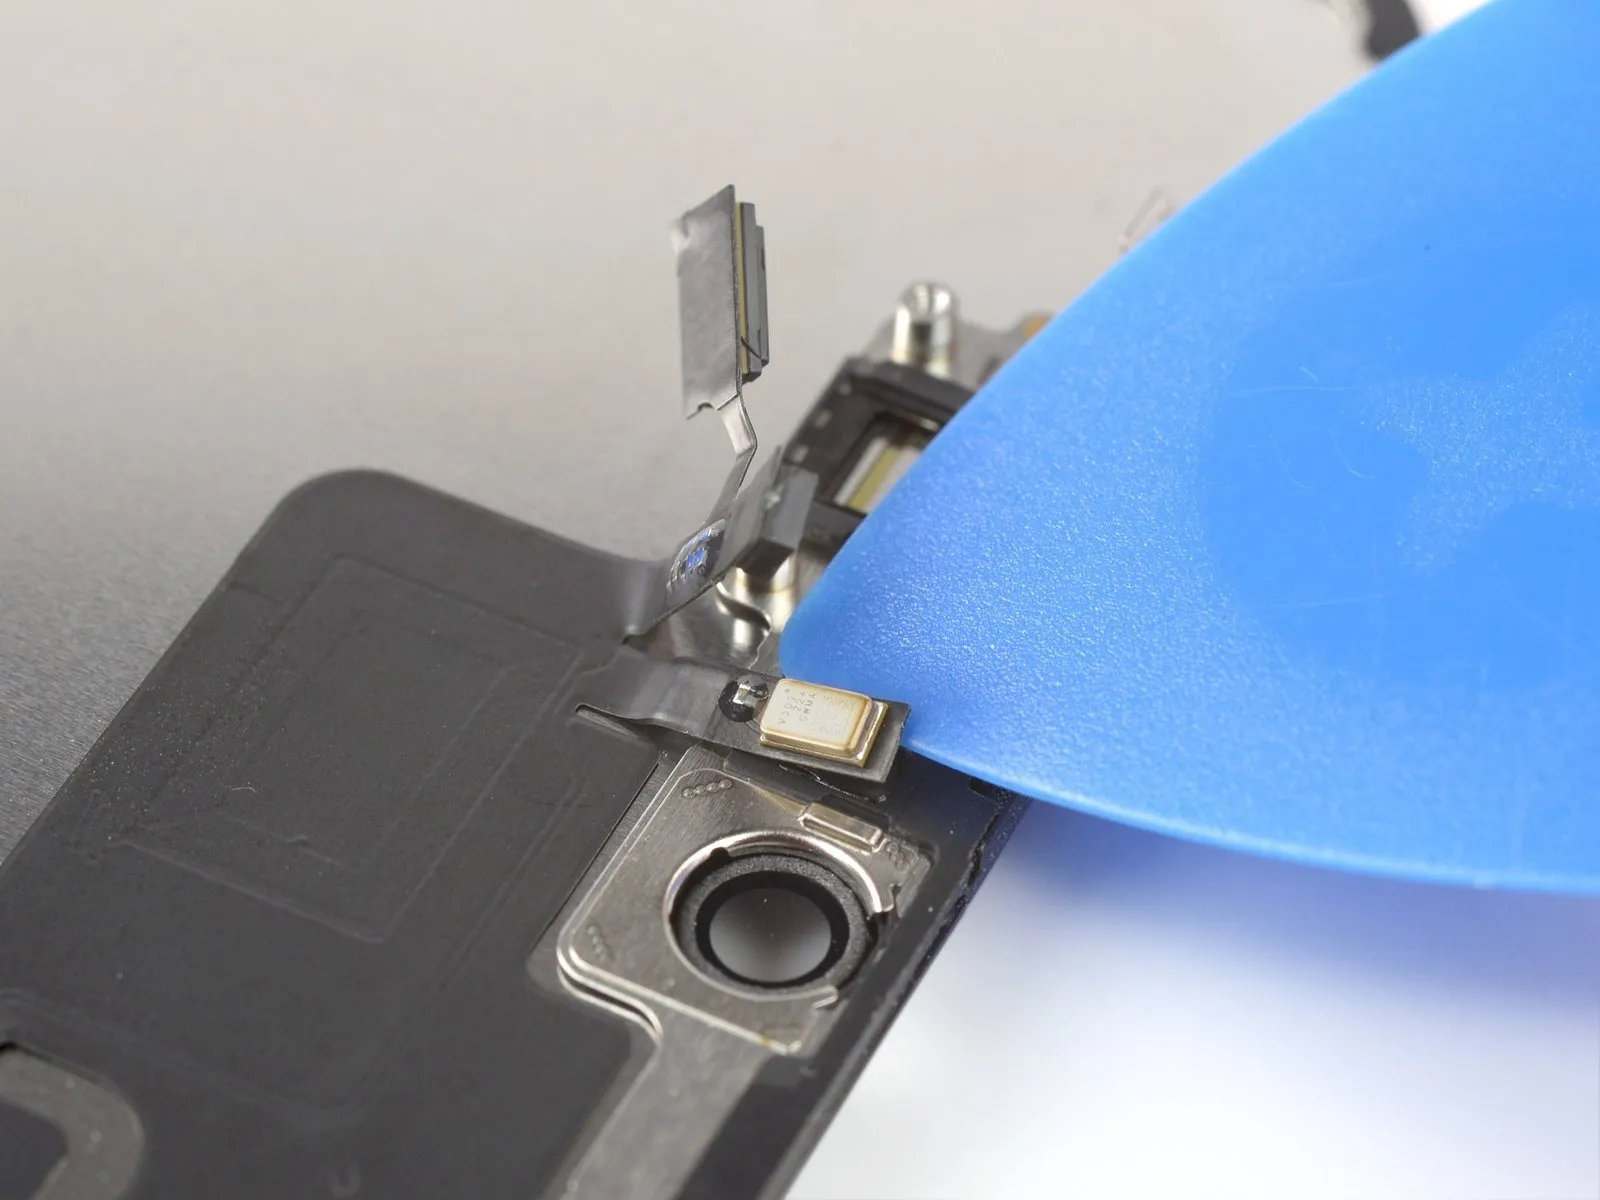
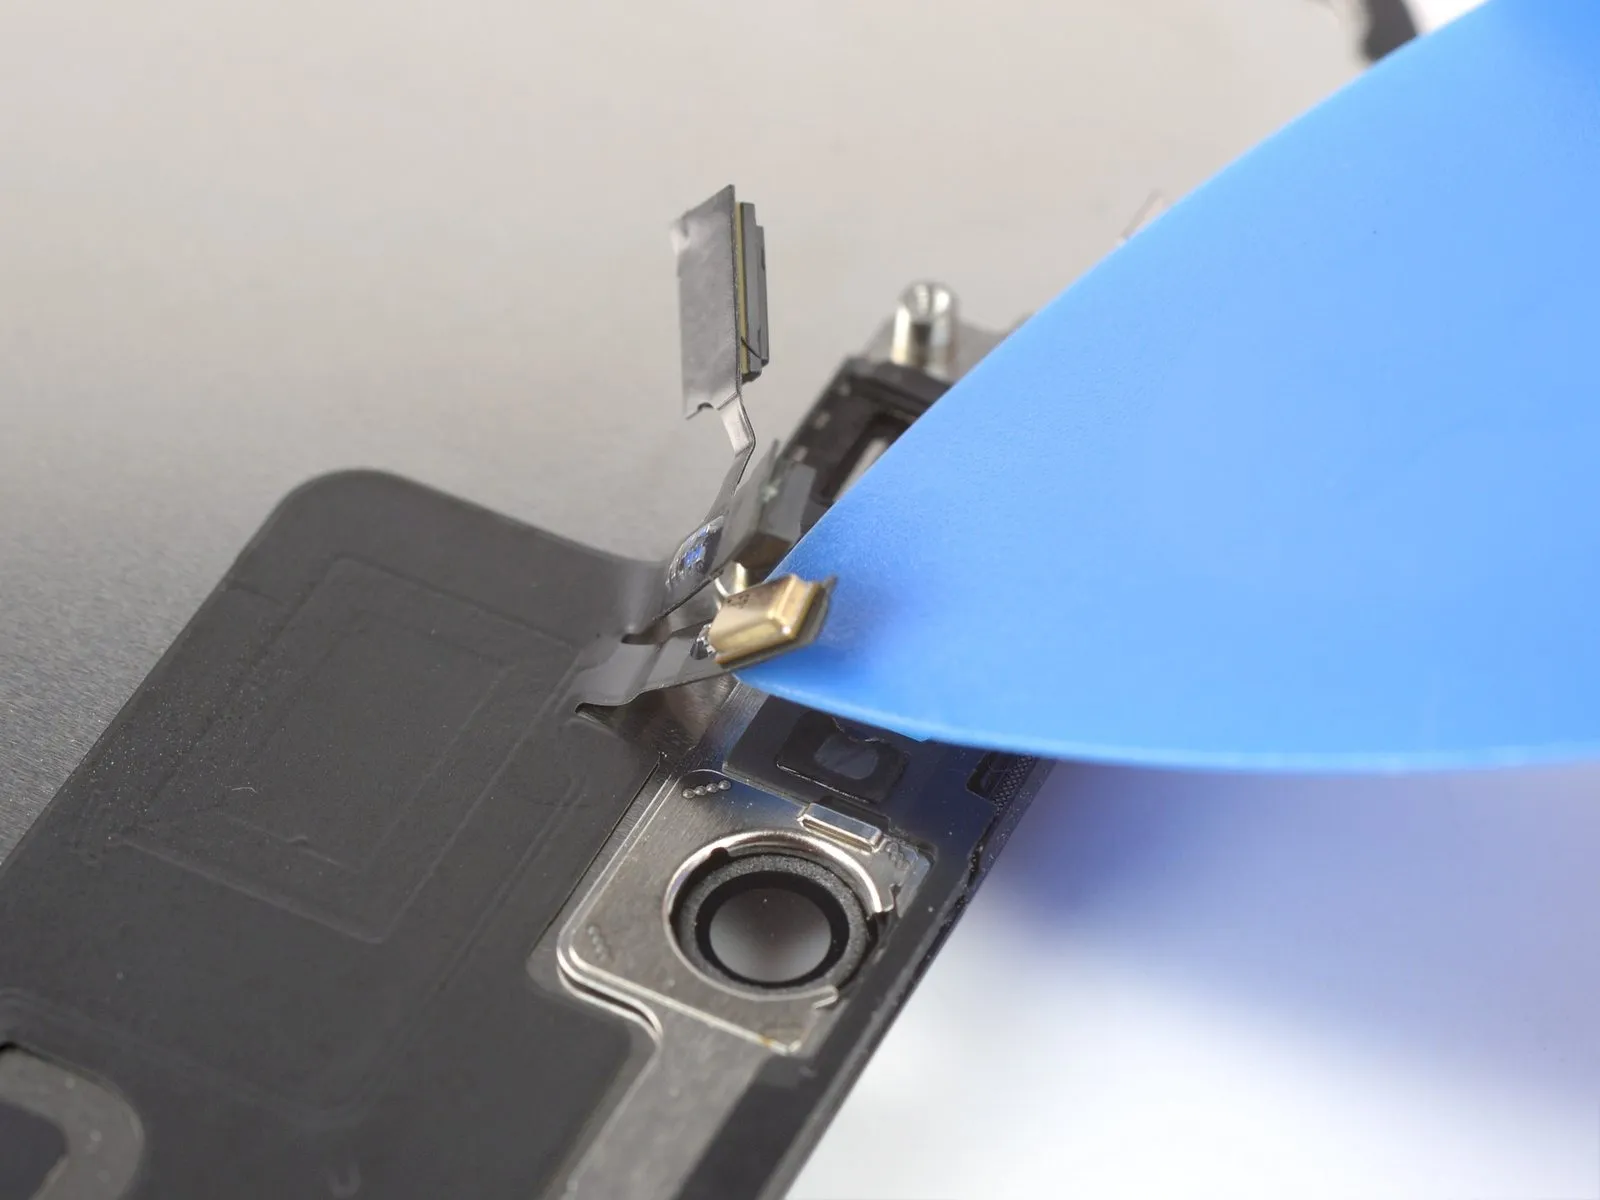
- Insert an opening pick under the microphone cable, close to the microphone (the metal rectangle).
- Slide the opening pick around the perimeter of the microphone to separate its adhesive.
Step 27 | Remove the front sensor assembly

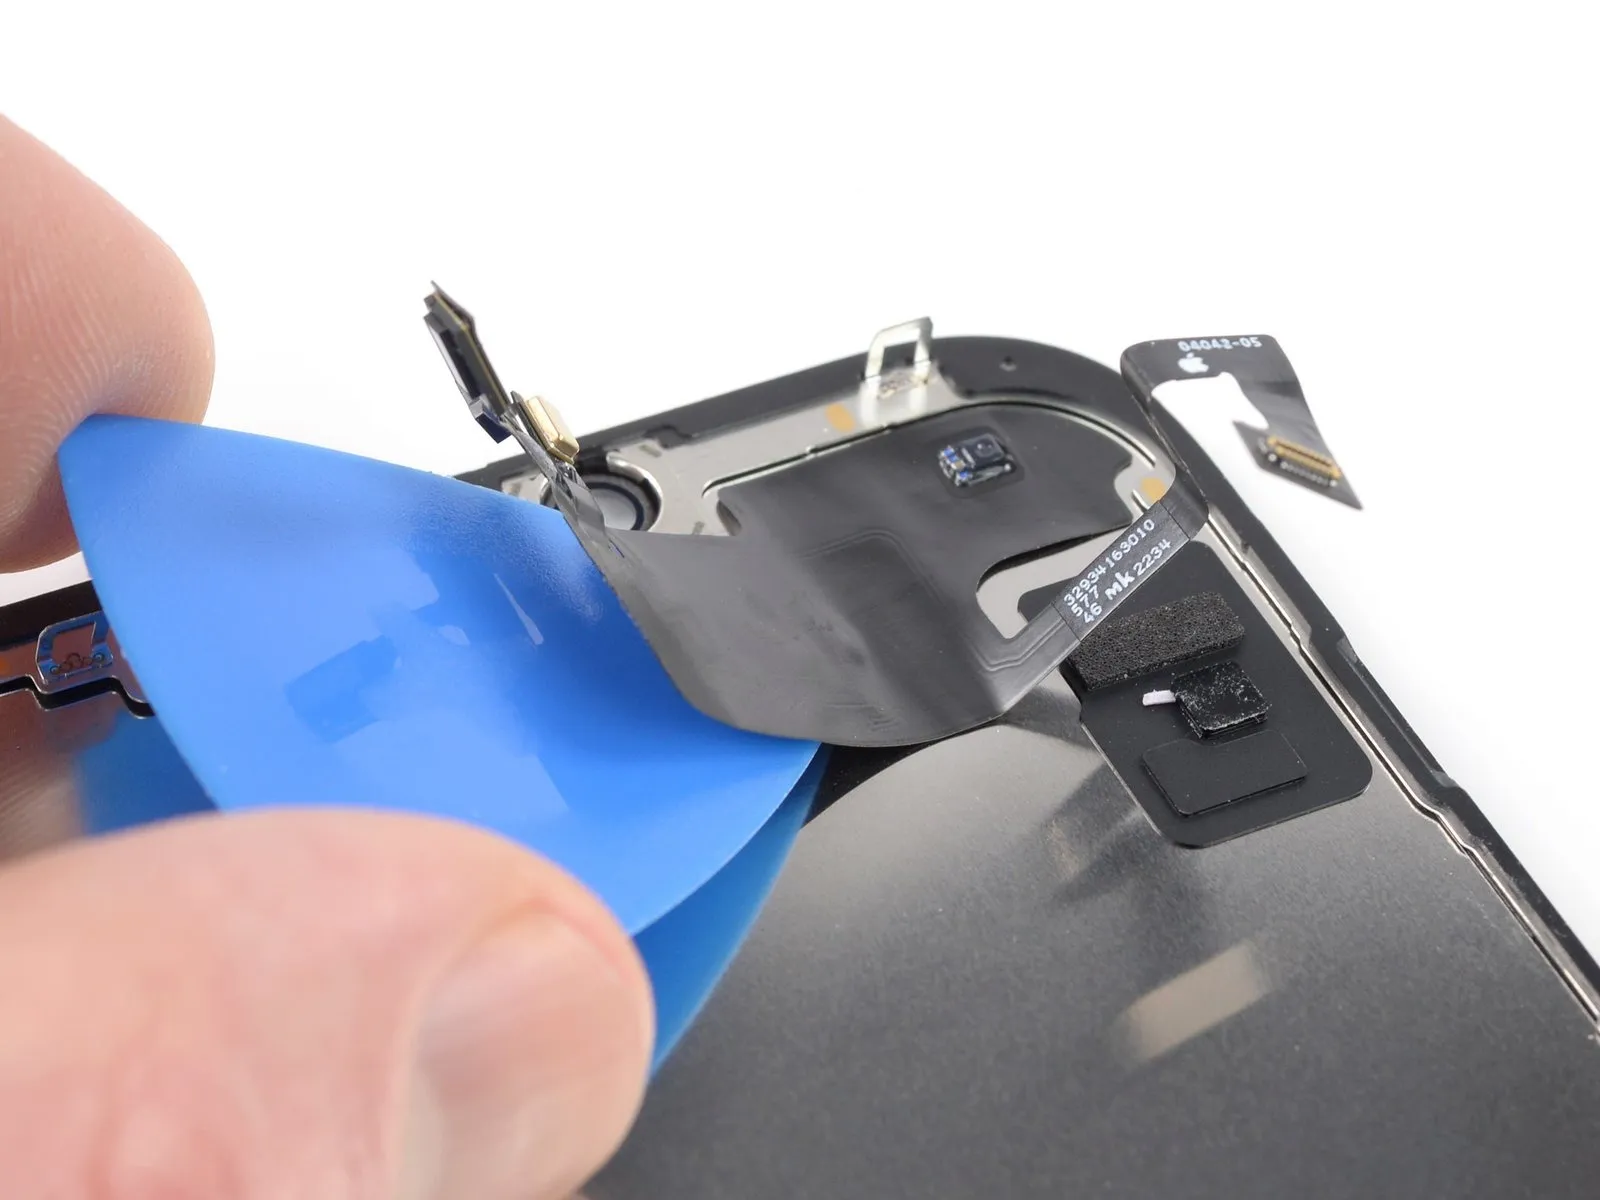
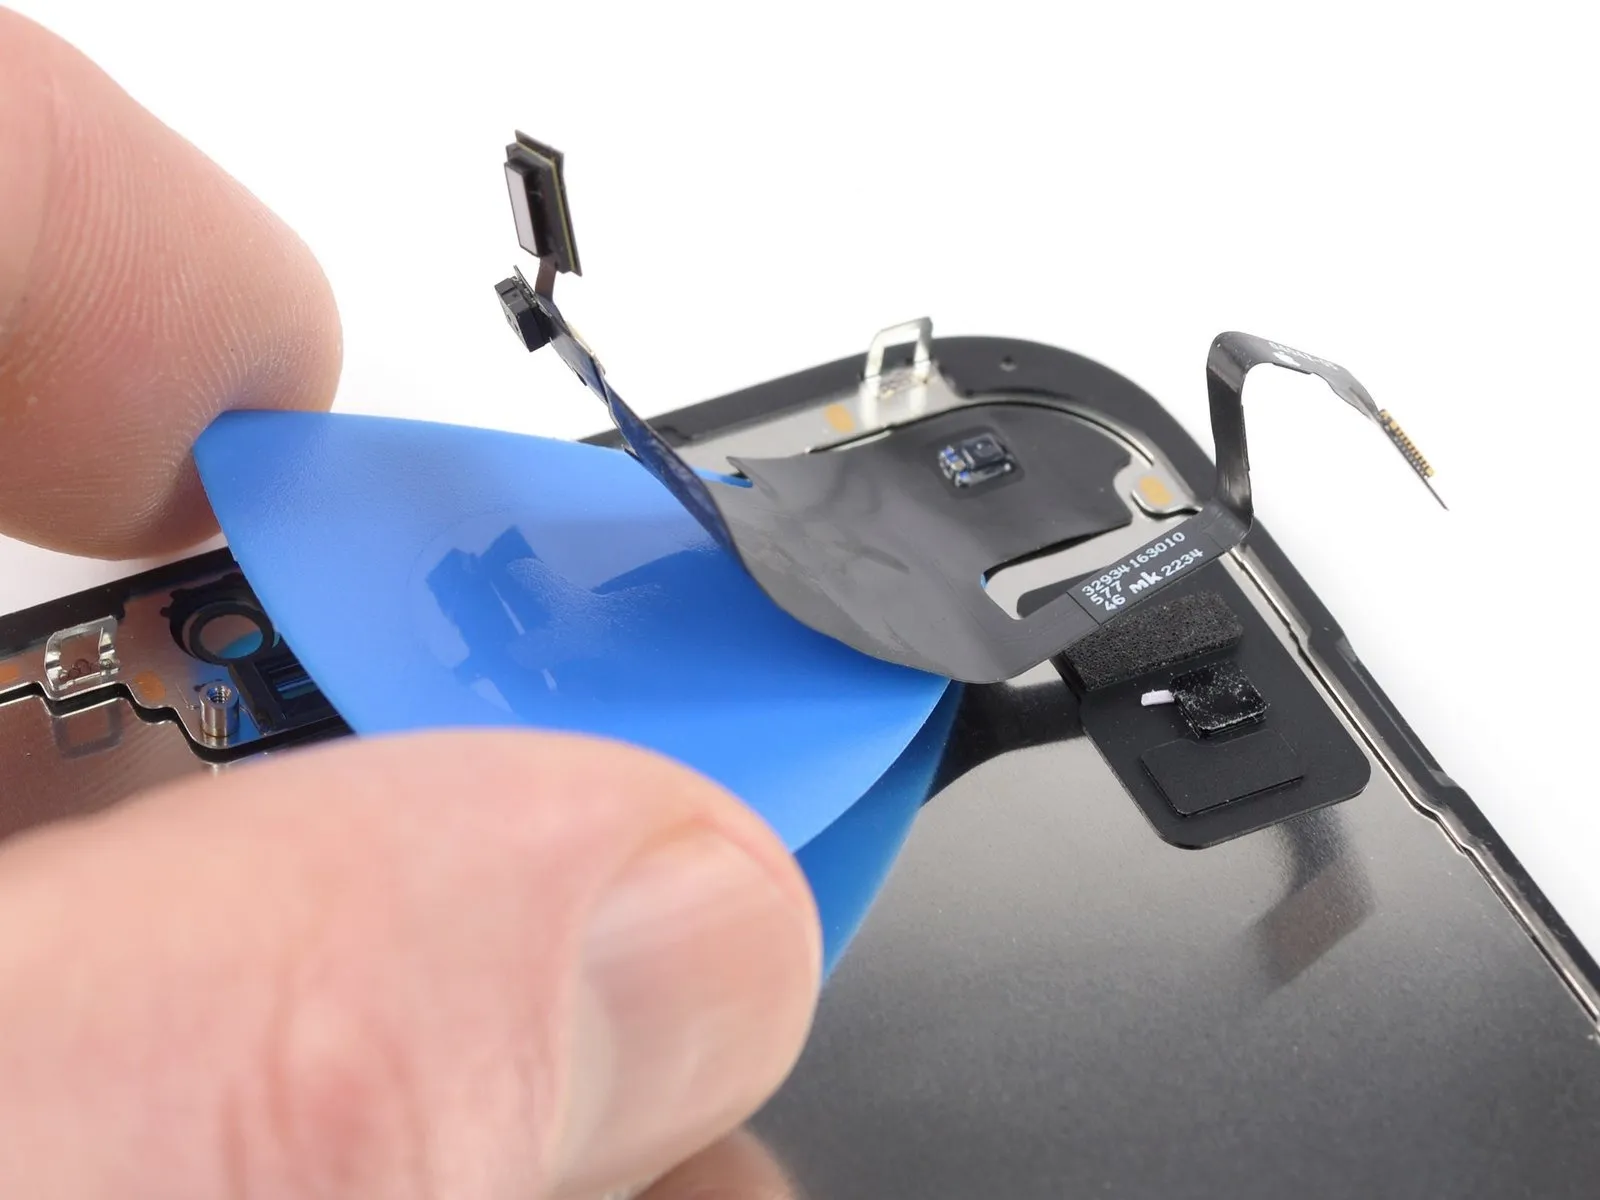
- At this point, the adhesive may have cooled down. If so, apply a heated iOpener to the assembly for one minute before continuing.
- Insert an opening pick under the left side of the front sensor assembly.
- Slide the pick under the assembly to separate it from the frame.
Step 28
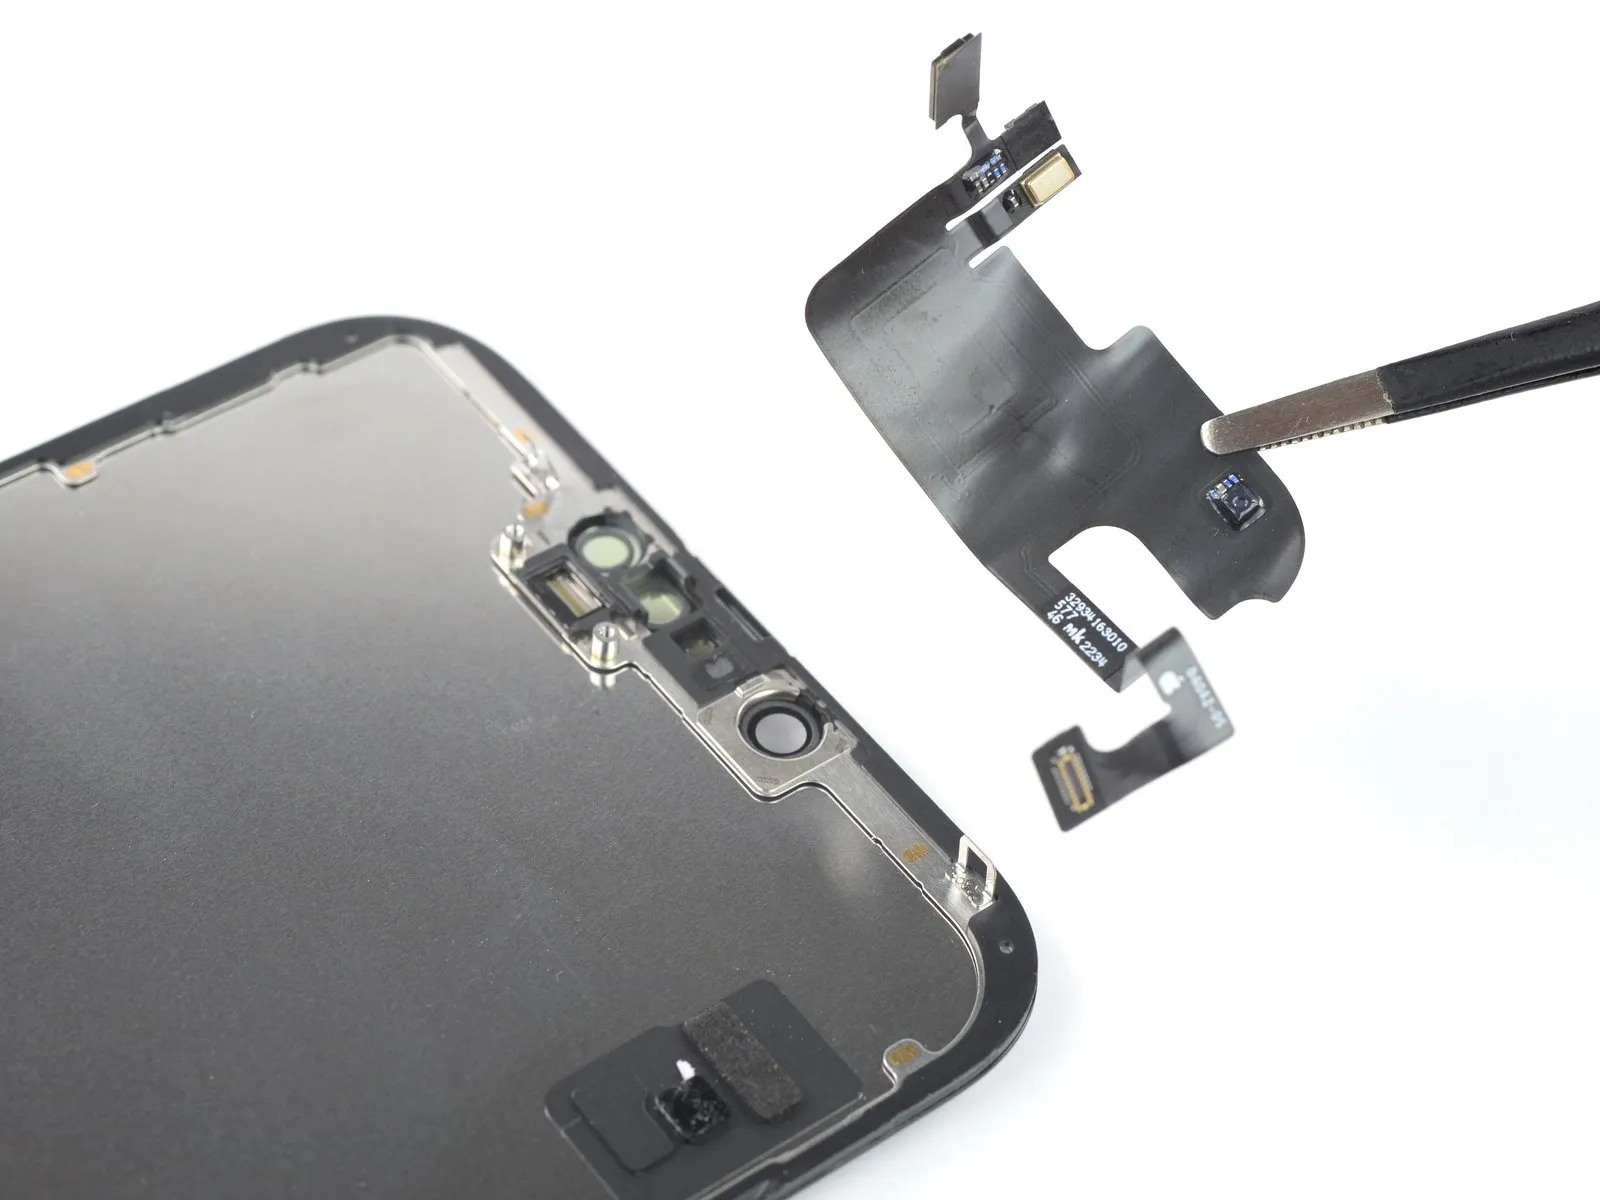
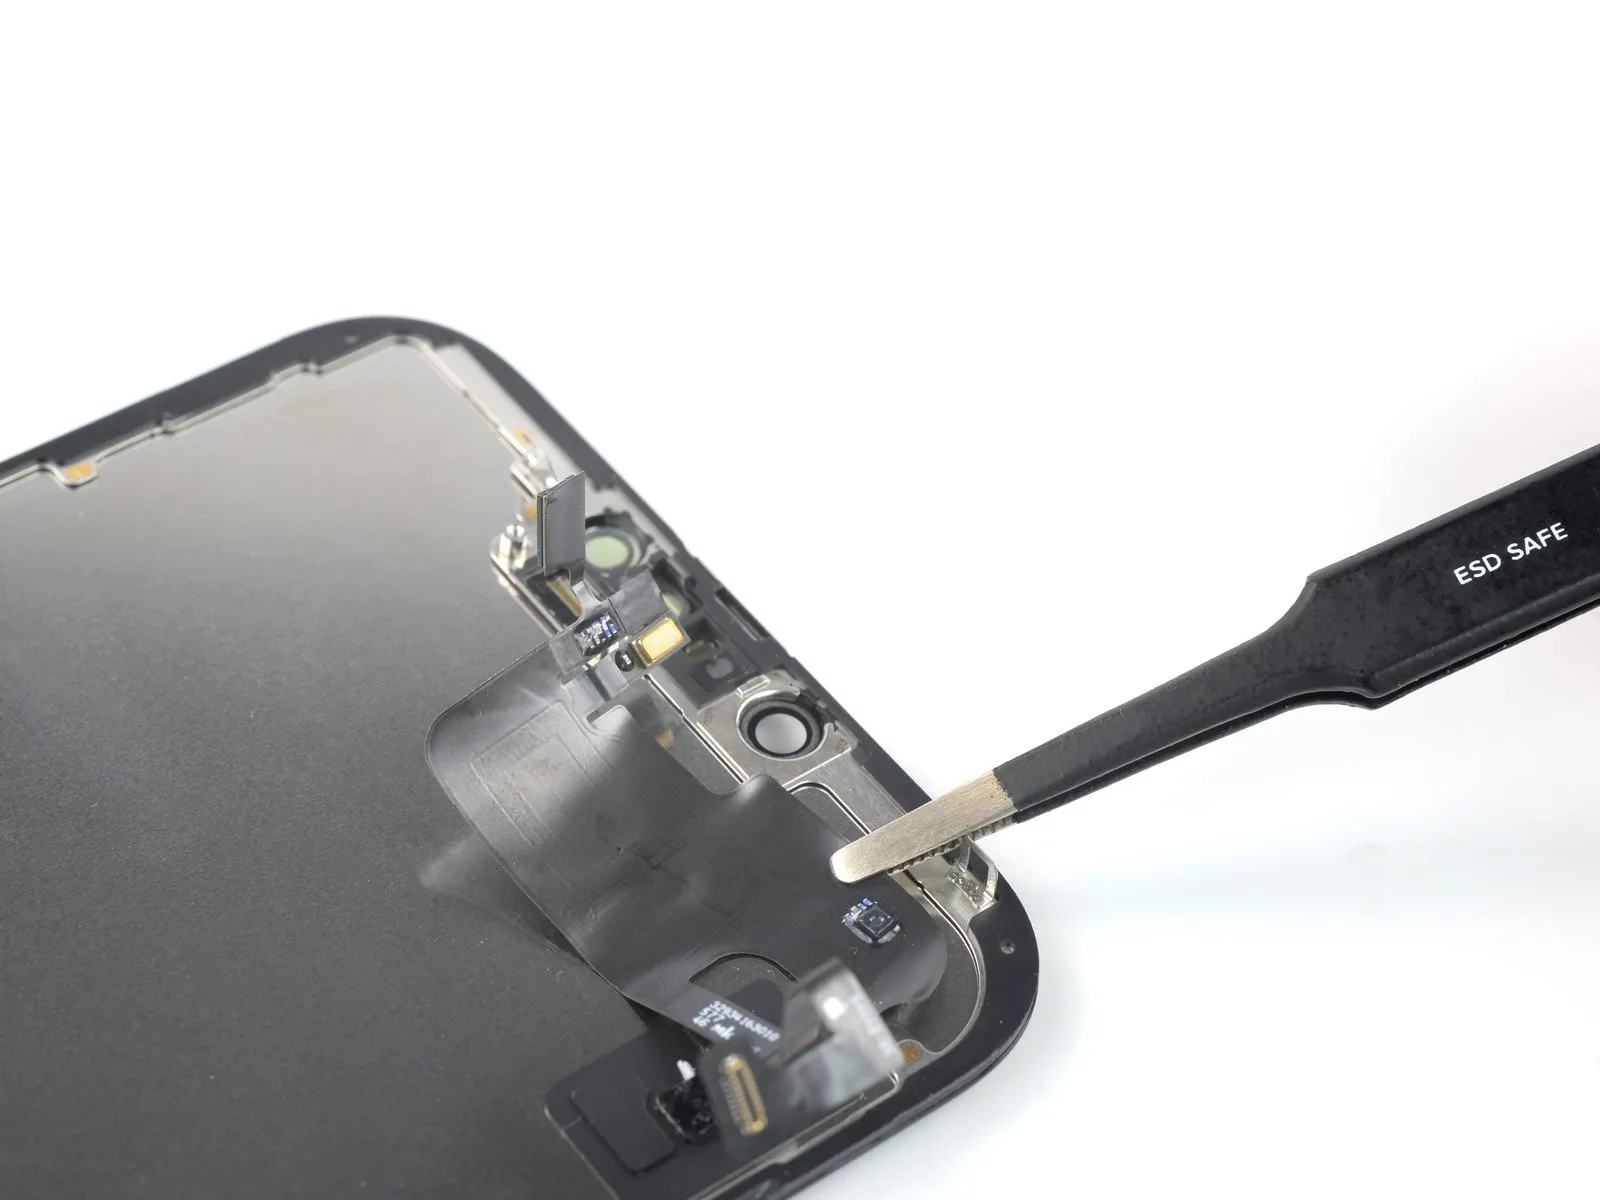
- Remove the front sensor assembly.
- When transferring the assembly to a new screen, follow these instructions:
- Connect the sensors to their slots in the frame to help align the main section of the assembly.
- Use Tesa tape to re-adhere any sections of the assembly that are no longer sticky.